Weaver vs Isosceles Stance: Which Pistol Shooting Stance Wins in 2026 (and Why)
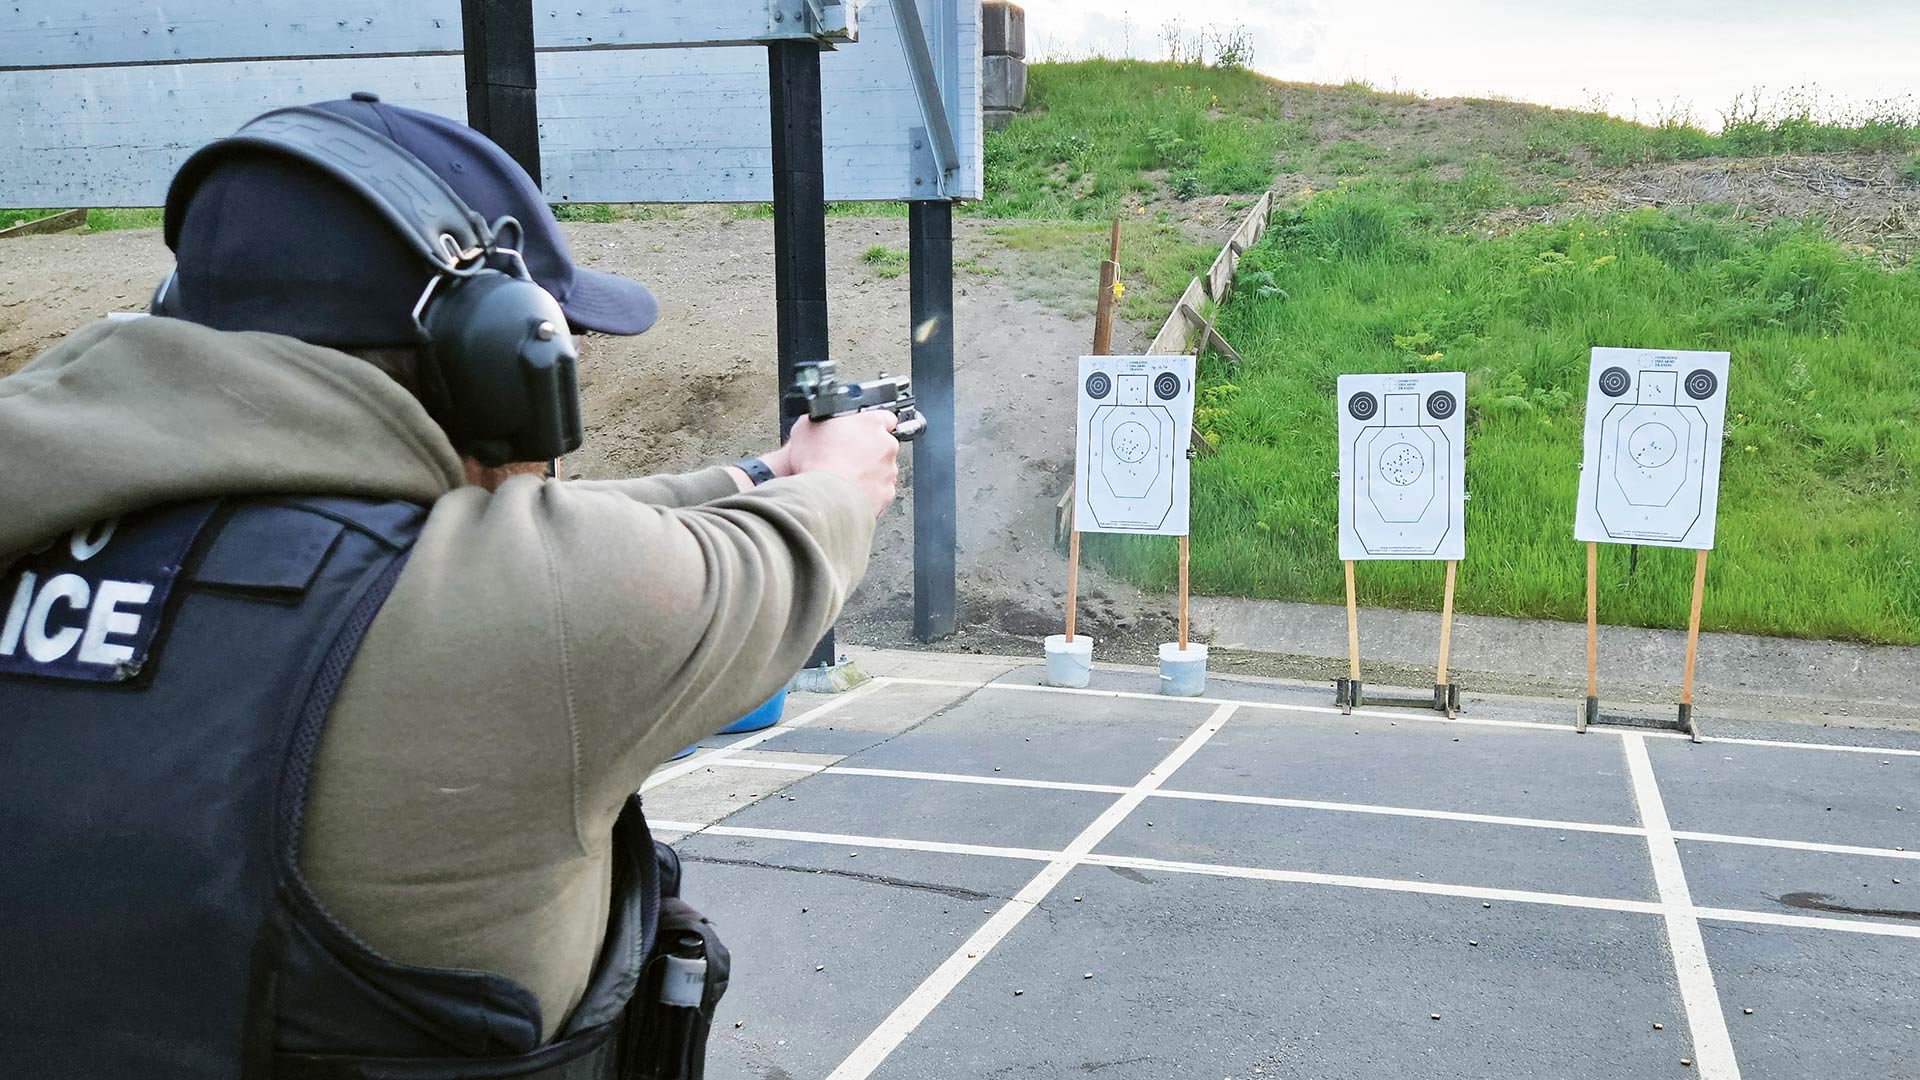
Weaver vs Isosceles in 60 Seconds
If you only read one paragraph, read this one. The Weaver stance is bladed, with the gun-side foot back, both elbows bent and a push-pull tension between the hands. The Isosceles stance is squared to the target with both arms pushed out so they form a triangle with your chest. The Chapman (or modified Weaver) keeps the bladed feet but locks the gun arm straight like a rifle stock. The Modern Isosceles keeps the squared chest, staggers the feet slightly, drops the shoulders in front of the hips and softens the elbows. That last one is what you will see on nearly every IPSC, USPSA and Steel Challenge winner today, and it is what we recommend you build first.
Three facts from the rest of this guide should settle the “which is better” argument before it starts. First, Jack Weaver himself said his bent elbows came from an injury, not from a theory of recoil control, and that nobody should copy his position outright. Second, a 1989 study of 98 real police shootings found that only 12.2% of officers who had been trained in Weaver actually used it when the shooting started, while 78.6% squared up into an Isosceles. Third, since Brian Enos and Rob Leatham started winning IPSC titles in the 1980s, the competition world has never gone back. Weaver is not useless; it still has real uses behind cover and for shooters with certain elbow problems. It is simply no longer the default.
Why Is Shooting Stance So Important?
Shooting stance is the foundation of pistol shooting, directly affecting your accuracy, shooting speed, and recoil control. A proper shooting stance allows you to:
- Quickly acquire sight alignment and maintain stability
- Effectively absorb and control recoil
- Maintain consistency across multiple shots
- Rapidly transition between targets and move
- Reduce fatigue and extend training sessions
Many new shooters overlook the importance of stance, jumping straight into trigger control and aiming, resulting in slow progress and bad habits. A correct shooting stance is the cornerstone of all advanced techniques.
“Your stance is like the roots of a tree—without a solid foundation, even light recoil can knock you off balance.”
The Three Classic Shooting Stances
The shooting community has developed several classic stances, each with unique characteristics and applications. Let’s explore the three most important ones.
1. Isosceles Stance
The Isosceles Stance is the most widely used shooting stance today and the preferred choice for many shooters.
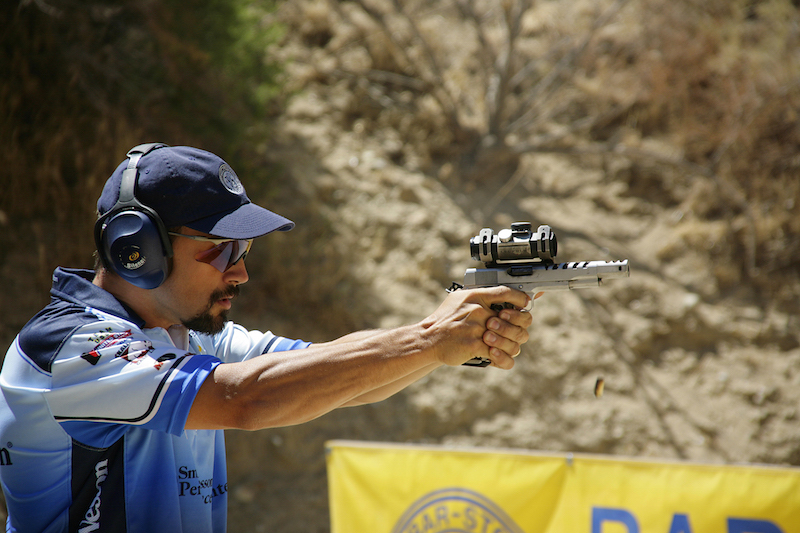
Basic Technique
-
Foot Position
- Feet shoulder-width apart or slightly wider
- Toes pointing toward the target
- Knees slightly bent for flexible support
-
Center of Gravity
- Body weight slightly forward
- About 60-70% of weight on the balls of your feet
- Maintain a “nose over toes” posture
-
Arm Extension
- Both arms extended forward
- Arms form an isosceles triangle (hence the name)
- Shoulders rolled slightly forward
-
Head Position
- Head remains upright
- Both eyes focused on the target
- Wide peripheral vision
Advantages
- Easy to Learn: The most natural and intuitive stance
- Lateral Stability: Excellent stability for side-to-side movement
- Peripheral Vision: Face-on to target maximizes visual field
- Body Armor Compatibility: Presents maximum armor coverage to threat
- Natural Under Stress: A 1989 review of 98 police shootings found 78.6% of officers squared up into an Isosceles when the shooting started, even though most had been trained in Weaver (details in the study section below)
Disadvantages
- Weak Front-to-Back Balance: With feet parallel, balance is compromised in the forward-backward direction
- Recoil Absorption: Recoil control is less effective than other stances with full-power ammunition
Best Applications
- IPSC/USPSA competitive shooting
- Indoor range practice
- Beginner training
- Officers wearing body armor
2. Weaver Stance
The Weaver Stance was worked out in 1959 by Jack Weaver, a Los Angeles County Deputy Sheriff and range officer, to win Jeff Cooper’s quick-draw matches. It is the ancestor of every modern two-handed shooting position, and its real origin story (told below) is stranger than most instructors let on.
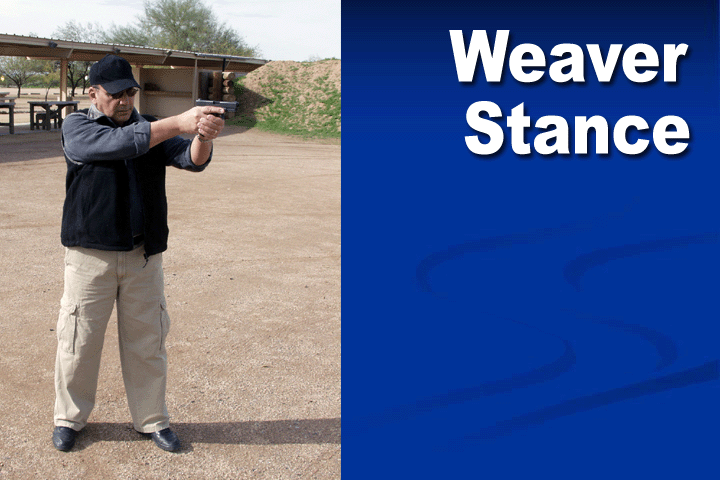
Basic Technique
-
Foot Position
- Adopt a bladed stance
- Strong-side foot (dominant hand side) stepped back
- Support-side foot forward, toes pointing at target
- Similar to a boxer’s fighting stance
-
Body Angle
- Body at approximately 45 degrees to target
- Side-facing the target
- Weight on the balls of your feet
-
Arm Position
- Strong arm mostly extended (but not locked)
- Support arm bent, elbow pointing down
- Creates a “push-pull” tension system
-
Push-Pull Grip
- Strong hand “pushes” the gun forward
- Support hand “pulls” the gun back
- These opposing forces create stability
Advantages
- Push-Pull System: Unique tension effectively controls recoil
- Reduced Exposure: Bladed stance minimizes body exposure
- Target Transitions: Unlocked elbows allow faster pivoting to side targets
- Quick Presentation: Fast sight acquisition
Disadvantages
- Poor Armor Compatibility: Side-facing exposes unprotected areas
- Movement Difficulty: Maintaining bladed position while moving is awkward
- Muscle Dependent: Requires upper body strength for push-pull tension
- Learning Curve: Requires more practice than isosceles to master
Best Applications
- Tactical environments (with cover)
- Situations requiring reduced body exposure
- Shooters who prefer traditional techniques
- IDPA defensive shooting
Jack Weaver famously said, “A pretty quick hit is better than a lightning-fast miss.”
3. Chapman / Modified Weaver Stance
The Chapman Stance is Ray Chapman’s variation of the Weaver. Chapman, a World War II Marine and police officer, used it to win the very first IPSC Handgun World Shoot in Zurich in 1975, and Jeff Cooper endorsed it even though he disliked the Isosceles for most of his career.
Basic Technique
-
Foot Position
- Same as Weaver: bladed stance
- Strong-side foot back
- Knees slightly bent
-
Arm Position
- Strong arm fully extended and locked
- Support arm bent for support
- This is the main difference from Weaver
-
Recoil Absorption
- Locked strong arm transfers recoil to upper body and shoulders
- Body mass helps absorb energy
Advantages
- Better Recoil Control: Locked arm absorbs recoil more effectively than bent arm
- Less Muscle Dependent: No need to maintain constant push-pull tension
- Better for Large Calibers: More comfortable with .44 Magnum and similar
- Best of Both Worlds: Retains bladed stance benefits while improving recoil control
Best Applications
- Shooting large-caliber handguns
- Shooters with less upper body strength
- Those who like Weaver but want better recoil control
Where the Weaver Stance Really Came From: 1959, Leatherslap and a Shoulder Injury
Most articles hand you the tidy version: Jack Weaver invented push-pull tension to control recoil, and he bladed his body to be a smaller target. Both halves of that story are later inventions, and knowing why changes how you should train.
In the late 1950s Jeff Cooper was running the “Leatherslap” matches in the mountains of Southern California. The format was brutally simple. Two shooters stood 21 feet from a row of twelve 18-inch balloons and drew on a signal, man against man, and the first one to pop his balloons won. Everyone shot from the hip with one hand, because that was what a fast gunfighter was supposed to do, and everyone missed a lot. Jack Weaver, a Deputy Sheriff who ran the Los Angeles County range at Mira Loma, decided that a slightly slower shot he could actually see would beat a lightning-fast miss. He put his second hand on the gun, brought it up to eye level, looked at the sights, and started winning. His line from that era is still the best summary of practical shooting: “A pretty quick hit is better than a lightning-fast miss.”
Cooper watched him do it, wrote about it in Guns & Ammo, and when he founded the American Pistol Institute (today’s Gunsite) in 1977 he made the “classic Weaver” one of the pillars of his Modern Technique of the Pistol, alongside the flash sight picture, the compressed surprise break and a big-bore pistol. Cooper taught the push-pull as a specific muscular act, roughly 40 to 45 pounds of opposing pressure, which he described to Massad Ayoob as “like wringing out a wet washcloth.”
Here is the part that gets left out. When asked late in life why his elbows stayed bent, Weaver’s answer, as recounted by instructor John Correia of Active Self Protection, was that he had a shoulder injury and simply could not extend his arms all the way. He also said the first time he heard about “push-pull” was when he read about it in a gun magazine, went to the range to check, and thought, “Huh, I guess I do that.” The technique that a generation of police academies drilled as doctrine was one man’s workaround for one man’s shoulder. Weaver knew it, too. His own advice was that nobody should duplicate his shooting position because they were not a clone of him; it was the principles that mattered.
That is why we do not teach the classic Weaver as a starting point. Not because it cannot work, but because when you adopt it you are adopting the accommodation without the injury. The same logic applies to Chapman. Correia’s educated guess is that Ray Chapman locked his gun arm and rested his cheek on his bicep because he was cross-eye dominant, which is exactly what that position fixes. Both stances were smart personal solutions that later got mistaken for universal laws.
There is one more Weaver relative worth knowing. Instructor D.R. Middlebrooks built a “reverse Chapman” into his Fist-Fire system: the support arm locks and the gun arm bends. It sounds backwards until you try to shoot toward your strong side while strapped into a car seat, at which point it is the only geometry that works. It is a reminder that stances are tools for situations, not identities.
Modern Isosceles: The Stance Every IPSC and USPSA Champion Actually Uses
The Modern Isosceles (you will also see it called the modified Isosceles, the fighting stance or simply the athletic stance) is the squared-up Isosceles with a few small, deliberate changes: a slight stagger in the feet, shoulders rolled in front of the hips, knees unlocked and elbows soft instead of locked. It is currently the most recommended stance in the shooting community, and it is not a compromise between Weaver and Isosceles so much as an Isosceles that finally got its balance sorted out.
Credit belongs to competition. In the 1980s Brian Enos and Rob Leatham began winning IPSC matches with a squared, forward-leaning platform that let them drive the gun between targets faster than any bladed shooter could, and the rest of the sport followed. Massad Ayoob puts it plainly: the Isosceles is the stance favored by the great majority of today’s practical shooting champions. Watch any USPSA Grand Master, any IPSC World Shoot final or any Steel Challenge run and you will see the same shape, because when the timer is running the shape that transitions fastest wins.
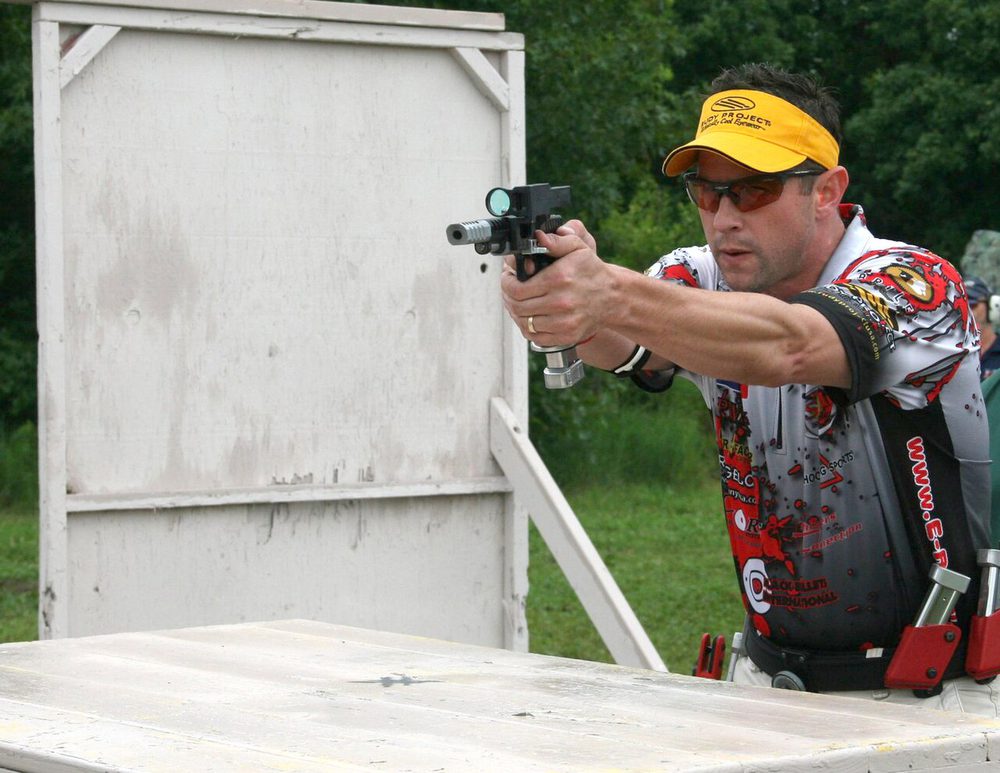 Open division Master-class competitor in a Modern Isosceles. Photo: Darren Mulford, U.S. Army Corps of Engineers, public domain.
Basic Technique
-
Foot Position
- Feet slightly wider than shoulder-width
- Strong-side foot stepped back slightly (about half a foot length)
- Support-side foot toe pointing at target
- Strong-side foot toe pointing about 45 degrees to the side
-
Body Position
- Face the target (like isosceles)
- Knees slightly bent for flexibility
- Hips pushed slightly forward
- Upper body leaning slightly forward
-
Arm Extension
- Both arms extended forward
- Elbows slightly bent (not fully locked)
- Shoulders rolled forward, creating a “diving” posture
-
Weight Distribution
- Like preparing to push a car
- Weight on balls of feet
- Ready to absorb recoil
Why Is the Modern Isosceles Most Recommended?
| Feature | Classic Isosceles | Weaver | Modern Isosceles |
|---|---|---|---|
| Learning Difficulty | Easy | Medium | Easy |
| Recoil Control | Medium | Good | Excellent |
| Moving & Shooting | Good | Difficult | Excellent |
| Target Transitions | Good | Good | Excellent |
| Armor Compatibility | Best | Poor | Good |
| Front-Back Stability | Poor | Good | Excellent |
| Lateral Stability | Excellent | Good | Excellent |
The Modern Isosceles has no significant disadvantages for a healthy shooter. It keeps the natural, under-stress simplicity of the Isosceles, fixes its front-to-back balance with the staggered foot and forward shoulders, and drops the Weaver’s dependence on arm strength and its awkwardness on the move. The one honest caveat comes from Ayoob: shooters with elbow injuries may find fully extended arms painful, and the fix is simply to unlock the elbows a little, which the modern version already does.
Is the Weaver Stance Outdated? The 1989 Study That Ended the Debate for Police
“Is the Weaver stance outdated?” is one of the most-asked questions about pistol shooting, and the honest answer is that for police and defensive use the data settled it more than three decades ago, while for the range it is still a legitimate choice.
The key piece of evidence is a study by H. Westmoreland published in Law and Order (volume 37, number 10, October 1989, pages 55 to 64) and archived in the U.S. Department of Justice’s NCJRS library. Westmoreland examined 98 real shooting events, gathered from textbooks, professional journals, videotape and direct observation of practical training exercises, and looked specifically at what the officer’s upper body did when the gun came out. He split them into 66 spontaneous events, where the officer had no warning and the gun was still holstered (traffic stops, domestic calls), and 32 non-spontaneous events where the officer already had the gun out (high-risk stops, building searches).
The finding is the number you will see quoted, usually without the source: despite the fact that most of these officers had been trained in the Weaver stance, only 12.2% used it. 78.6% squared their shoulders to the threat and ended up in an Isosceles. Westmoreland’s explanation was that the Isosceles is a gross, open motor skill, the kind of movement the body can still perform when adrenaline has taken the fine motor control away, whereas the Weaver’s opposing tensions and bladed footwork are finer, more controlled movements that fall apart under stress. His recommendation was that training should match what the body does anyway.
Body armor pushed police the same direction for a different reason. Early vests had no side plates, and a bladed Weaver shooter points exactly that unprotected gap at the threat. Yoki Maurx, a former police officer who was taught Weaver at the academy and later abandoned it, describes the problem bluntly: a single round entering under the raised arm can cross lung, heart and lung, a wound no surgeon is likely to fix. Squaring the chest points the armor at the danger instead. Even shooters who never wear armor benefit from the same geometry, because the Isosceles is also the position your body wants to snap back to when you relax.
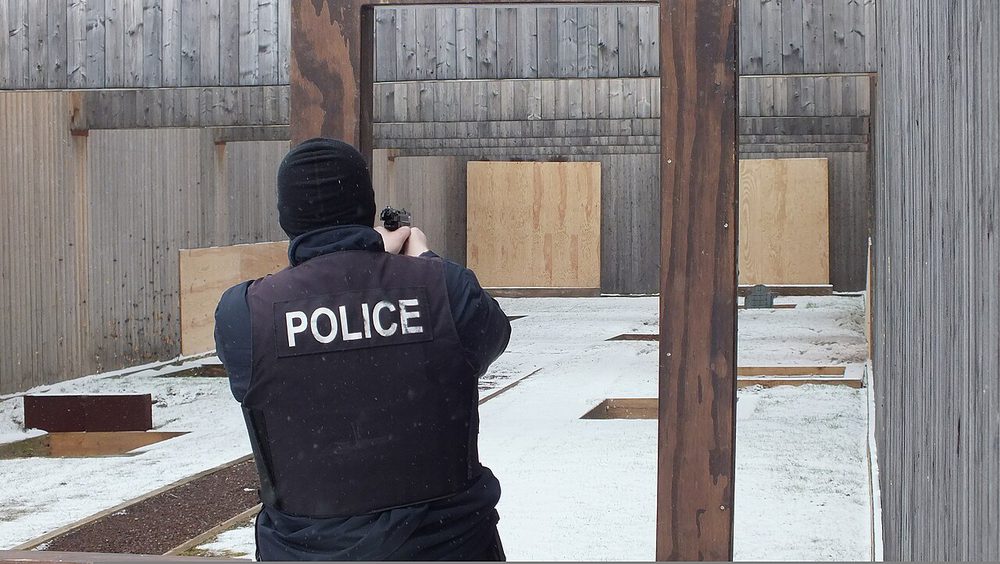 A Department of the Army civilian police officer squared up on a qualification course, vest pointed at the target. Photo: Luis Viegas, U.S. Department of Defense, public domain.
So is Weaver outdated? As a default for new shooters, yes. As a tool it still earns its place in two situations: working a barricade or vehicle where a bladed body fits the cover better, and shooters whose elbow or shoulder condition makes a locked or nearly locked arm painful, which is the very reason Jack Weaver used it.
The Turret Test: Feel the Difference in Your Living Room
You do not need a range to understand why competition shooters abandoned the bladed stance. You need an unloaded pistol, an airsoft pistol or a training gun and about two minutes. This is a drill Maurx uses to show students the difference, and it is the fastest way to turn the theory above into something your body believes.
Stand in a Weaver: gun-side foot back, body at roughly 45 degrees, support elbow bent and pulling. Extend toward an imaginary target in front of you, then slowly rotate your upper body to the support-hand side, then to the strong-hand side, while keeping the gun on the horizon. Notice two things. Rotating toward your support side is comfortable for a while, and if you glance down at your arms at the point where it stops being comfortable, you have quietly turned into an Isosceles. Rotating toward your strong side runs out of room almost immediately; you are “bound up,” as Maurx puts it, like a tank turret that can only traverse one way. To engage a target on that side you have to move your feet.
Now do the same thing from an Isosceles. Because the platform is your arms and shoulders, not your feet, you can swing through a much wider arc without anything below the waist changing. That is what practical shooters mean when they say the Isosceles is an upper-body stance: your feet can be side by side, staggered, mid-step or mid-splits and the gun is still driven by the same triangle. Walk forward with an imaginary muzzle up and you will feel the second advantage. A Weaver shooter who rounds a corner with the wrong foot forward has to reset before the shot; an Isosceles shooter simply keeps walking.
Finally, try the relaxation test. Punch out in a Weaver, then let your arms drop and your muscles go soft. Your torso will swing back to square, away from the target, because a bladed Weaver is a twisted position your body maintains only by working against itself. Under recoil and adrenaline that twist unwinds shot by shot and you end up fighting your own stance to stay on target. The Isosceles has nothing to unwind.
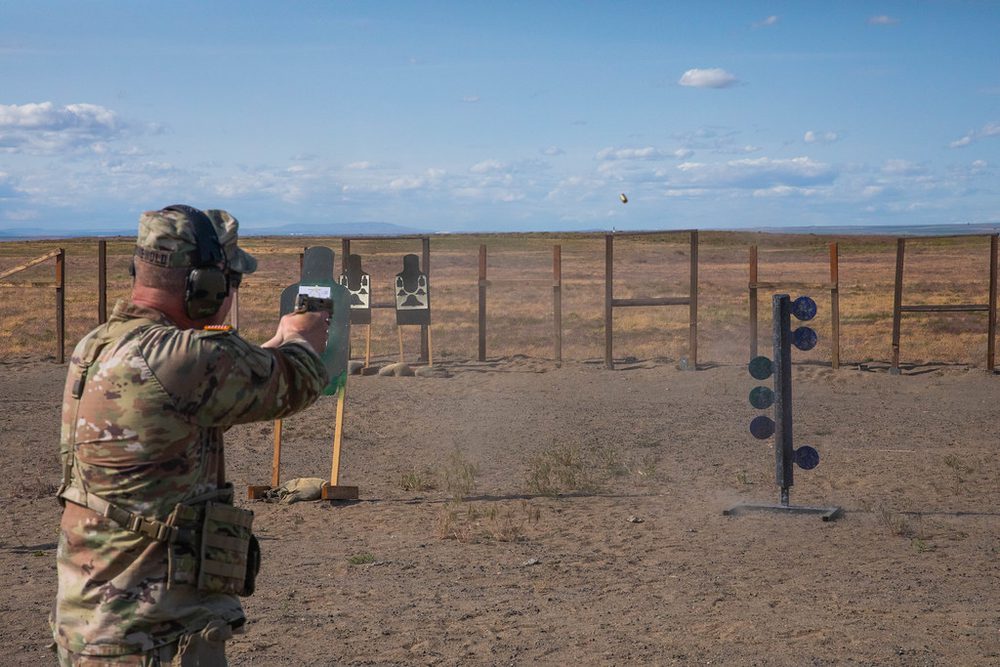 Multiple-target transitions are where the squared-up stance earns its keep. Photo: Oregon National Guard, CC BY 2.0.
Measure it: an airsoft shot-timer drill for stance transitions
Feelings are a good start, but a shot timer turns them into a number, and this drill fits in any garage or airsoft bay. Set up two targets about 90 degrees apart, three to five meters away. Start facing the midpoint with the gun at the ready. On the beep, engage the left target with two shots, transition, and engage the right target with two shots. Run five strings from a classic Weaver and five from a Modern Isosceles and compare the transition split (the time between the second shot on target one and the first shot on target two). Then swap the order so you transition toward your strong side. Most people see the Isosceles win the strong-side transition by a wide margin for exactly the turret reason, and see their Weaver splits get worse as the session goes on because the push-pull tires the arms.
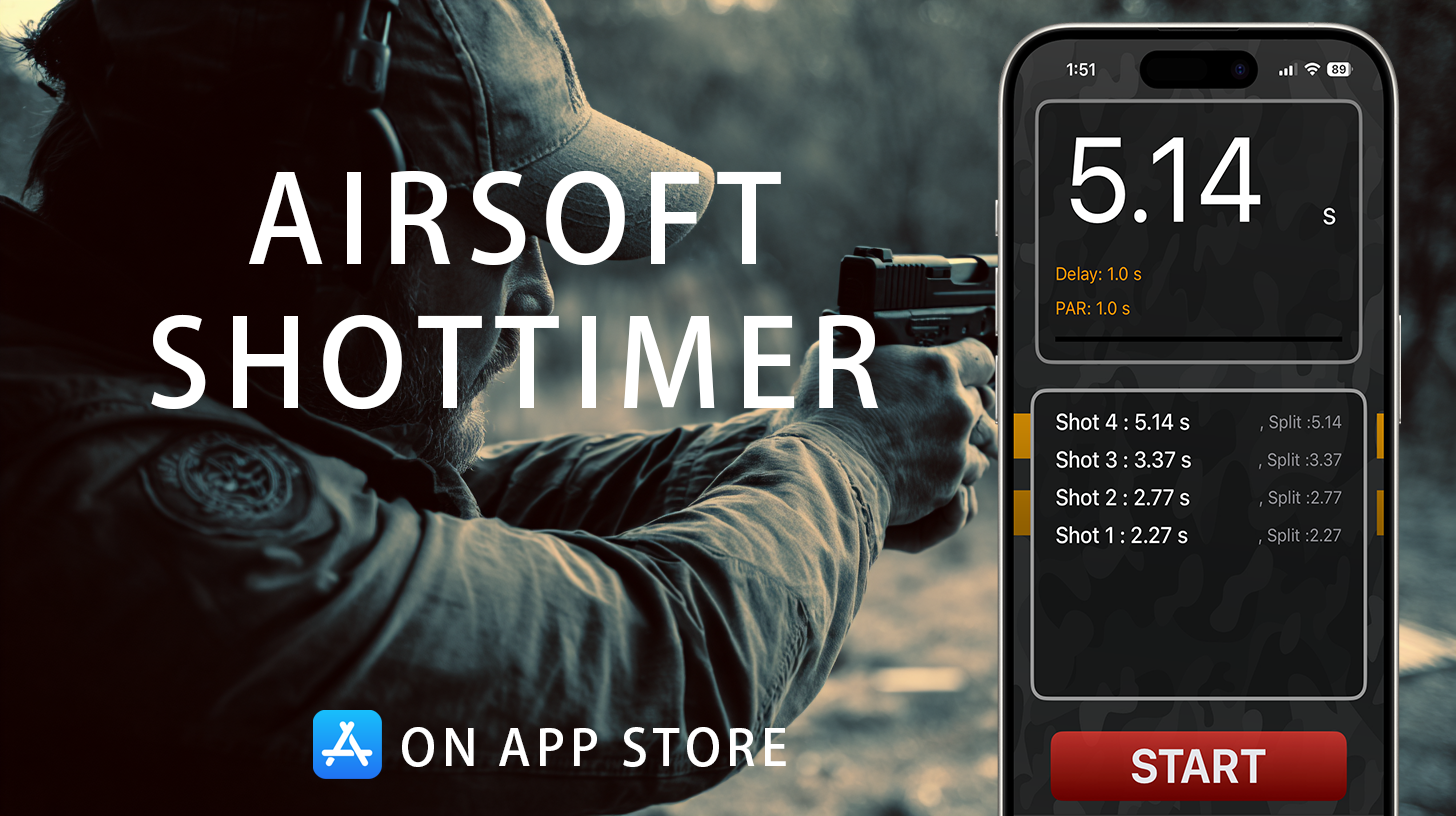
The free Airsoft Shot Timer app records every split for you and can also run a PAR time, so once you know your Modern Isosceles number you can shave it down 0.1 seconds at a time. If you train at home without a gas gun, the same drill works as dry fire with a PAR time, and our dry fire training guide explains how to set it up.
Cross-Eye Dominant? Don’t Tilt Your Head
Roughly one shooter in three is cross-eye dominant, meaning the dominant eye is on the opposite side from the dominant hand, and stance debates rarely mention that it changes the answer. The classic Weaver is the worst stance for this group, because the gun sits in front of the strong-side eye and the bladed body makes it hard to get it across to the dominant one. That is very likely why Ray Chapman locked his arm and rested his cheek on his bicep: it walked the sights over to his dominant eye. The Isosceles puts the gun on your centerline, which is why Ayoob calls it the easiest stance for cross-dominant shooters.
The fix is small. Do not cock or tilt your head to chase the sights, which bends the spine and drags your balance sideways. Keep the head upright, keep the eyes level, and bring the gun an inch or two toward the dominant eye instead. The Modern Isosceles absorbs that adjustment without anyone noticing, and it keeps the athletic “head, shoulders, knees and toes toward the target” alignment that lets you move.
Proper Grip Technique
Stance is just the foundation—grip technique is equally important.
Basic Principles of Two-Handed Grip
1. Strong Hand Grip
-
Grip Height
- Web of hand as high as possible toward barrel axis
- Backstrap should fully contact the heel of your palm
- Higher grip means less muzzle flip
-
Finger Position
- Middle, ring, and pinky fingers grip the frame tightly
- Thumb naturally rests along the side of the slide
- Index finger straight along the frame (when not shooting)
-
Grip Pressure Distribution
- Grip pressure mainly from the bottom three fingers
- About 70% of total grip strength
2. Support Hand Grip
-
Placement
- Support hand fingers wrap around strong hand fingers
- No gaps should remain
- Support palm fills all available space on the grip
-
Thumb Position
- Support thumb lies flat below strong hand thumb
- Both thumbs parallel, pointing forward
- Never place thumb behind the slide
-
Grip Pressure Distribution
- Support hand provides about 30% of total grip
- Primary function is filling space and adding stability
Common Grip Mistakes
Mistake 1: Tea Cup Grip
What it looks like: Support hand cupping under the magazine
Why it’s wrong: Support hand provides almost no stability—essentially one-handed shooting
Fix: Support hand should wrap around the side of the grip, not underneath
Mistake 2: Support Hand Too Low
What it looks like: Support hand positioned lower than the strong hand
Why it’s wrong: Creates gaps that allow the gun to shift during recoil
Fix: Support hand should grip as high as possible, filling all space
Mistake 3: Thumb Behind the Slide
What it looks like: Either thumb placed behind the slide
Why it’s wrong: Slide will cut or pinch the thumb when cycling
Fix: Both thumbs always on the side of the slide
Mistake 4: Limp Wristing
What it looks like: Loose wrist that doesn’t resist recoil
Why it’s wrong: Causes severe muzzle flip and can cause malfunctions
Fix: Keep wrists locked, transferring recoil to arms and body
Common Stance Mistakes
Mistake 1: Leaning Back
Symptom: Shooter fears recoil and leans body backward
Problems:
- Weight on heels, extremely poor stability
- Recoil pushes body further back
- Cannot effectively control muzzle flip
Fix:
- Adopt “nose over toes” forward-leaning posture
- Imagine preparing to absorb a pushing force
- Keep weight on balls of feet
Mistake 2: Locked Knees
Symptom: Both legs fully extended, knees locked
Problems:
- Cannot absorb recoil
- Stiff and inflexible during movement
- Fatigues quickly
Fix:
- Keep knees slightly bent
- Like a pre-jump position
- Knees act as shock absorbers
Mistake 3: Over-Extended Arms
Symptom: Arms fully straightened to hyperextension
Problems:
- Muscles fatigue rapidly
- Excessive stress on joints
- Cannot maintain stable aim
Fix:
- Extend arms to natural stopping point
- If elbows start rotating inward, you’ve gone too far
- Keep slight bend in arms
Mistake 4: Over-Tensing
Symptom: Entire body tense, death-gripping the gun
Problems:
- Muscle tremors transfer to gun
- Rapid fatigue
- Movements become stiff
Fix:
- Learn to relax
- Grip should be firm but not rigid
- “Firm without stiffness” is the goal
Special Shooting Positions
One-Handed Shooting
When one hand is injured or occupied, single-hand shooting is necessary.
Strong Hand Only
- Body slightly turned to reduce exposure
- Arm extended but not locked
- Wrist remains locked
- Grip tighter than two-handed
Support Hand Only
- Requires extensive practice to master
- May need to tilt head to align with dominant eye
- Target time typically 150% of strong hand
Kneeling Positions
Used to lower profile or utilize low cover.
Single Knee Down
- Strong-side knee on ground
- Support-side leg forward for stability
- Upper body maintains same position as standing
- Can rest elbow on forward knee for stability
Both Knees Down
- Both knees on ground
- Buttocks can rest on heels
- Lowest shooting position
- Least mobile
Cover Shooting
Common in IPSC/IDPA competition.
Key Points
- Minimize body exposure
- Only expose what’s needed for aiming
- Quick lean out, shoot, retreat
- Practice both left and right side cover shooting
Shooting Stance Training Plan
Beginner (Weeks 1-4)
Daily training 15-20 minutes
| Activity | Time | Focus |
|---|---|---|
| Dry stance practice | 5 min | Build proper body memory |
| Grip practice | 5 min | Ensure correct hand position |
| Presentation | 5 min | From ready to aim |
| Mirror check | 5 min | Confirm correct posture |
Weekly Goals:
- Week 1: Familiarize with the Modern Isosceles
- Week 2: Confirm correct grip technique
- Week 3: Begin incorporating draw stroke
- Week 4: Smooth draw-to-aim sequence
Intermediate (Weeks 5-12)
Daily training 20-30 minutes
| Activity | Time | Focus |
|---|---|---|
| Draw training | 10 min | Record with Shot Timer |
| Moving stance | 10 min | Maintain upper body stability |
| Position transitions | 5 min | Standing to kneeling |
| Cover shooting | 5 min | Both sides |
Using AirsoftShotTimer:
- Record draw to first shot time
- Beginner target: Under 2.0 seconds
- Intermediate target: Under 1.5 seconds
Advanced (Week 13+)
Daily training 30-45 minutes
| Activity | Time | Focus |
|---|---|---|
| Stress training | 15 min | Shooting after physical exertion |
| Weak hand training | 10 min | Well-rounded development |
| Complex drills | 10 min | Movement + cover + shooting |
| Speed work | 10 min | PAR time training |
Advanced Goals:
- Draw to first shot: Under 1.0 second
- Maintain stance consistency under all conditions
- Stable performance under pressure
Frequently Asked Questions (FAQ)
Q1: Which shooting stance is best?
A: There’s no “best” stance for every body, but the Modern Isosceles is the most recommended and the one nearly every practical shooting champion uses. It keeps the Isosceles’ natural, under-stress simplicity and adds the forward balance and soft elbows that the classic version lacked.
Q2: Which stance should beginners learn first?
A: We recommend starting with the Modern Isosceles. It’s relatively easy to learn and builds a solid foundation. We don’t recommend starting with pure Isosceles (weak front-to-back balance) or classic Weaver (too dependent on arm strength and awkward on the move).
Q3: Does stance affect shooting accuracy?
A: Yes, significantly. Poor stance causes:
- Inadequate recoil control
- Point of aim drift during rapid fire
- Rapid fatigue
- Inability to shoot stable while moving
Q4: How much time should I spend practicing stance?
A: In the early stages of shooting training, we recommend spending over 50% of your time on stance and grip practice. Once these fundamentals are solid, improvements in accuracy and speed will come much faster.
Q5: Can I practice shooting stance with airsoft guns?
A: Absolutely! Benefits of airsoft training:
- Low cost
- Can practice at home
- Handling similar to real firearms
- Quantify progress with AirsoftShotTimer
Related reading: Complete Guide to Dry Fire Training - Home practice for shooting skills
Q6: Do tall or short shooters need to adjust their stance?
A: Basic principles remain the same, but minor adjustments can help:
- Tall shooters may need wider stance
- Short shooters may need more forward lean
- The key is finding your Natural Point of Aim
Q7: Is the Weaver stance outdated?
A: As the default for new shooters and for police, yes. A 1989 study of 98 police shootings found only 12.2% of Weaver-trained officers used it under stress, 78.6% squared up into an Isosceles, and competition abandoned it once Enos and Leatham started winning with the Modern Isosceles. It still has legitimate uses behind barricades and for shooters whose elbow or shoulder injuries make an extended arm painful, which is the reason Jack Weaver used it in the first place.
Q8: What is the difference between the Isosceles and Weaver stances?
A: Weaver is bladed (gun-side foot back, body about 45 degrees to the target), both elbows bent, with the gun hand pushing and the support hand pulling. Isosceles is squared to the target with both arms extended so they form a triangle with the chest. In practice the biggest differences show up when you move or transition: the Isosceles is driven by the upper body and works with any foot position, while the Weaver has to be rebuilt every time the feet change.
Q9: What are the three basic shooting stances?
A: The three you will find in almost every course are the Isosceles, the Weaver and the Chapman (modified Weaver). The Modern Isosceles that competition shooters use is a refinement of the first one rather than a fourth school.
Q10: What are the advantages of the Isosceles stance?
A: It’s the position the body adopts naturally under stress, it’s a gross motor skill that survives adrenaline, it points body armor at the threat, it puts the gun on your centerline (easiest for cross-eye-dominant shooters), it transitions through the widest arc without moving the feet, and it needs far less arm strength than a push-pull Weaver. Its one weakness, poor front-to-back balance, is what the Modern Isosceles fixes.
Q11: What are the disadvantages of the Weaver stance?
A: It depends on upper-body strength to maintain the push-pull, it exposes the unarmored side of the torso when bladed, it’s the hardest stance for cross-eye-dominant shooters, it binds up when you rotate toward your strong side, and it unwinds toward square when you relax or take recoil. Its strengths are recoil absorption through bent arms and a compact fit behind cover.
Q12: What shooting stance does John Wick use?
A: The compact, canted, close-to-the-body position from the films is Center Axis Relock (C.A.R.), a system developed by British-born instructor Paul Castle for close-quarters work and weapon retention, with a “high” position near the chest and an “extended” position for longer shots. It looks dramatic, but it’s a specialized close-range tool, not a general-purpose stance, and it isn’t what you’ll see on any IPSC or USPSA stage. Learn the Modern Isosceles first; you can explore C.A.R. later if your context (vehicles, tight hallways) calls for it.
Q13: Can I switch stances after years of shooting one way?
A: Yes, and dry fire makes it far less painful than doing it live. Expect your first few sessions to feel slow and awkward, run the turret test and the shot-timer transition drill above so you can see the improvement in numbers, and give yourself a few weeks of daily 10-minute reps before judging the result.
Conclusion
Shooting stance is the foundation of all shooting techniques. Whether you want to compete in IPSC/IDPA or simply enjoy shooting, proper stance will help you achieve better results with less effort.
Key Takeaways
- Modern Isosceles is the most recommended, combining stability, flexibility and the shape every champion uses
- Grip technique is as important as stance—avoid common mistakes
- Forward lean, soft knees, relaxed but firm are core stance principles
- Use AirsoftShotTimer to record training data and quantify progress
- Consistent practice matters more than any technique
Next Steps
- Practice the Modern Isosceles in front of a mirror, then run the turret test
- Check that your grip is correct
- Start recording draw times with AirsoftShotTimer
- Practice 15-30 minutes daily
- Periodically record video to review your stance
Correct Stance + Consistent Training = Rapid Improvement in Shooting Skills!
Happy training!
Image Credits
- Modern Isosceles competitor: Darren Mulford, U.S. Army Corps of Engineers, public domain, via Wikimedia Commons
- Police officer on qualification course: Luis Viegas, U.S. Department of Defense, public domain, via Wikimedia Commons
- Pistol match target transition: Oregon National Guard, CC BY 2.0, via Flickr
Related Articles
Training Guides
- Complete Guide to Dry Fire Training - Home practice for shooting skills
- how to read a shot timer - Track progress with data
- Complete Guide to Magazine Reloads - Master reload techniques
Competitive Shooting
- IPSC Practical Shooting Training Guide - Core competitive shooting techniques
- IDPA Defensive Shooting Training Guide - Tactical-oriented training
- IPSC Range Commands & First Match Guide - The eight official commands and your first match
Pistol Guides
- Glock 17 Training Guide - Classic pistol training
- CZ Shadow 2 Complete Guide - Top competitive pistol
- SIG P320 Complete Guide - Modular pistol training
Beginner Guides
- Complete Beginner’s Guide to Airsoft - Start your Airsoft journey
Put a Shot Timer in Your Pocket
Airsoft Shot Timer is a free shot timer app tuned for airsoft and Action Air — it picks up BB gun shots, tracks your split times, and saves you the cost of a $150+ hardware timer for IPSC/IDPA practice.

- Shooting Stance
- Weaver Stance
- Isosceles Stance
- Weaver vs Isosceles
- Modern Isosceles Stance
- Modified Isosceles Stance
- Chapman Stance
- Modified Weaver Stance
- Pistol Shooting Stance
- Handgun Stance
- 3 Basic Shooting Stances
- Push-Pull Grip
- Jack Weaver
- Jeff Cooper
- Ray Chapman
- Center Axis Relock
- Cross Eye Dominance
- Shooting Training
- IPSC
- IDPA
- USPSA
- Pistol Training
- Handgun Grip
- Dry Fire
- Airsoft Training