IPSC Range Commands 2026: All 8 Official Commands, the 1-4 Second Standby Rule & Your First Match
🎯 The 60-Second Answer
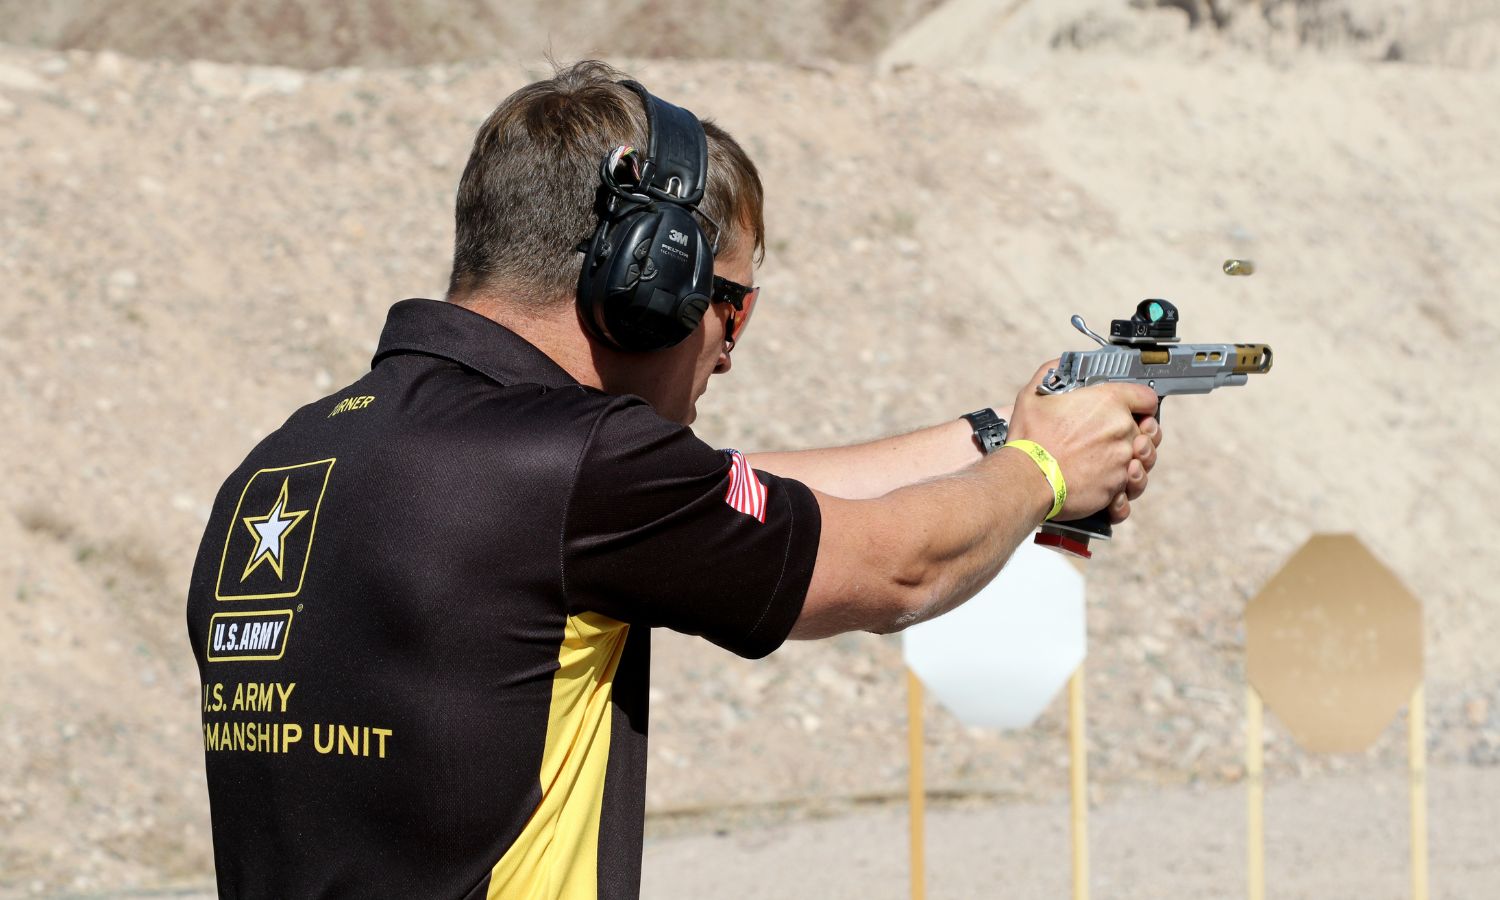
The eight official IPSC range commands, in order (Section 8.3, IPSC Handgun Competition Rules, January 2026 Edition):
- “Load And Make Ready” — or just “Make Ready” if the stage starts unloaded (8.3.1)
- “Are You Ready?” — silence means yes; say “Not Ready” if it is not (8.3.2)
- “Standby” — one word, and the beep follows within 1 to 4 seconds (8.3.3)
- “Start Signal” — the beep itself is an official command (8.3.4)
- “Stop” — any RO on the stage, at any time (8.3.5)
- “If You Are Finished, Unload And Show Clear” (8.3.6)
- “If Clear, Hammer Down, Holster” (8.3.7)
- “Range Is Clear” — nobody moves downrange before this (8.3.8)
Three things that will cost you: creeping after “Standby” is 1 procedural penalty under Rule 10.2.6. Reacting to the beep and then stopping without an official time recorded gives you zero time and zero score for the stage (8.3.4.2). And only the RO’s timing device counts as your official time (9.10.1) — your own timer never does.
A detail worth knowing even if it is not yours to use: a competitor with a severe hearing disability can have the commands replaced by a shoulder-tap countdown — 3 taps, 2 taps, 1 tap on the weak-side shoulder (8.3.9.1), with the Range Master’s prior approval.
The rest of this guide walks through a full match around those commands: registration, check-in, stage briefing, walkthrough, scoring and the post-match review.
Introduction: Your First IPSC Match
Stepping onto the IPSC range for the first time can be nerve-wracking. Facing unfamiliar procedures, strict safety protocols, and experienced shooters all around you, many beginners feel overwhelmed. But remember: every Grand Master once started as a complete beginner.
This guide will walk you through every aspect of an IPSC match—from pre-match preparation, check-in procedures, stage walkthroughs, to shooting execution and scoring. Whether you’re preparing for your first competition or looking to better understand match procedures, this guide will help you be fully prepared.
Looking for basic IPSC training? Check out our Complete IPSC Training Guide first.
Pre-Match Preparation: One Week to One Day Before
Confirm Eligibility and Registration
Before participating in an IPSC match, confirm the following:
Basic Requirements
- Completed IPSC Safety Course (Black Badge / ACC)
- Valid IPSC membership
- Legal firearms license for your jurisdiction
Registration Process
- Complete online registration on official website or designated platform
- Select your division (Production, Production Optics, Standard, Open, etc.)
- Pay registration fee
- Confirm your squad and check-in time
Equipment Checklist
The day before the match, use this checklist to verify all equipment:
Firearm and Ammunition
- Competition handgun (cleaned and maintained)
- Backup firearm (if available)
- 4-6 magazines (per division rules)
- 200-300 rounds of ammunition (bring 50% more than expected)
- Ammunition must meet division power factor requirements (Minor/Major)
- Cleaning kit and lubricant
Belt System
- Competition belt (double-layer recommended)
- Holster (division-compliant competition holster)
- 3-4 magazine pouches
- Verify all mounting hardware is secure
Personal Protection
- Eye protection (required, bring backup)
- Ear protection (electronic preferred)
- Knee and elbow pads (for some stages)
Other Essentials
- IPSC membership card / match confirmation
- Rulebook (digital version acceptable)
- Shot timer (for warm-up)
- Pen and notepad
- Sunscreen / rain gear (weather dependent)
- Water and snacks
- Portable charger
Ammunition and Power Factor
IPSC uses Power Factor to classify ammunition levels:
Calculation Formula
Power Factor = Bullet Weight (grains) × Velocity (fps) ÷ 1000
There is no single “Major” number — it depends on your division. This is one of the most commonly mis-stated facts in beginner guides (this one included, until we checked). Straight from Appendix D of the IPSC Handgun Competition Rules, January 2026 Edition:
| Division | Minor PF | Major PF |
|---|---|---|
| Open | 125 | 160 |
| Standard | 125 | 170 |
| Classic | 125 | 170 |
| Revolver | 125 | 170 — but a revolver holding 7 rounds or more does not qualify for Major at all, however fast it chronos |
| Production | 125 | Not applicable — Minor scoring only |
| Production Optics | 125 | Not applicable |
| Optics | 125 | Not applicable |
So the “160” you hear quoted at the club is the Open number. If you shoot Standard or Classic, your Major floor is 170; if you shoot Production, Production Optics or Optics, Major does not exist for you and there is nothing to chase.
Two chronograph details worth knowing before you load your match ammo:
- Nothing rounds up. Rule 5.6.3.5 says the final result ignores all decimal places — for IPSC purposes, 124.9999 is not 125. Build in a margin; do not load to the floor.
- You get a second chance, of a sort. If your first 3 rounds fail the declared floor, another 3 are fired, and the power factor is recalculated using the 3 highest-velocity rounds out of the 6 (Rule 5.6.3.6).
Note: Without an official chronograph at the match, a competitor’s declared power factor cannot be challenged (Rule 5.6.1).
Match Day: Check-in and Preparation
Arrival and Check-in
Arrive 30-60 minutes early to give yourself adequate time:
-
Registration Desk Check-in
- Confirm name and squad assignment
- Receive competitor number sticker (place on visible part of holster)
- Understand the day’s schedule
-
Equipment Check
- Firearm inspection and function check
- Holster position and draw test
- Magazine capacity verification
- Optics and accessories compliance
-
Chronograph Test
- Usually random sampling or full testing
- Prepare 8-10 rounds of your competition ammunition
- Test the actual ammunition you’ll use
Warm-up and Preparation
Between check-in and match start:
Physical Warm-up
- Arm and shoulder stretches
- Wrist rotations
- Simple squats and lateral movements
Dry Fire Practice
- Practice draws in the safety area
- Verify holster retention is working properly
- Practice magazine changes
Mental Preparation
- Deep breathing, stay relaxed
- Review your training rhythm
- Remind yourself: safety first, speed second
Stage Procedure: From Briefing to Completion
Stage Briefing
Before each stage, the Range Officer (RO) will brief the entire squad:
Briefing Content Includes
- Stage name and design description
- Round count
- Start position and stance
- Shooting procedure (if special requirements exist)
- Scoring target and penalty target locations
Tips for Beginners
- Listen carefully, don’t get distracted
- Ask if you don’t understand—ROs will patiently answer
- Note key information (target count, special rules)
Stage Walkthrough
After the briefing, competitors can physically walk through the stage:
Walkthrough Time
- Usually 3-5 minutes
- Same duration for all competitors to ensure fairness
Walkthrough Focus Points
- Plan your route: Decide movement sequence and direction
- Identify targets: Memorize each target’s position and distance
- Find shooting positions: Decide where to stop and shoot
- Calculate round count: Confirm how many shots at each position
- Note obstacles: Ground conditions, cover positions
Walkthrough Techniques
- Actually walk your planned route with your feet
- “Simulate” shooting with your hands
- Visualize your first move when the timer beeps
- Discuss with teammates to get different perspectives
Beginner’s Tip: Don’t chase the fastest route for your first match. Choose the safest, most stable way to complete the stage.
Shooting Execution
Range Commands
IPSC uses the same eight English commands at every match on earth, in the same order. They are worth learning word for word before your first match — the full list, the rule numbers behind each one and the penalties attached to getting them wrong are in The 8 Official IPSC Range Commands below.
The short version, for the shooter standing on the line: you will hear “Load And Make Ready”, then “Are You Ready?”, then “Standby”, and then the beep. From “Standby” to the beep is 1 to 4 seconds — long enough that trying to guess it will only make you creep, and creeping is a penalty.
Shooting Process Notes
Safety First
- 180 Rule: Muzzle must never point past your body’s sides toward the rear
- Finger Discipline: Finger off trigger when moving
- Violation = DQ: Match disqualification
Execution Tips
- Execute according to your walkthrough plan
- Maintain steady breathing
- Confirm target hits before moving
- Don’t panic because of others’ speed
The 8 Official IPSC Range Commands (Rule 8.3)
Every IPSC match in the world runs on the same eight English commands, in the same order, whether you are shooting in Mallorca, Manila or Melbourne. They are not a local club custom — they are defined in Section 8.3, “Range Communication”, of the IPSC Handgun Competition Rules, January 2026 Edition, and the wording is unchanged from the January 2024 edition. If you learned them from an older Black Badge handout, what you learned is still current.
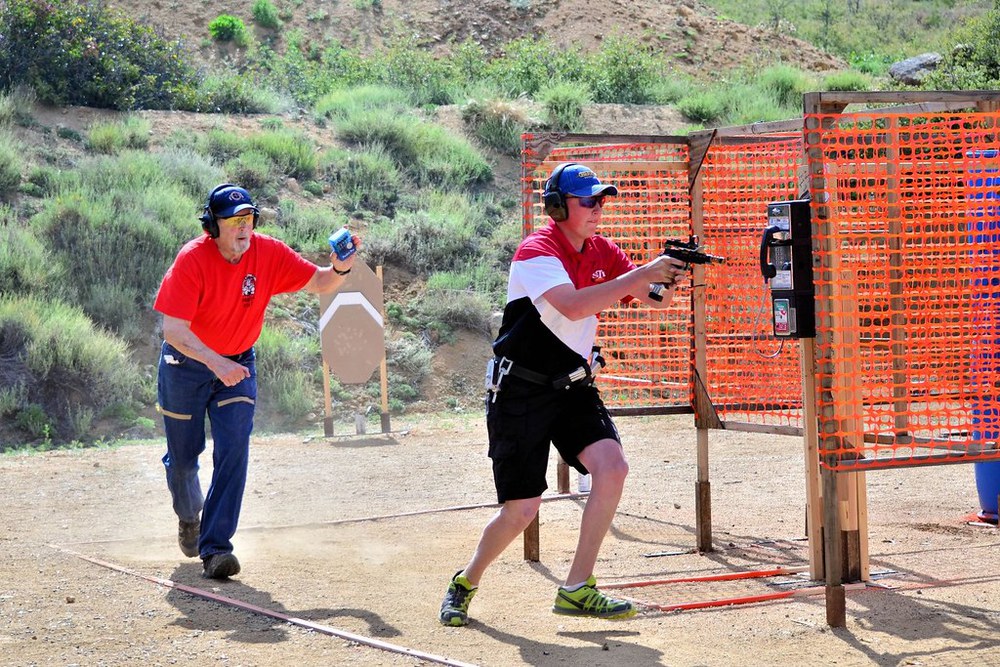
The RO shadows you through the whole stage, timer in hand — and every one of the eight commands comes from them. Photo by zinkpics / Flickr, CC BY-SA 2.0.
Two details trip up almost every new shooter, and both are worth fixing before you ever step into a bay:
- The command is “Standby” — one word. Plenty of guides (including, until today, this one) write it as “Stand By”.
- The beep is a command. It is not an informal extra tacked on the end; “Start Signal” is an official range command with its own rule number, 8.3.4, and its own set of consequences when it goes wrong.
| # | Command (Rule) | What the RO means | What you do |
|---|---|---|---|
| 1 | “Load And Make Ready” (8.3.1) | The Course of Fire has officially started | Face downrange (or the safe direction the RO specifies), fit eye and ear protection, prepare the firearm exactly as the written stage briefing requires, then assume the required start position |
| 2 | “Are You Ready?” (8.3.2) | Your last chance to stop the sequence | Say nothing if you are ready — silence is consent. Say “Not Ready” out loud if you are not |
| 3 | “Standby” (8.3.3) | The start signal follows in 1 to 4 seconds | Freeze. Do not creep toward the gun, the mags or a better stance |
| 4 | “Start Signal” (8.3.4) | The beep | Execute your plan |
| 5 | “Stop” (8.3.5) | Any RO assigned to the stage may call this at any time | Immediately cease firing, stop moving, and wait for instructions |
| 6 | “If You Are Finished, Unload And Show Clear” (8.3.6) | Present the gun for inspection | Muzzle downrange, magazine removed, slide locked or held open, chamber empty. Revolvers: cylinder swung out and empty |
| 7 | “If Clear, Hammer Down, Holster” (8.3.7) | Final safety check, then put it away | Self-loaders: release the slide and pull the trigger — without touching the hammer or decocker. Revolvers: close the empty cylinder without touching the hammer |
| 8 | “Range Is Clear” (8.3.8) | The stage is over | Only now may anyone move forward of the firing line to score, patch and reset |
“Make Ready” vs “Load And Make Ready”
If the stage starts with an unloaded firearm, the RO says “Make Ready” instead of “Load And Make Ready” (Rule 8.3.1). Same command, same effect, one word dropped because there is nothing to load. Hearing it for the first time on a start-unloaded stage is unsettling if nobody warned you — now you have been warned.
The moment either version is given, the Course of Fire has begun. Rule 8.3.1.1 then locks you in place: you must not move away from the start location before the Start Signal without the RO’s prior approval and direct supervision. First offense is a warning; a second offense in the same match can be escalated under Rule 10.6.1.
The 1-4 Second Standby Window — and Why Creeping Costs a Penalty
This is the single most useful number in Section 8.3, and almost no beginner guide quotes it.
Rule 8.3.3: “Standby” — This command should be followed by the Start Signal within 1 to 4 seconds.
That window exists to make the start unguessable. You cannot time it, you cannot count it, and the shooter who tries to shave a tenth by pre-loading their draw is the shooter who gets caught by Rule 10.2.6: creeping after “Standby” — moving your hands toward the firearm, a reloading device or ammunition, or shifting into a more advantageous position or stance — is one procedural penalty. If the RO catches it in time, you get a warning on the first offense and a restart instead.
This is also the reason a serious dry-fire session uses a random delay, not a fixed countdown. If your timer beeps at exactly 3.0 seconds every repetition, you are not training a reaction — you are training an anticipation, and the match will punish it. Set your timer’s random start delay to the same 1-4 second range the rulebook mandates, which is exactly what the random delay in our free shot timer app is built around, and practise reacting instead of predicting.
What Happens When the Start Signal Goes Wrong
Three separate rules cover the three ways a start can fall apart, and knowing them is the difference between standing there confused and knowing you are fine:
- You did not react at all (8.3.4). Sometimes you simply do not hear it — wind, ear pro, the bay next door. The RO will confirm you are ready and resume the commands from “Are You Ready?”. No penalty, no drama.
- You started early — a false start (8.3.4.1). The RO stops you as soon as possible, the course of fire is restored, and you are restarted. Note the difference from creeping: a genuine false start gets you a restart, while creeping that the RO could not stop in time gets you a procedural penalty.
- You reacted, then stopped (8.3.4.2). If you react to the Start Signal but do not continue your attempt, and no official time is recorded on the RO’s timing device, you are given zero time and zero score for that stage. This is the rule behind the advice every squad mate gives you: if something goes wrong mid-stage, keep going and let the RO call “Stop” — bailing out yourself is how a bad stage becomes a zero.
One related rule worth filing away: under Rule 9.10.1, only the timing device operated by the Range Officer records your official time. Your own timer, your squad mate’s phone, the video someone shot from behind the berm — none of them count. If the RO’s timer is deemed faulty and your time cannot be credited accurately, you are required to reshoot the stage.
Interim Commands on Shared Bays
When two or more courses of fire share a bay, ROs are allowed to issue extra commands between them — Rule 8.3.5.1 gives “Reload if required” as the example. These are legitimate, but they are only legitimate if they are clearly stated in the written stage briefing. If you hear a command in a bay that is not one of the eight and not in the briefing, it is entirely reasonable to ask the RO to clarify before you touch the gun.
The 3-2-1 Tap Protocol for Hard-of-Hearing Competitors
IPSC has a formal accommodation here, and it is almost never mentioned outside the rulebook itself. Under Rule 8.3.9, a competitor with a severe hearing disability may — with the Range Master’s prior approval — have the verbal range commands supplemented by visual and/or physical signals.
The recommended physical signals (Rule 8.3.9.1) are taps on the competitor’s weak-side shoulder, counting down:
- 3 taps = “Are You Ready?”
- 2 taps = “Standby”
- 1 tap = coincides with the Start Signal
A competitor who would rather use their own electronic or other device can, but Rule 8.3.9.2 requires it to be submitted to the Range Master for examination, testing and approval first — bring it to registration, not to the line.
One Place the Commands Do Not Apply
Rule 8.3.10: there are no fixed range commands at the chronograph station or at an equipment compliance check, which may not even be on a shooting range. The rule there is simpler and stricter: do not handle your handgun at all until the examiner asks for it to be passed to him, and then follow his instructions exactly. Violations are handled under the match disqualification rules, so the chrono table is a genuinely bad place to be casual.
Scoring System: Hit Factor Explained
Target Zones and Points
IPSC paper targets have different scoring zones:
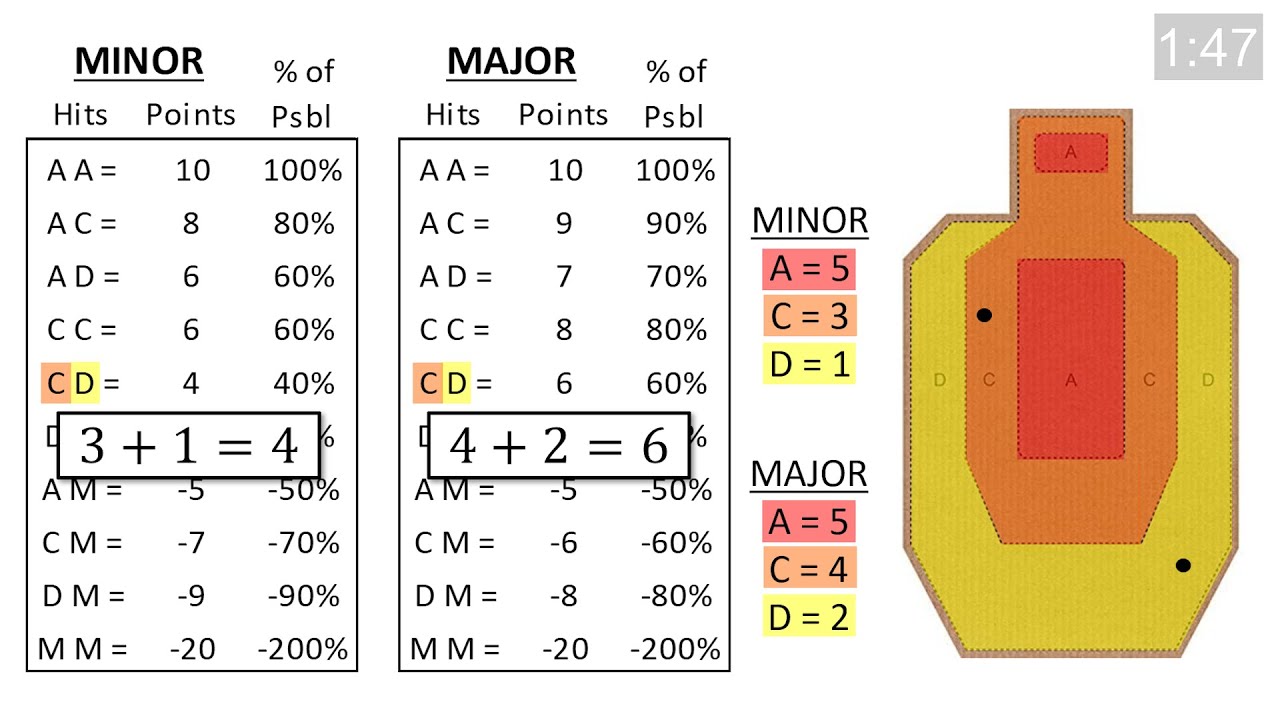
| Zone | Name | Minor Points | Major Points |
|---|---|---|---|
| A | Alpha | 5 pts | 5 pts |
| C | Charlie | 3 pts | 4 pts |
| D | Delta | 1 pt | 2 pts |
| M | Mike (Miss) | -10 pts | -10 pts |
| NS | No Shoot | -10 pts | -10 pts |
Hit Factor Calculation
IPSC uses Hit Factor as the primary scoring method:
Hit Factor = Total Points ÷ Time
Calculation Example
- 12 Alphas (12 × 5 = 60 points)
- 6 Charlies (6 × 3 = 18 points)
- 1 Mike (-10 points)
- Total Score: 60 + 18 - 10 = 68 points
- Time: 15.32 seconds
- Hit Factor = 68 ÷ 15.32 = 4.44
Ranking Method
- Highest Hit Factor on stage = 100%
- Other shooters calculated as percentage of winner
- All stage scores combined determine final placement
Balancing Speed and Accuracy
Hit Factor scoring means you need to find the balance between speed and accuracy:
All Alpha but Slow
- High points but long time
- Hit Factor may be low
Maximum Speed but Poor Hits
- Short time but many Charlie/Delta/Mike
- Penalties offset speed advantage
Best Strategy
- Consistent A-C zone hits
- Acceptable speed
- Zero Mikes and No Shoots
Beginner’s Goal: First aim for “zero Mikes,” then gradually increase speed.
Match Etiquette and Teamwork
Being a Good Squad Member
IPSC matches have no paid staff—everything runs on mutual assistance:
Post-Shooting Responsibilities
- Patch targets (after RO has scored)
- Reset steel targets (repaint or verify reset)
- Help collect brass (if range requires)
Observation and Learning
- Watch other shooters’ movement strategies
- Note their techniques and mistakes
- But don’t over-discuss and disturb others’ preparation
Interacting with ROs
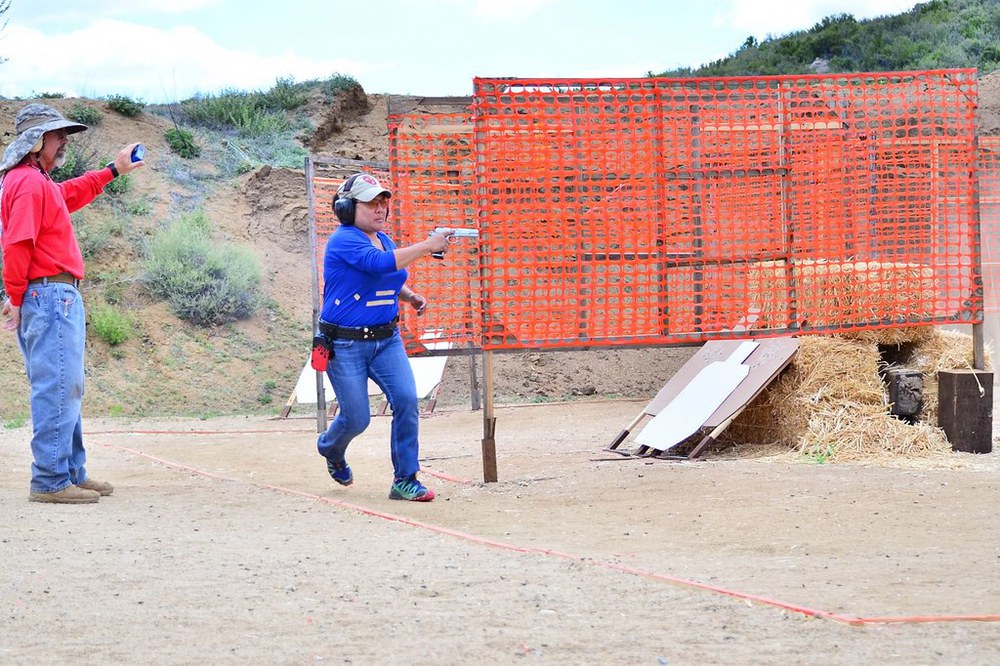
The RO moves with you for the entire course of fire, close enough to see your muzzle and your trigger finger at all times. They are not there to mark you down — they are the person who will call “Stop” if something goes wrong. Photo by zinkpics / Flickr, CC BY-SA 2.0.
Respect RO Decisions
- RO scoring and rulings are final
- If in doubt, ask politely
- Formal protests have specific procedures
Tell ROs You’re New
- Most ROs will be more patient
- They’ll give extra reminders on important matters
- Don’t feel embarrassed
Common Beginner Mistakes and How to Avoid Them
Mistake 1: Chasing Speed
Problem: Seeing other shooters finish quickly and trying to imitate them Result: Many misses, safety violations Solution: Remember “slow is smooth, smooth is fast”—stable execution beats fast and messy
Mistake 2: Inadequate Walkthrough
Problem: Only looking during walkthrough time, not actually walking Result: Forgetting route during match, missing targets Solution: Actually walk your route with your feet, verbally rehearse each action
Mistake 3: Ignoring Magazine Management
Problem: Unsure of remaining rounds in magazine Result: Reloading at wrong time or running dry Solution: Calculate shot count at each position during walkthrough
Mistake 4: Too Nervous
Problem: Excessive anxiety on match day Result: Shaky hands, slow reactions, more mistakes Solution:
- Deep breaths, remind yourself this is a learning opportunity
- First match goal is “safe completion”
- Enjoy the process, results aren’t most important
Mistake 5: Not Bringing Enough Supplies
Problem: Only bringing exactly what’s needed Result: Can’t handle equipment failures, run out of ammunition Solution:
- Bring 50% more ammunition
- Bring backup glasses and ear protection
- Basic tools and spare parts
Using AirsoftShotTimer to Prepare for Competition
Pre-Match Training Simulation
Use AirsoftShotTimer to simulate match scenarios at home:
Draw Reaction Training
- Set random delay to 1-4 seconds — this is not an arbitrary default, it is the window Rule 8.3.3 gives the RO between “Standby” and the Start Signal
- Simulate match start position
- Draw and shoot on signal
- Record first shot time
The point of the random delay is that it makes the start unguessable, exactly as the rulebook intends. A fixed 3-second countdown trains you to anticipate; on match day that anticipation shows up as creeping, and creeping is a procedural penalty.
PAR Time Pressure Training
- Set target completion time
- Must complete specific actions within time limit
- Gradually reduce time to increase pressure
Match Day Warm-up
Quick Reaction Check
- Warm up with timer in safety area
- Verify body and equipment are ready
- Establish match rhythm
Post-Match Analysis
Record Each Stage Performance
- Use phone to record stage times
- Analyze which skills need improvement
- Set improvement goals for next match
Post-Match: Learning and Growth
Performance Review
After the match ends:
-
Get Your Score Sheet
- Analyze each stage performance
- Identify lowest-scoring stages
- Confirm scoring issues (time? accuracy? penalties?)
-
Network with Experienced Shooters
- Ask about their movement strategies
- Inquire about technical questions
- Build shooting community connections
-
Set Improvement Goals
- Arrange training for weak areas
- Set specific goals for next match
Continuous Improvement
Regular Competition
- Participate in at least one match per month
- Competition experience can’t be replaced by practice
- Pressure reveals true weaknesses
Diversified Training
- Use AirsoftShotTimer for daily training
- Mix dry fire and live fire practice
- Compete at various difficulty levels
Conclusion
IPSC competition is a comprehensive test of technique, strategy, and mental fortitude. For beginners, the first match goal isn’t winning, but:
- Safe Completion: Zero DQ, follow all safety rules
- Full Experience: Understand match flow and atmosphere
- Enjoy the Process: Feel the thrill of competitive shooting
- Learn and Grow: Find areas for improvement
Remember, every world-class shooter started with their first match. Use AirsoftShotTimer for continuous training, regularly compete to accumulate experience, and you’ll find your progress faster than you imagined.
Good luck with your first IPSC match!
Frequently Asked Questions
Q1: How many range commands are there in IPSC?
Eight. Section 8.3 of the IPSC Handgun Competition Rules, January 2026 Edition lists them in sequence: “Load And Make Ready”, “Are You Ready?”, “Standby”, “Start Signal”, “Stop”, “If You Are Finished, Unload And Show Clear”, “If Clear, Hammer Down, Holster” and “Range Is Clear”. Section 8.3 has ten numbered sub-rules in total, but 8.3.9 and 8.3.10 cover signals for hard-of-hearing competitors and the chronograph station rather than spoken commands.
Q2: How long after “Standby” does the beep come?
Between 1 and 4 seconds (Rule 8.3.3). The range is deliberate — it stops you from timing the start. Anyone telling you it is always about three seconds is describing a habit, not a rule.
Q3: Is it “Standby” or “Stand By”?
The rulebook writes it as one word: “Standby”. Plenty of club handouts and blog posts split it into two, and no RO will pull you up for saying it either way, but if you are quoting the rule, quote it correctly.
Q4: What happens if I start shooting before the beep?
That is a false start, and Rule 8.3.4.1 covers it: the RO stops you as soon as possible, the course of fire is restored, and you are restarted. No penalty for the false start itself. What does carry a penalty is creeping — moving your hands toward the gun, magazines or ammunition, or shifting to a better stance after “Standby” but before the beep. Under Rule 10.2.6 that is one procedural penalty, or a warning plus a restart if the RO stops you in time.
Q5: What if I do not hear the start signal?
Nothing bad. Rule 8.3.4 says the RO will confirm you are ready and resume the commands from “Are You Ready?”. It happens regularly — wind, ear protection, a loud bay next door.
Q6: Can I use my own shot timer to record my match time?
No. Rule 9.10.1 is explicit: only the timing device operated by the Range Officer records your official elapsed time. Your own timer is a training tool, not a scoring device. (If the RO’s timer is judged faulty and your time cannot be credited accurately, you are required to reshoot the stage.)
Q7: Are IPSC and USPSA range commands the same?
They are close enough that you will not get lost crossing between them, but they are separate rulebooks maintained by separate bodies, and the exact wording and rule numbering differ. Learn whichever set governs the match you have entered, and when in doubt ask the RO at the stage briefing — that is what the briefing is for.
Q8: What does “Range Is Clear” actually permit?
It is the declaration that ends the stage. Until the RO says it, nobody — competitor or match personnel — may move forward of, or away from, the firing line or final shooting position (Rule 8.3.8). Once it is given, officials and competitors may move downrange to score, patch and reset targets.
Q9: What is the shoulder-tap countdown?
An official accommodation for competitors with a severe hearing disability, under Rules 8.3.9 and 8.3.9.1. With the Range Master’s prior approval, the verbal commands can be supplemented by physical signals: 3 taps on the weak-side shoulder for “Are You Ready?”, 2 taps for “Standby”, and 1 tap timed to coincide with the Start Signal. A competitor who would rather use their own electronic device must submit it to the Range Master for examination and approval first (8.3.9.2).
Q10: Do the range commands apply at the chronograph station?
No — Rule 8.3.10 says there are no fixed range commands there, or at an equipment compliance check, which may not even be held on a shooting range. The rule is simply that you must not handle your handgun until the examiner asks for it to be passed to him, and then you follow his instructions.
Q11: Which rulebook edition do these numbers come from?
The IPSC Handgun Competition Rules, January 2026 Edition, downloaded from ipsc.org. Section 8.3 is unchanged in wording from the January 2024 edition, so the rule numbers quoted here are also valid against older printed copies — but always check the current edition before quoting a rule in a protest.
Image Credits
- Range Officer following a competitor with a shot timer, USPSA stage — photo by zinkpics, CC BY-SA 2.0, via Flickr — resized only, not otherwise altered.
- Range Officer shadowing a competitor through a stage — photo by zinkpics, CC BY-SA 2.0, via Flickr — resized only, not otherwise altered.
Related Articles
IPSC Training Series
- Complete IPSC Training Guide - Fundamental technique training
- IPSC Production Optics Guide - Red dot division
- Magazine Reload Complete Guide - Reload technique training
Handgun Selection
- CZ Shadow 2 Complete Guide - Popular competition pistol
- SIG P320 Complete Guide - Modular competition gun
- Glock 17 Training Guide - Classic beginner choice
- Walther PDP Complete Guide - Modern striker-fired pistol
Fundamental Training
- Dry Fire Training Complete Guide - Home training methods
- how to use a shot timer - Timing training tools
Put a Shot Timer in Your Pocket
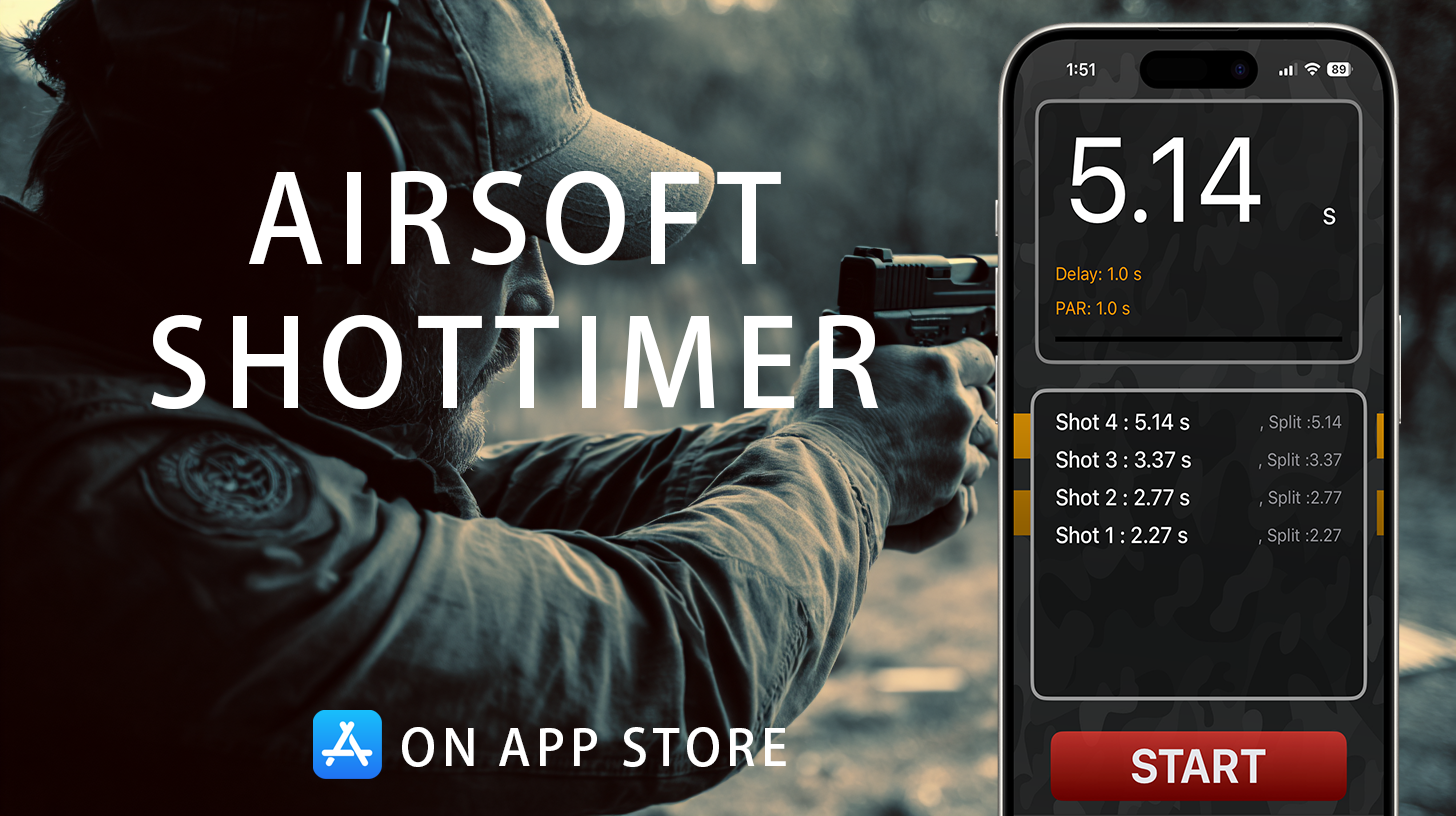
Airsoft Shot Timer is a free shot timer app tuned for airsoft and Action Air — it picks up BB gun shots, tracks your split times, and saves you the cost of a $150+ hardware timer for IPSC/IDPA practice.

- IPSC Range Commands
- IPSC Range Commands 2026
- IPSC Commands
- IPSC Rule 8.3
- Load and Make Ready
- Are You Ready
- Standby
- Start Signal
- If You Are Finished Unload and Show Clear
- If Clear Hammer Down Holster
- Range Is Clear
- IPSC Match
- IPSC Match Procedure
- IPSC Start Signal
- IPSC False Start
- IPSC Creeping Penalty
- IPSC Rule 10.2.6
- Uspsa Range Commands
- IPSC Range Officer
- IPSC
- Match Procedure
- Competitive Shooting
- IPSC Beginner
- Practical Shooting
- IPSC Competition
- Shot Timer
- Random Start Delay
- IPSC Handgun Rules 2026