Best Airsoft Shot Timer App — Free IPSC & IDPA Training Timer (2026)
Last year, a friend showed up to our weekly airsoft session with a $130 CED 7000 shot timer strapped to his belt. He timed his draw a few times, then spent the rest of the afternoon fighting wind-noise false triggers because the thing was designed for live-fire ranges, not GBB pistols popping at half the decibel level. Meanwhile, I pulled out my phone, opened AirsoftShotTimer, and ran twenty clean strings without a single misfire. That $130 timer went back in its box by the end of the day.
The truth is, most competitive shooters and airsoft players don’t need expensive hardware to train with data. A well-designed shot timer app on your phone can time draws, splits, and reloads to the hundredth of a second — and the best ones are built from the ground up to handle the quieter, sharper sounds of airsoft guns. If you’ve ever finished a training session thinking “I feel faster” but have zero numbers to back it up, a shot timer app is the single cheapest upgrade that will actually change how you practice.
Download AirsoftShotTimer free on iOS or Google Play — set your sensitivity, pick a drill, and you’re timing shots in under 30 seconds.
Shot Timer Apps Compared: Which One Is Right for You?
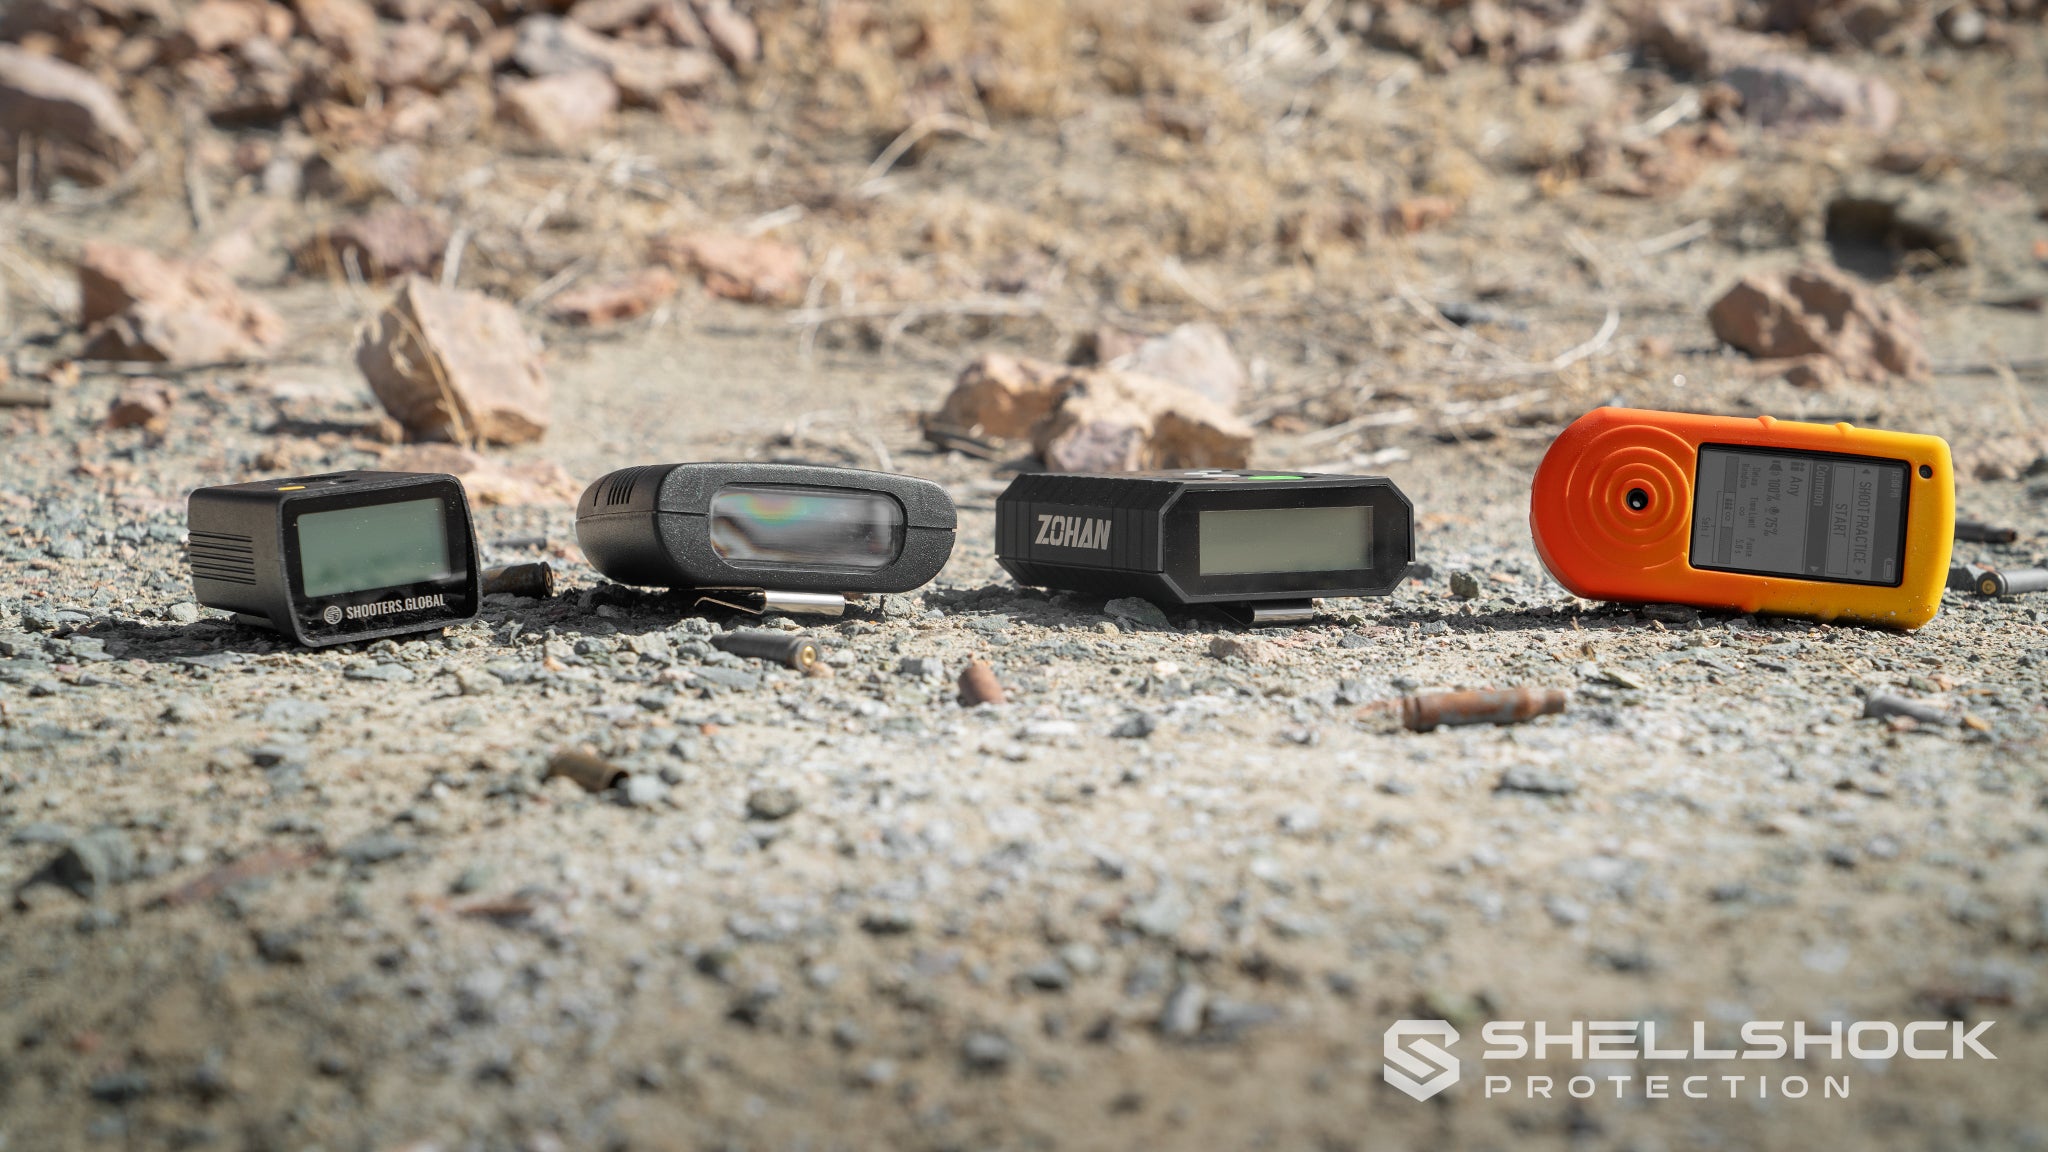
With dozens of shot timer apps on the App Store and Google Play, it’s easy to download the wrong one and waste an afternoon fighting missed detections. I’ve tested the most popular options side by side so you don’t have to. Here’s how they stack up for airsoft and competition training in 2026.
ShootOnTime is the simplest option — it’s a pure par timer that counts down and beeps when time runs out. It does that job well, and it’s completely free. But here’s the catch: it doesn’t actually listen for your shots. There’s no microphone detection at all, so you won’t get split times, draw times, or any shot data. For structured drills like Bill Drill or El Presidente where split analysis matters, ShootOnTime simply can’t help.
IPSC Shot Timer on Android is a solid free option that does detect shots through your phone’s mic. It supports Comstock, Virginia, and Par Time scoring — great for USPSA and IPSC shooters. However, it wasn’t designed with airsoft in mind. The detection algorithms are tuned for louder live-fire reports, and many airsoft players report missed shots with GBB and especially AEG guns at default settings. There’s no wind-noise filtering either, which makes outdoor airsoft sessions frustrating.
Recoil Shot Timer takes a completely different approach — it runs on your Apple Watch and detects shots through wrist recoil rather than sound. This is brilliant for live-fire shooters because it works even with suppressed firearms or next to other shooters on a busy firing line. The AI model was trained with over 20,000 shots in partnership with the U.S. Navy. The downside? It requires an Apple Watch ($2.99/month or $39.99 lifetime after the free tier), and it physically cannot detect airsoft shots since there’s almost no wrist recoil from a GBB pistol.
Shotbud is another Apple Watch option that combines audio and accelerometer data. It includes airsoft and dry-fire presets, which is nice, but the Watch microphone is much less sensitive than a phone mic sitting next to your gun. In my testing, detection reliability dropped significantly compared to phone-based apps.
SG Timer (Shooters Global) is actually a hardware timer ($150+) with a companion Drills app. The app itself offers impressive features — 3D stage planning, video analysis, global leaderboards — but all of that requires the physical timer connected via Bluetooth. Without the hardware, the app is essentially a drill library.
For airsoft players and anyone who wants actual shot detection from a phone without extra hardware, AirsoftShotTimer is purpose-built for exactly this use case. It’s the only app with FFT frequency-domain analysis specifically tuned for the 275-458 Hz range of airsoft guns, plus three-layer wind noise filtering for outdoor sessions. And unlike hardware-dependent options, it’s completely free to download and use.
AirsoftShotTimer App Complete Feature Guide
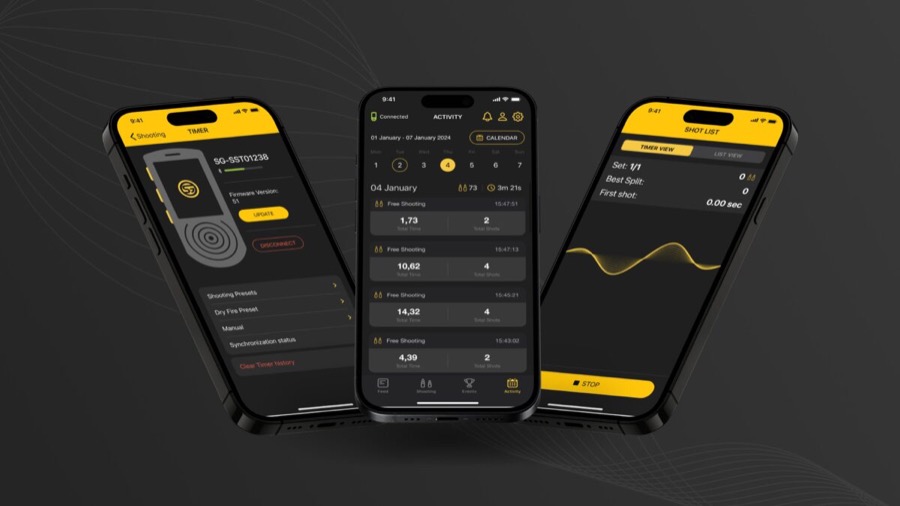
AirsoftShotTimer is a professional Shot Timer App designed specifically for airsoft and shooting training, providing complete timing and recording functionality.
Core Features
1. Smart Gunshot Detection System
AirsoftShotTimer uses advanced FFT (Fast Fourier Transform) frequency domain analysis technology for precise gunshot recognition:
- Mid-frequency identification: Optimized for 275-458 Hz gunshot characteristics
- Adjustable sensitivity: 0-40 range, adapts to different guns and environments
- Multi-power support: Accurately detects gas blowback, AEG, and CO2 guns
2. Three-Layer Wind Noise Filtering Technology
The biggest challenge in outdoor training is environmental noise. AirsoftShotTimer features an exclusive three-layer wind noise filtering engine:
Layer 1: Environmental Baseline Check
- Automatically learns background noise level
- Only records sounds significantly above background
Layer 2: Spectrum Pattern Analysis
- Wind noise characteristics: Low frequency dominant (>70%)
- Gunshot characteristics: Significant mid-high frequency energy
- Automatically distinguishes between the two, filtering wind noise
Layer 3: Impulse Characteristic Verification
- Wind noise: Continuous fluctuation
- Gunshots: Instant burst (energy change rate 1.3-1.8x)
- Further confirms actual gunshots
Adjustable filter strength: 0%-100%, set freely based on environment.
3. Precise Timing System
- Millisecond precision: Accurate to 0.01 seconds
- 60 FPS update rate: Real-time timing display
- Split time calculation: Automatically calculates time between each shot
4. PAR Time Mode
PAR (Par Time) is a core training feature:
- Set target time: 0-10 second range
- Single beep: Alert when PAR time is reached
- Repeat beep: Continuous alerts at PAR time intervals
- Build rhythm: Makes training more structured
5. Delay Start Settings
- Fixed delay: 0-10 seconds fixed delay
- Random delay: 1-8 seconds random delay
- Train real reactions: Simulates unpredictability of competition
6. Complete Recording System
- Auto-recording: Time and volume of each shot
- Split times: Time difference from previous shot
- Round management: Records grouped by training rounds
- History lookup: View all past training records
Video Recording with Timer Overlay
One feature that sets AirsoftShotTimer apart from every other app on the market is built-in video recording with a real-time timer overlay. While you’re running a drill, the app records your camera feed and burns the live timer directly onto the video. When you review the footage later, you can see exactly what your hands were doing at 1.23 seconds into your draw, or pinpoint the moment you fumbled a reload at the 3.8-second mark.
This is something that even $150+ hardware timers struggle with — Shooters Global’s SG Timer 2 offers video through its companion app, but it requires the separate hardware timer connected via Bluetooth. With AirsoftShotTimer, the camera and timer run simultaneously on your phone with zero extra gear.
For coaches and training partners, video review paired with split-time data is incredibly powerful. Instead of guessing why your El Presidente time plateaued at 16 seconds, you can watch the footage frame by frame and see that your magazine insertion is costing you an extra half-second because you’re looking down at the magwell.
Why Choose AirsoftShotTimer Over Other Apps?
If you train with airsoft guns — GBB pistols, AEGs, or CO2 replicas — most shot timer apps were simply not built for you. They were designed to pick up the 160+ dB crack of a 9mm, not the 90 dB pop of a gas blowback valve. AirsoftShotTimer was engineered from day one around the acoustic signature of airsoft guns, and that fundamental difference shows up in every training session.
The FFT-based detection doesn’t just listen for “loud noises.” It analyzes the frequency spectrum of each sound event and looks for the specific mid-frequency energy pattern (275-458 Hz) that characterizes airsoft shots. This means it can tell the difference between a GBB slide cycling and someone dropping a magazine on a table, or between an AEG burst and wind hitting the microphone.
The three-layer wind noise filtering makes outdoor training actually viable. Most apps either miss shots outdoors or false-trigger constantly — you end up spending more time resetting the timer than actually training. AirsoftShotTimer’s environmental baseline learning, spectrum pattern analysis, and impulse verification work together so you can run drills at the field without babysitting the sensitivity slider.
And it comes with built-in drill presets for Bill Drill, El Presidente, Draw Practice, and Reload Drill, plus the ability to create your own custom drills. Your training records are organized by drill type, making it easy to track progress in specific skills over weeks and months.
AirsoftShotTimer Settings Tutorial
Basic Settings
Open the AirsoftShotTimer App, go to “Settings” page, and you’ll see these options:
1. Sensitivity
Range: 0-40 | Default: 10
Sensitivity controls how sensitive the gunshot detection is:
- Lower values: More sensitive, but may false trigger (detect environmental noise)
- Higher values: Less sensitive, may miss detections (quieter guns)
Recommended settings:
| Gun Type | Recommended Sensitivity |
|---|---|
| Gas blowback pistol (GBB) | 8-12 |
| AEG rifle | 10-15 |
| CO2 pistol | 6-10 |
| Dry fire (trigger click) | 3-6 |
Adjustment tip: Start with default, test a few shots. Lower the value if missing detections, raise it if false triggering.
2. PAR (Par Time)
Range: 0-10 seconds | Default: 1.0 second
PAR time is your target completion time.
How to use:
- Set how many seconds you want to complete the action in
- After timing starts, an alert sounds when PAR time is reached
- Completing before the alert means you met the goal; after means you need improvement
Recommended settings:
| Training Drill | Recommended PAR |
|---|---|
| Draw and fire (beginner) | 2.5-3.0 sec |
| Draw and fire (advanced) | 1.5-2.0 sec |
| Bill Drill (6 shots) | 3.5-4.5 sec |
| Magazine reload | 2.0-3.0 sec |
3. PAR Repeat
Options: On / Off | Default: Off
- Off: Only one alert when PAR time is reached
- On: Continuous alerts at PAR time intervals
When to use:
- Turn on when practicing rhythmic shooting
- Turn off for general training
4. Delay
Range: 0-10 seconds | Default: 1.0 second
The delay between pressing start and actual timing beginning.
5. Delay Random
Options: On / Off | Default: Off
- Off: Uses fixed delay time
- On: Random 1-8 second delay
Strongly recommended to enable: Random delay trains “real reactions” rather than “prediction.” In IPSC/IDPA competitions, you can’t predict when the signal will sound.
6. Beep Volume
Range: 0%-100% | Default: 100%
Controls the volume of start signal and PAR alerts.
Tip: Lower the volume in quiet environments to avoid disturbing others.
7. Wind Filter
Options: On / Off | Default: On
Recommended to enable for outdoor training to reduce wind noise false triggers.
8. Wind Filter Strength
Range: 0%-100% | Default: 50%
- 0%: Filter completely off
- 50%: Medium filtering (suitable for general outdoor)
- 100%: Maximum filtering (suitable for windy conditions)
Note: Higher filter strength may miss quieter gunshots.
Recommended Setting Templates
Indoor Dry Fire Training
Sensitivity: 5
PAR: Set according to drill
Delay: Random
Wind Filter: Off
Outdoor Gas Gun Training
Sensitivity: 10
PAR: Set according to drill
Delay: Random
Wind Filter: On
Filter Strength: 50%
Indoor AEG Training
Sensitivity: 12
PAR: Set according to drill
Delay: Random
Wind Filter: Off
Training Drills with Shot Timer App
Drill 1: Draw to First Shot
The most fundamental and important training drill, measuring time from ready position to first shot.
Recommended settings:
- Delay: Random (1-8 seconds)
- PAR: Based on current ability (see table below)
Training procedure:
- Holster pistol, adopt ready position
- Press start, wait for random delay
- Draw after hearing the “beep”
- Aim and fire first shot
- Check recorded time
Target time reference:
| Level | Target Time | Suggested PAR |
|---|---|---|
| Beginner | 2.5-3.0 sec | 3.0 sec |
| Intermediate | 1.5-2.0 sec | 2.0 sec |
| Advanced | 1.0-1.5 sec | 1.5 sec |
| Competition | < 1.0 sec | 1.0 sec |
Training focus:
- Smooth movements, don’t rush
- Ensure first shot hits target
- Use the App to track each improvement
💡 Further reading: Complete Guide to Pistol Draw Techniques
Drill 2: Bill Drill (6 Consecutive Shots)
Tests rapid fire ability, recoil control, and trigger control.
Recommended settings:
- Delay: Random
- PAR: Based on current ability
Training procedure:
- Distance to target: 7 yards (about 6.4 meters)
- Draw from holster, fire 6 consecutive shots
- All must hit A-zone
Key data interpretation:
- Total time: From signal to 6th shot
- Split time: Interval between each shot
Target times:
| Level | Total Time | Split Time |
|---|---|---|
| Beginner | 5.0-5.5 sec | 0.40+ sec |
| Intermediate | 4.0-5.0 sec | 0.30-0.40 sec |
| Advanced | 3.0-4.0 sec | 0.20-0.30 sec |
| Competition | < 3.0 sec | < 0.20 sec |
Drill 3: Reload Training
Measures complete magazine change time.
Emergency Reload procedure:
- Fire until magazine empty (slide locks back)
- Press magazine release
- Insert new magazine
- Release slide
- Fire next shot
Using Shot Timer App to record:
- Record time difference between last shot and first shot after reload
- This difference is your reload time
Target times:
| Level | Emergency Reload | Tactical Reload |
|---|---|---|
| Beginner | 3.5-4.0 sec | 4.0-4.5 sec |
| Intermediate | 2.5-3.0 sec | 3.0-3.5 sec |
| Advanced | 2.0-2.5 sec | 2.5-3.0 sec |
| Competition | 1.5-2.0 sec | 2.0-2.5 sec |
💡 Further reading: Complete Guide to Fast Magazine Reload Techniques
Drill 4: Target Transitions
Tests ability to quickly move between multiple targets.
Recommended setup:
- Prepare 2-3 targets, spaced 1-2 meters apart
- Fire 2 shots at each target
Data analysis:
- Shooting splits: Interval between two shots on same target (should be short)
- Transition splits: Interval between different targets (this is the training focus)
Key techniques:
- Eyes look at next target first
- Gun follows line of sight
- Fire on arrival, don’t over-aim
Drill 5: El Presidente (Classic Comprehensive Test)
This is the most classic IPSC/IDPA training drill, testing all skills.
Setup:
- Distance: 10 yards (about 9 meters)
- 3 targets, 1 meter apart
- Start facing away from targets
Procedure:
- At signal, turn around
- Draw
- Fire 2 shots at each target (6 total)
- Reload
- Fire 2 more shots at each target (12 total)
Target times:
| Level | Target Time |
|---|---|
| Beginner | 18-22 sec |
| Intermediate | 14-18 sec |
| Advanced | 11-14 sec |
| Competition | < 10 sec |
How to Interpret Shot Timer App Data
Key Metrics Explained
1. First Shot Time (Draw Time)
Time from signal to first shot, reflects your reaction speed and draw efficiency.
Analysis points:
- If this time is too long, focus on draw practice
- Should be consistent within a range; too much variation means unstable technique
2. Split Time
Interval between each shot, reflects your shooting rhythm and recoil control.
Analysis points:
- Split times should be consistent (±0.05 sec variation)
- If certain splits are notably longer, you may be re-aiming
3. Transition Time
Time to move from one target to another.
How to calculate: In multi-target training, observe sudden increases in split time.
Example:
Shot 1: 1.25s (Split: 1.25s) ← Draw
Shot 2: 1.47s (Split: 0.22s) ← Same target rapid
Shot 3: 1.70s (Split: 0.23s) ← Same target rapid
Shot 4: 2.42s (Split: 0.72s) ← Target transition
Shot 5: 2.65s (Split: 0.23s) ← Same target rapid
Shot 6: 2.88s (Split: 0.23s) ← Same target rapid
This data shows:
- Draw time: 1.25 seconds
- Rapid fire splits: ~0.22-0.23 sec (very consistent)
- Transition time: 0.72 sec (notably longer, area for improvement)
Identifying Training Bottlenecks
Problem 1: Draw time too long
- Symptom: First shot time notably slower than target
- Solution: Focused practice on draw motion, smoothness from holster to presentation
Problem 2: Inconsistent split times
- Symptom: Split times vary widely
- Solution: Practice stable grip and trigger control
Problem 3: Transition time too long
- Symptom: Target transition time is too large a proportion of total time
- Solution: Practice “eyes first” technique, faster visual acquisition
Problem 4: Reload time too long
- Symptom: Magazine change notably slows overall time
- Solution: Dedicated reload practice, build muscle memory
Building a Progress Tracking System
Weekly records:
- Best times for each drill
- Average times
- Hit rate
Monthly evaluation:
- Compare start and end of month data
- Identify most and least improved drills
- Adjust next month’s training focus
Progress expectations:
- Early stage (1-3 months): Visible weekly improvement
- Mid stage (3-12 months): Measurable monthly improvement
- Later stage (1+ years): Progress slows, requires more refined training
PAR Time Training Method
PAR (Par Time) is one of the most powerful Shot Timer features, allowing you to set target times and train under pressure.
What PAR Time Does
- Creates pressure: Must complete within time, simulates competition mindset
- Builds rhythm: Fixed time frame helps establish shooting rhythm
- Breaks plateaus: Forces you to speed up
How to Set PAR Time
Step 1: Measure current ability
- Conduct 5-10 training runs, record average time
Step 2: Set challenging target
- PAR = Average time - 10%
- Example: Average 2.0 sec → PAR set to 1.8 sec
Step 3: Train until consistent
- Can consistently complete within PAR time (8/10 successes)
Step 4: Reduce again
- Reduce by another 5-10%
- Repeat the process
PAR Time Example Settings
Draw Training Plan
| Week | Current Ability | PAR Setting | Goal |
|---|---|---|---|
| 1-2 | 2.5 sec | 2.3 sec | Adapt to PAR pressure |
| 3-4 | 2.3 sec | 2.0 sec | Stable 80% achievement |
| 5-6 | 2.0 sec | 1.8 sec | Stable 80% achievement |
| 7-8 | 1.8 sec | 1.6 sec | Stable 80% achievement |
PAR Repeat Mode Applications
With PAR Repeat enabled, an alert sounds at each PAR time interval.
Application scenarios:
- Rhythmic shooting practice: Set 0.3 sec PAR, fire one shot per beep
- Reload rhythm: Set 2.5 sec PAR, complete reload between beeps
Dry Fire Training with Shot Timer App
Dry fire training is one of the most effective methods for improving shooting skills, and combining it with a Shot Timer App makes training even more effective.
App Settings for Dry Fire
Sensitivity settings:
- Dry fire sounds are quieter, need lower sensitivity
- Recommended setting: 3-6
Delay settings:
- Use random delay to train real reactions
- Recommended: Enable random delay
Wind filter:
- Usually not needed for indoor dry fire
- Recommended: Off
Dry Fire Training Drills
1. Draw Dry Fire
Procedure:
- Confirm gun is completely empty
- Holster gun, adopt ready position
- Start Shot Timer App
- At signal, draw, aim, pull trigger
- Record time
Goal: Train smoothness and speed of draw motion
2. Trigger Control Dry Fire
Procedure:
- Present gun aimed at target
- Start Shot Timer App
- At signal, slowly, steadily press trigger
- Observe if sights move
Goal: Train smooth trigger control with stable sights
3. Reload Dry Fire
Procedure:
- Prepare empty magazines
- Simulate firing until slide locks back
- Start Shot Timer App
- At signal, perform reload motion
- Press trigger to complete
Goal: Train fast, smooth magazine change motion
Dry Fire Safety Rules
Absolute compliance required:
- ✅ Confirm gun is completely empty before each training session
- ✅ Keep all ammunition far from training area
- ✅ Choose a safe training backstop
- ✅ Announce before and after training
- ❌ Never train when tired or distracted
💡 Further reading: Complete Guide to Dry Fire Training
Frequently Asked Questions
Can AirsoftShotTimer actually detect airsoft gun sounds?
Yes — this is what the app was specifically designed for. AirsoftShotTimer uses FFT frequency-domain analysis tuned to the 275-458 Hz range characteristic of airsoft discharges. Gas blowback pistols produce a clear valve release sound that’s easy to detect. AEGs generate motor and gear noise that requires slightly lower sensitivity settings (10-15 range). CO2 guns are the loudest and easiest to pick up. When switching to a new gun, fire a few test shots and dial in the sensitivity — it usually takes less than a minute.
Does it work outdoors in windy conditions?
The three-layer wind noise filtering system handles most outdoor conditions well. Enable the wind filter, start with 50% strength, and increase to 70-80% if you’re getting false triggers. The system learns your environment’s baseline noise and uses spectrum analysis to distinguish between continuous wind fluctuations and the sharp impulse of a gunshot. In gusty conditions above 25 mph, you may need to shield the phone mic or increase filter strength, but for typical field days it works without fussing.
How should I set my PAR time?
Start by establishing your baseline: run 5-10 repetitions of a drill without PAR pressure and take the average time. Set your PAR to 10% below that average — if your draw averages 2.0 seconds, set PAR to 1.8 seconds. Train until you can beat the PAR 8 out of 10 times, then drop it another 5-10%. This progressive approach builds speed without sacrificing accuracy, which is the mistake most beginners make when they just set an aggressive PAR from the start.
Can I export my training data?
AirsoftShotTimer stores all training records locally on your device, organized by date, drill type, and training round. You can browse your complete history within the app and review split times, draw times, and trends over time. For detailed analysis in a spreadsheet, you can manually log key numbers after each session — many serious competitors keep a simple training journal alongside the app data to track notes about what they were working on.
Does AirsoftShotTimer support Apple Watch?
Currently, AirsoftShotTimer is designed as a phone-based app for iOS and Android. There’s no Apple Watch companion app at this time. For airsoft training, a phone-based approach actually works better than wrist-based detection because the phone microphone can be positioned close to the gun for optimal shot detection. Wrist-based timers like Recoil and Shotbud rely on physical recoil impulse, which is too weak in airsoft guns to trigger reliably.
Can the app detect airsoft shots specifically, or is it only for real firearms?
AirsoftShotTimer is the only shot timer app built specifically for airsoft from the ground up. While apps like IPSC Shot Timer and generic shot timers are tuned for the 140-170 dB reports of live ammunition, AirsoftShotTimer’s FFT engine targets the quieter, mid-frequency acoustic signature of airsoft guns. It works with GBB pistols, AEGs, CO2 guns, and even the subtle click of dry-fire trigger pulls when sensitivity is set to 3-6.
Is the app really free? What are the limitations?
AirsoftShotTimer is free to download and use with all core features — shot detection, PAR timing, random delay, wind filtering, drill presets, training records, and video recording with timer overlay. There’s no paywall gating essential training features behind a monthly subscription, unlike some competitors that charge $2.99/month or $39.99 lifetime for full functionality.
Can I use Bluetooth earphones to hear the start signal?
Yes, the start beep and PAR alerts will play through connected Bluetooth earphones. Keep in mind that the phone speaker won’t output sound simultaneously, and Bluetooth may introduce a slight audio delay (typically 50-150ms). For most training purposes this delay is negligible, but if you’re chasing competition-level reaction times, using the phone speaker directly gives the most accurate start signal.
Why is the app missing some of my shots?
The most common cause is sensitivity set too high (meaning less sensitive). Lower the sensitivity value to make detection more responsive — try dropping it by 2-3 points at a time. Also check that your phone’s microphone isn’t covered by a case or your hand. AEGs are naturally quieter than GBB or CO2 guns, so they need lower sensitivity values (10-15 range). If you’re training outdoors with wind filtering on high, try reducing the filter strength since aggressive filtering can occasionally suppress legitimate shots that have a softer acoustic profile.
How fast should my split times be?
For airsoft (where there’s minimal recoil compared to live fire), realistic split time targets are: beginners 0.35-0.50 seconds, intermediate 0.25-0.35 seconds, advanced 0.18-0.25 seconds, and expert-level under 0.18 seconds. But always consider splits alongside accuracy — a 0.20-second split means nothing if you’re missing the target. The app tracks both timing data and shot count, so use them together to find the speed where your accuracy starts falling apart, then train just below that threshold.
What makes AirsoftShotTimer different from a $130 hardware timer?
Hardware timers like the CED 7000 or Competition Electronics Pocket Pro excel in loud, multi-shooter live-fire environments where microphone sensitivity isn’t an issue. But they’re actually at a disadvantage with airsoft guns because their detection circuits are designed for much louder reports. AirsoftShotTimer’s software-based FFT analysis can be fine-tuned for the exact acoustic profile of your gun, and features like video recording with timer overlay, built-in drill presets, and organized training history are things most hardware timers simply don’t offer. For personal training with airsoft, dry fire, or quiet range sessions, the app delivers more useful data at zero cost.
Start Training Smarter Today
Every serious shooter eventually hits a wall where “I feel faster” stops being enough. A shot timer turns vague impressions into hard numbers, and those numbers tell you exactly where to focus your limited training time. Whether you’re prepping for your first IPSC match, trying to shave a half-second off your draw, or just want to track your airsoft skills over the season, the data makes the difference between productive practice and just burning through BBs.
Download AirsoftShotTimer for free on iOS or Google Play, fire a few test shots to dial in your sensitivity, and run your first timed drill. You’ll have your baseline in five minutes — and from there, every session builds on real data instead of guesswork.
Related Articles
- Best Shot Timer Buyer’s Guide 2026 — Hardware vs app timers compared
- Dry Fire Training Guide — Home training drills that pair perfectly with a shot timer
- Pistol Draw Techniques — Faster first shots start with a better draw
- Pistol Reload Techniques — Speed up your emergency and tactical reloads
- Shooting Drills Guide — Classic drills from Bill Drill to El Presidente
- IPSC Training Guide — Complete IPSC competitive training system
- IDPA Training Guide — Tactical shooting drills for IDPA
- Airsoft Firearms Training Crossover Guide — How airsoft skills transfer to real steel
- Shot Timer
- Shot Timer App
- AirsoftShotTimer
- Training Guide
- Shooting Training
- IPSC
- IDPA
- Dry Fire Training
- Airsoft
- Shooting Timer
- Free Shot Timer App
- Best Shot Timer 2026
- Airsoft Shot Timer