G&G CM16 Raider 2.0 Review (2026): Is It the Best Beginner AEG?
The Short Answer (2026)
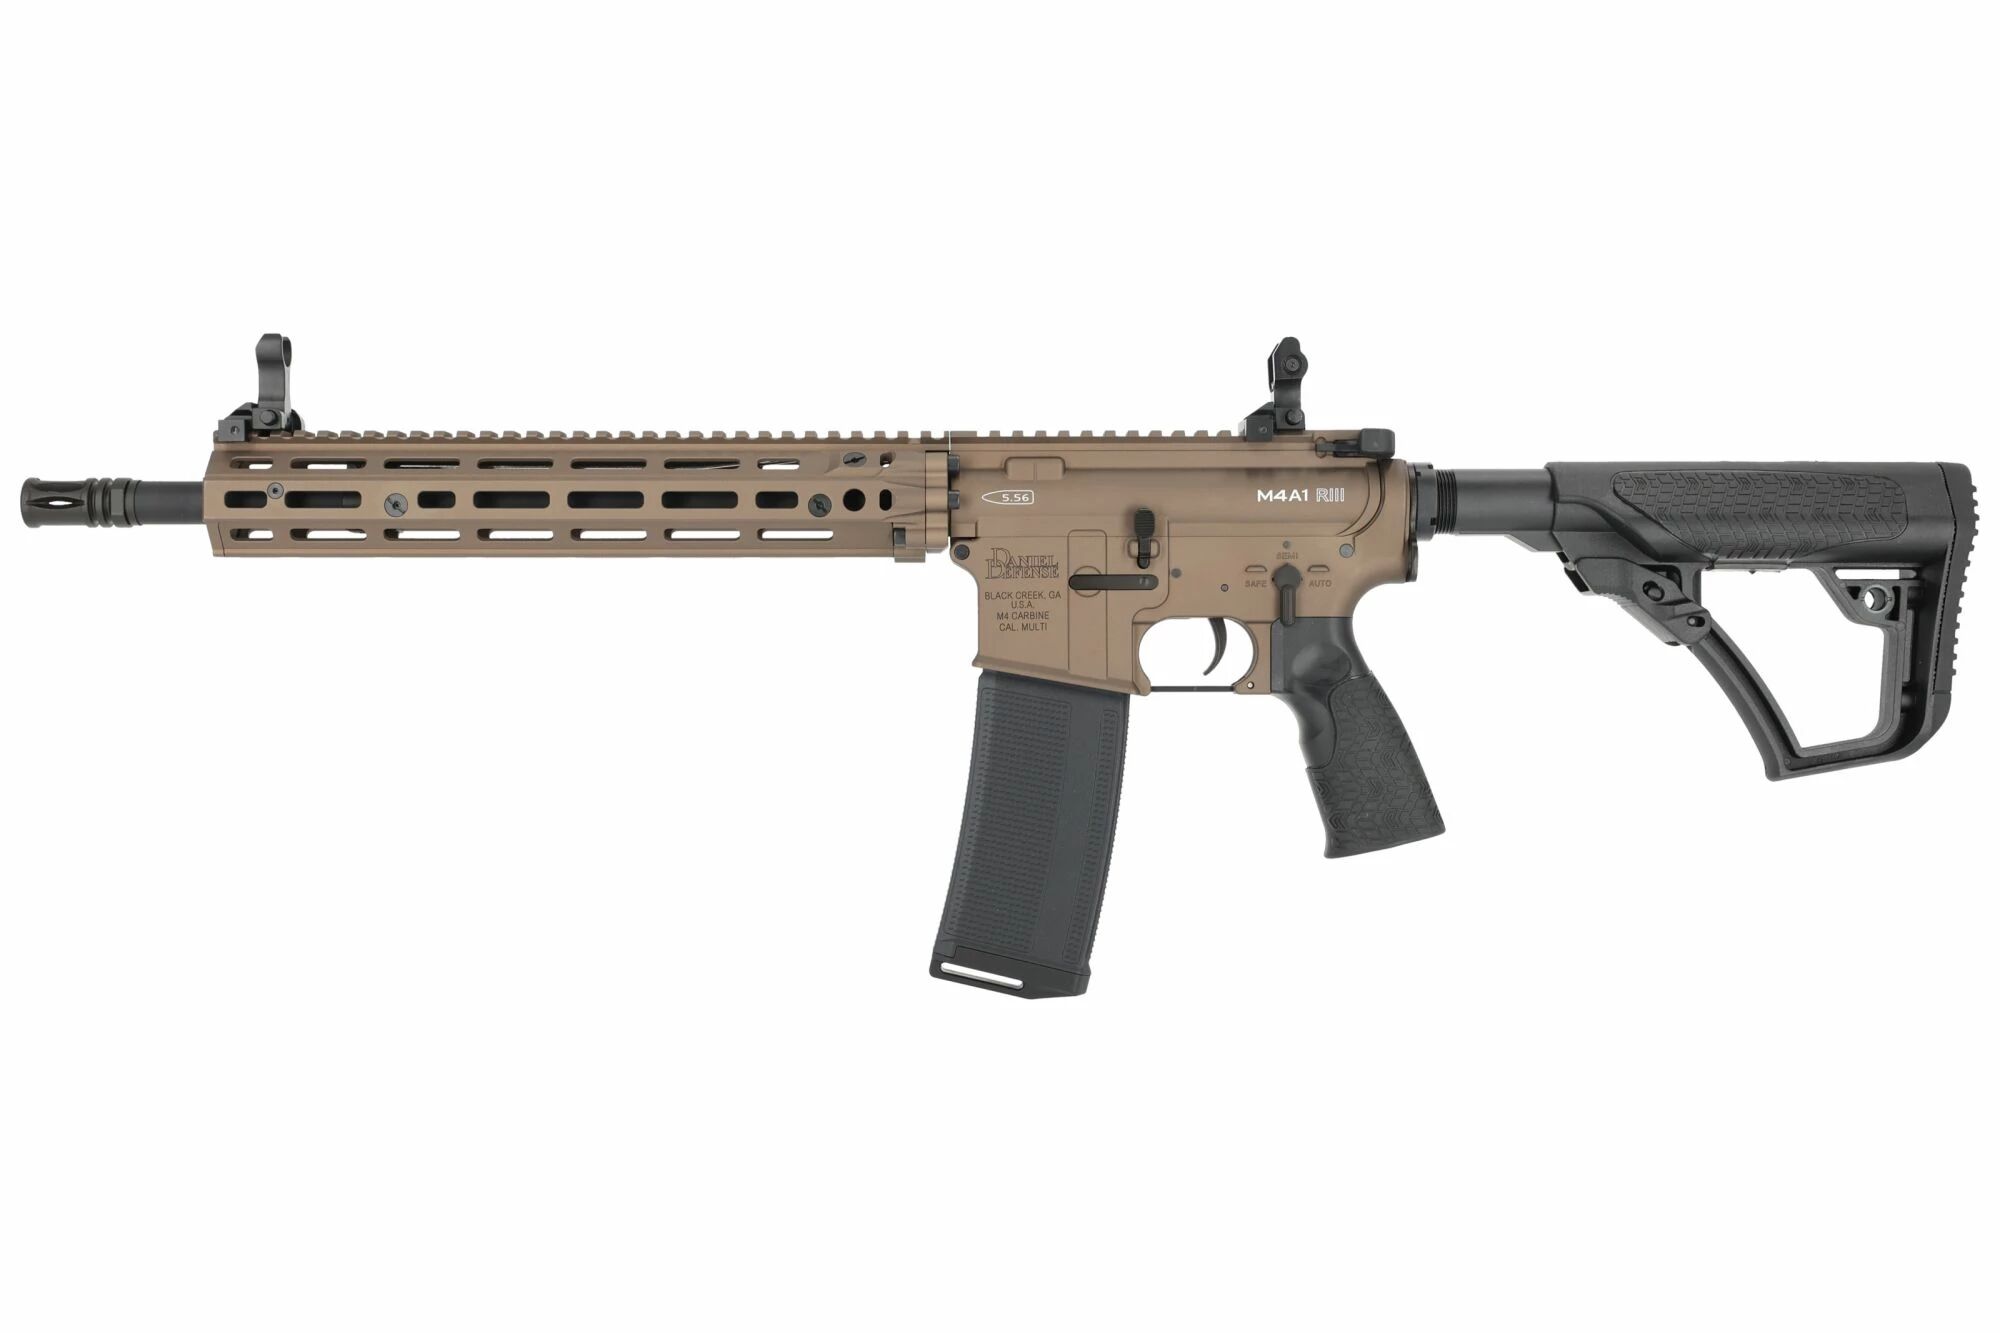
The G&G CM16 Raider 2.0 is a polymer-bodied M4 AEG that runs roughly $150-180 for the standard version and $200-230 for the 2.0E, chronographs around 350-380 FPS on 0.20g BBs, and is still the single most recommended first airsoft gun in the hobby. It earns that recommendation not by winning any one category, but by being reliable enough that you spend your weekends playing instead of repairing, light enough at about 2.3kg that a full game day doesn’t wreck your arms, and built on the M4 platform so magazines, spare parts and troubleshooting advice are everywhere.
Three things trip people up before they buy. “CM16 Raider” is a family, not a single gun — there’s a 1.0 and a 2.0, a short and a long (Raider-L), and an “E” variant with a factory MOSFET, and they do not shoot the same numbers (full lineup below). The FPS figure you read online is probably wrong for your gun, because G&G fits region-specific springs to meet each country’s power limit (why the numbers never match). And the standard 2.0 does not have a MOSFET — only the 2.0E does.
Why Does Everyone Recommend the CM16 for Beginners?
If you ask “What should I buy as my first airsoft gun?” on any forum, one name comes up with almost suspicious frequency — the G&G CM16 Raider. This isn’t a coincidence. From North America to Europe to Asia, from Reddit threads to local pro shop recommendations, nearly every experienced player points newcomers toward this rifle. It’s not the cheapest option out there, and it’s not the highest-performing one either. But somehow, it hits that sweet spot where everything is “just right.”
My first encounter with a CM16 was in a friend’s gear bag. At the time, I was running a no-name M4 that started developing all kinds of quirks after three months — magazine feeding issues, hop-up inconsistency, and an occasional dead trigger. My friend’s CM16, on the other hand, had been going strong for nearly two years of weekly games without a single trip to the tech bench. That kind of “I don’t have to worry about it breaking” reliability is exactly why the CM16 has become the default starter recommendation.
This guide will walk you through everything about the CM16 Raider 2.0 — from brand history to hands-on impressions, from box-stock specs to upgrade paths, and how to get the most out of it on the field.
Which CM16 Raider Is Which? The Whole Lineup, Mapped
Most of the confusion around this rifle comes from people saying “CM16 Raider” as if it were one product. It isn’t. G&G has been building Combat Machine rifles for well over a decade, and at any given moment a retailer’s site will carry half a dozen listings with nearly identical names and meaningfully different specs. Here’s how to read them.
Raider 1.0 versus Raider 2.0. The 2.0 is the current generation and the one worth buying. Compared with the original it swapped the quad RIS handguard for M-LOK, moved from a lever-adjusted hop-up to a rotary hop-up dial, gained a fake bolt behind a dust cover that actually opens (on the 1.0 you were prying at a fixed panel), picked up metal flip-up front and rear sights, got a better-shaped pistol grip, and — the change that matters most for accuracy — tightened the inner barrel from 6.08mm to 6.04mm. That last one comes with a string attached: a tighter bore is far less forgiving of bad ammunition, so the cheap hardware-store BBs a 1.0 would shrug off will jam or fly wild in a 2.0. Budget for decent BBs from day one.
Standard versus Raider-L versus Short. The plain Raider 2.0 is the carbine-length build, roughly 710-790mm overall depending on where you set the stock, with an inner barrel that retailers list anywhere between 275mm and 300mm depending on batch and destination market. The Raider-L — “L” for long — uses a roughly 14-inch outer barrel with an 8-inch M-LOK rail and a longer inner barrel of about 357mm; G&G’s own figures put it near 380-390 FPS against roughly 340-350 for the shortest builds. There is also a Raider 2.0 Short, which is exactly what it sounds like. Internally all three are the same rifle — same Ver.2 gearbox, same hop-up unit, same parts compatibility — so choose on length and muzzle energy, never on internals.
The E suffix. The 2.0E exists in both short and long forms and adds an ETU (Electronic Trigger Unit) with the MOSFET tucked inside the buffer tube, a 6.01mm precision inner barrel, and on most versions a PDW-style collapsing stock in place of the crane stock. That buffer tube has enough room for a buffer-style LiPo, which is genuinely convenient once you stop wrestling stick packs into a handguard.
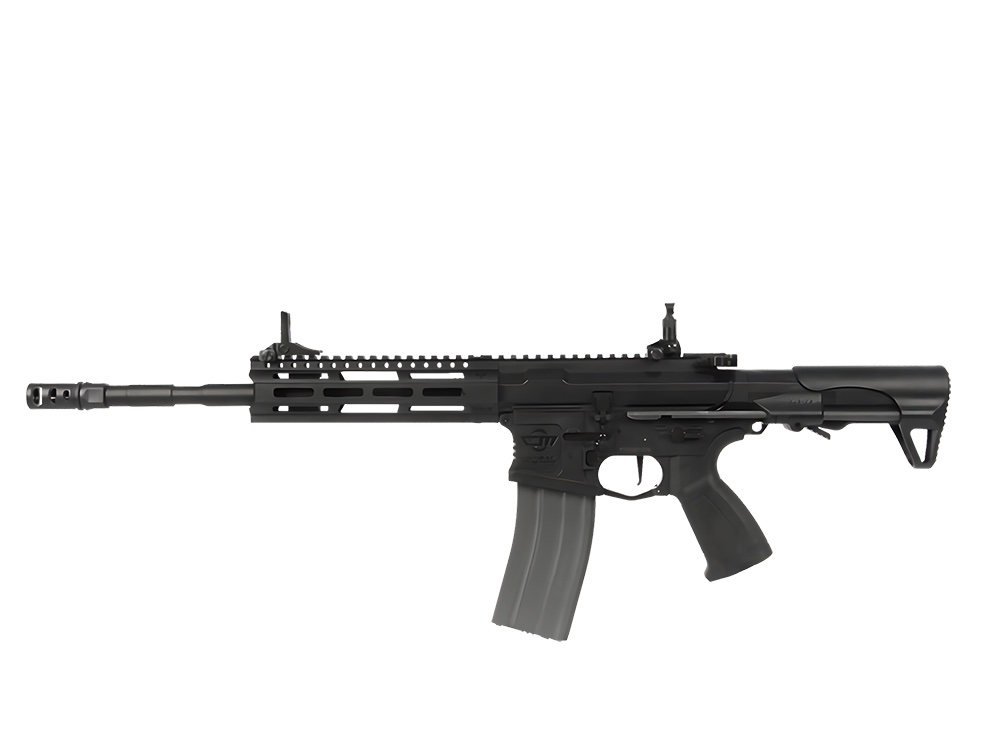
Raider versus Carbine. These are siblings, not the same gun. The CM16 Carbine is the traditional-looking build — classic M4A1 handguard, removable carry handle, front wiring — while the Raider is the railed, rear-wired, crane-stocked version. If you plan to mount a red dot and a light, the Raider is the one you want.
So which do you actually buy? If your field’s limit is generous and you play mostly outdoors, the Raider-L gives you the most muzzle energy and reach for the same money. If you split your time between woodland and CQB, the standard 2.0 is the safest single answer. And if a 2.0E fits your budget, take it — the factory MOSFET is precisely the upgrade you’d otherwise pay a tech to install six months from now.
G&G Armament: A World-Class Brand from Taiwan
G&G Armament (Guay Guay Trading Co., Ltd.) was founded in Taipei, Taiwan in 1986, initially operating as a dealer of airsoft products and military collectibles. In 2001, G&G made the pivotal decision to launch their own brand and start designing their own electric airsoft guns. That decision reshaped the industry.
Between 2004 and 2013, G&G developed and released over 100 different airsoft replicas, shipping products to markets worldwide. To keep up with growing demand, G&G established a second factory in Changhua, Taiwan, and all their products carry ISO 9001 quality certification. The company also invented a unique pneumatic blowback system, patented in multiple countries.
The Combat Machine (CM) series is G&G’s signature entry-level product line. The “16” in CM16 represents the M4/M16 platform, and the design philosophy behind the series is straightforward: deliver reliable performance at a reasonable price. The original CM16 Raider was a massive commercial success, and the 2.0 version brought comprehensive upgrades to both the exterior and internals, making this “people’s starter gun” even better.
Unboxing the CM16 Raider 2.0: First Impressions
The first thing you notice when you pick up the CM16 Raider 2.0 is how light it is. At roughly 2.3 kg with an empty magazine, it weighs nearly half as much as many full-metal AEGs. For a beginner, this is a huge advantage — after a full day of gaming for the first time, your arms will be far less fatigued than you’d expect.
The receiver is made from reinforced nylon fiber polymer with a fine matte texture. Honestly, it feels noticeably different from metal — you won’t mistake it for an aluminum body. But consider this: the weight savings from a polymer receiver matter far more in actual gameplay than whether the gun “feels like a real firearm” when you hold it. And G&G’s polymer quality is well-regarded in the industry — the hardness and impact resistance are leagues ahead of cheap plastic.
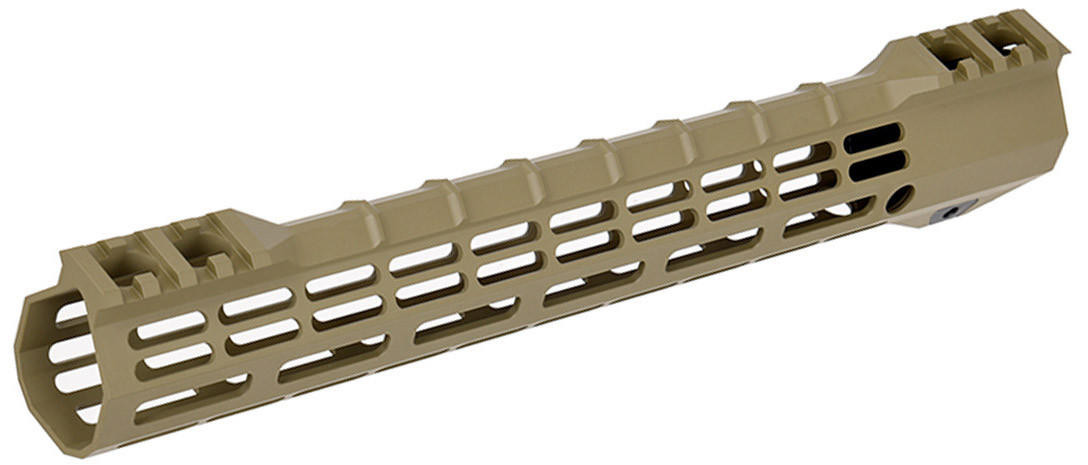
The most obvious visual change in the 2.0 is the handguard, which swaps the traditional RIS quad rail for an M-LOK system. The M-LOK handguard is lighter, cleaner-looking, and more convenient for mounting accessories. You no longer need a full Picatinny rail section just to attach a flashlight — a small M-LOK adapter is all it takes. The front and rear flip-up sights are another welcome upgrade; fold them down when you’re not using irons, and they won’t obstruct your view when running a red dot.
The ergonomic pistol grip is a noticeable improvement over the first generation — your fingers naturally wrap around it, and extended sessions don’t leave your hand feeling cramped. The retractable stock has six positions, accommodating shooters of all sizes. The battery sits inside the buffer tube — a 7.4V LiPo is recommended, as it’s lighter, lasts longer than a 9.6V NiMH, and fits more easily in the tube-style stock.
| Specification | Details |
|---|---|
| Overall Length | 715mm (stock collapsed) / 790mm (extended) |
| Weight | Approx. 2,300g (with empty magazine) |
| Magazine Capacity | 450 rounds (Hi-Cap) |
| Muzzle Velocity | ~350-380 FPS (0.2g BBs) |
| Power System | AEG (Automatic Electric Gun) |
| Fire Modes | Semi-Auto / Full-Auto |
| Hop-Up | Rotary adjustable |
| Inner Barrel | 6.04mm brass tight bore (275mm) |
| Gearbox | Ver.2 full metal |
| Connector | Deans (Tamiya adapter included) |
2.0 vs 2.0E: Which Version Should You Choose?
The CM16 Raider currently comes in two main variants: the standard 2.0 and the enhanced 2.0E. They look virtually identical — the differences are all internal.
The standard 2.0 comes with a 6.04mm brass inner barrel and basic wiring, priced at roughly $150-180. For players who simply want to get started and are watching their budget, this version is more than adequate. Its out-of-the-box performance handles most field conditions, and the internal component quality won’t have you reaching for upgrades anytime soon.
The 2.0E adds two key features: a built-in programmable MOSFET electronic trigger unit, and an upgraded 6.01mm precision inner barrel. What’s a MOSFET? In simple terms, it’s a protective circuit board that reduces trigger contact wear, supports higher-voltage batteries (11.1V LiPo), and enables adjustable fire modes. With the MOSFET, you can configure burst fire, active braking, and more. The 2.0E runs about $200-230 — the extra $50 buys long-term value.
If your budget allows, I’d recommend going straight for the 2.0E. A MOSFET is something you’ll want eventually, and having it factory-installed means you don’t have to crack open the gearbox yourself or worry about compatibility. But if budget is truly tight, the standard 2.0 won’t leave you with regrets — it’s a thoroughly complete gun on its own.
Why Everyone Quotes a Different FPS Number
Search for the CM16 Raider 2.0’s FPS and you’ll find one player insisting it’s 379, another swearing his chronos at 357, a UK player reporting 330, and a shop listing that flatly says 350. Everybody is telling the truth. The number genuinely isn’t fixed, and understanding why will stop you from buying a rifle your local field won’t let you use.
The biggest reason is that G&G builds region-specific springs into the same model. The company ships to dozens of countries with wildly different legal and field power limits, and rather than sell one rifle everywhere it fits whichever spring meets the destination market’s ceiling. A US-market Raider typically lands somewhere around 115-120 metres per second — roughly 377-394 FPS on 0.20g — while a European-market example of the identical gun can sit in the low 100s m/s, closer to 330-360 FPS. Two players comparing chrono readings across an ocean will never agree, and neither of them is misremembering.
Barrel length is the second variable. The Raider-L’s longer inner barrel gives the cylinder more time to work on the BB, which is why G&G quotes it near 380-390 FPS while the shortest builds sit around 340-350. Third is BB weight: every published FPS figure assumes 0.20g, and the moment you switch to the 0.25g or 0.28g BBs you should actually be running outdoors, the chronograph reading drops even though your effective range goes up. Finally, springs settle. A brand-new AEG usually reads slightly hot for its first few hundred rounds, then stabilises a few FPS lower once everything beds in.
The practical takeaway is simple: find out your field’s limit before you order, and chrono your own gun rather than trusting any listing. Most outdoor sites in North America cap AEGs around 400 FPS on 0.20g and many indoor CQB sites cap far lower, while UK sites work in joules and commonly land near a 350 FPS equivalent. If you’re buying for one specific field, the safe play is the shorter build or a swapped spring — not the highest number you can find on a product page.
How Does the CM16 Stack Up Against the Competition?
In the $150-250 price range, the CM16 Raider 2.0 isn’t your only option. CYMA and Specna Arms both field strong competitors, and understanding the differences will help you make a more informed decision.
CYMA holds an unshakeable position in the AK segment. If you prefer the AK platform’s aesthetics and manual of arms, the CYMA CM.028 is the classic budget choice at just over $100, with a full-metal receiver that feels substantial. That said, CYMA’s M4 lineup isn’t as impressive — in the M4 world, their reputation trails behind G&G. CYMA’s strength is extreme value for money; the trade-off is that factory hop-up units and motors generally need upgrading to reach satisfying performance.
Specna Arms is a Polish brand that has risen rapidly in the European market in recent years. Their CORE series is the entry-level line, priced similarly to the CM16, with a standout feature: a built-in quick-change spring system that lets you swap springs without opening the gearbox — incredibly handy when you need to adjust FPS for different field limits. The EDGE series sits higher, equipped with an ORION gearbox and GATE X-ASR MOSFET. Specna Arms’ weakness is their shorter track record — their long-term durability reputation hasn’t yet matched G&G’s decade-plus of market-proven Combat Machine reliability.
The core reason to choose the CM16 Raider 2.0 isn’t that it leads in any single category — it’s that it maintains a solid standard across every dimension. A proven Ver.2 gearbox, mature M4 platform compatibility, and the most extensive parts and upgrade ecosystem in the world — together, these make the CM16 the “safest” choice for beginners. You’ll never discover that a critical replacement part is impossible to find, and you’ll never post a question on a forum that nobody can answer.
What the Raider 2.0 Genuinely Isn’t Good At
Every recommendation thread for this rifle reads like an advertisement, which is exactly why the honest limitations are worth writing down. None of these are dealbreakers. Knowing them in advance is the difference between “my gun is broken” and “oh, that’s just how it is.”
The outer barrel is two-piece, not the single-piece assembly you get on higher-end rifles. In practice the front section is held on with screws and can work loose over time, and the joint becomes a mild wobble point if you hang a heavy bipod or laser off the end. Snug the screws every few games and it’s a non-issue; ignore it for a season and you’ll be posting “my inner barrel came loose” like half the airsoft forum archive already has.
The polymer receiver is exactly as light as everyone promises and exactly as plasticky as that implies. It’s genuinely tough — G&G’s reinforced nylon fibre is nothing like cheap ABS — but if part of what you want from airsoft is the cold, dense heft of a real firearm, this rifle will never give you that. It’s a matter of taste rather than quality, but people are regularly disappointed by it, and it’s better to know going in.
Hop-up access needs both hands. The dust cover on the 2.0 opens, which is already an improvement over the 1.0, but it doesn’t stay open on its own — so adjusting the rotary hop-up mid-game means holding the cover down with one hand while turning the dial with the other. Perfectly doable from behind cover, thoroughly annoying in the middle of a firefight.
The stock motor is unremarkable. At around 18,000 RPM it’s entirely adequate, but semi-auto trigger response feels soft next to a high-torque replacement, and this is the single thing experienced players notice when they pick up a box-stock Raider after shooting something tuned. It’s also the cheapest meaningful fix on the whole rifle.
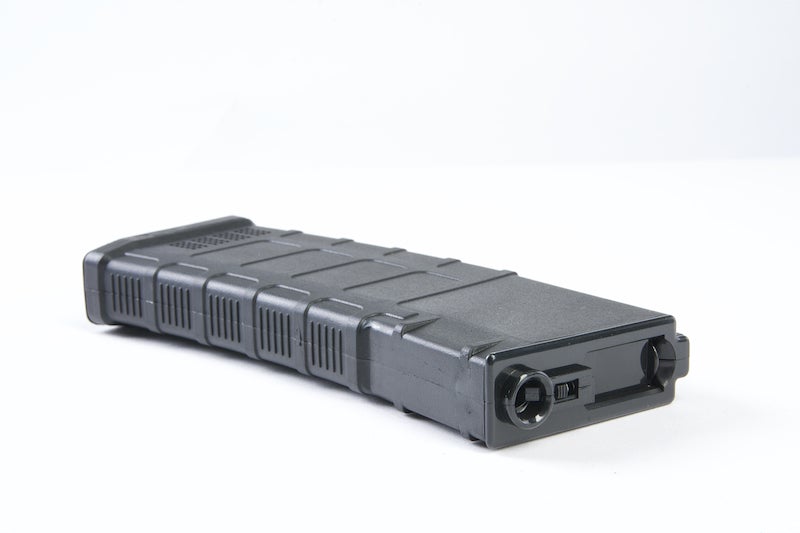
And the 450-round hi-cap rattles and needs winding. That’s true of every hi-cap ever made, but new players consistently read “the gun stopped firing” as a mechanical fault when the real answer is “you didn’t wind the wheel.” It also makes quiet movement essentially impossible, which matters far more on an indoor field than most people expect.
None of that changes the verdict. It changes what you expect — and expectation management is most of what makes a first gun feel like a good purchase.
Upgrade Paths: Taking Your CM16 to the Next Level
The CM16 Raider 2.0 performs well enough out of the box to keep you happy for months. But when you start wanting better performance, its Ver.2 gearbox opens up nearly unlimited upgrade potential. There’s no need to do everything at once — follow a priority order and put every dollar where it counts.
Step one is always accuracy. Swapping the hop-up bucking is the single best value upgrade — a Maple Leaf or Modify bucking costs around ten to fifteen dollars, yet the improvement in trajectory consistency is immediately visible. Pair it with a quality nub, and your effective range can easily gain 10-15 meters. If the budget allows, a Prometheus or ZCI 6.03mm stainless steel inner barrel will push accuracy up another notch. These three components together run under $50, yet they’ll bring your CM16’s precision close to guns costing twice as much.
Step two is the motor. The stock CM16 runs an 18,000 RPM standard motor — adequate but unspectacular in trigger response and rate of fire. A high-torque motor (such as the ASG Infinity U-18000 or SHS High Torque) noticeably improves trigger response, especially in semi-auto where you want each shot to follow your finger immediately. This makes a real difference in scenarios demanding quick, precise single shots.
Step three is the electrical system. If you bought the standard 2.0 (without a built-in MOSFET), adding one is strongly recommended. A basic MOSFET costs just $20-30 and protects your trigger contacts from the high-current draw of LiPo batteries, allowing you to safely run 11.1V LiPo for faster cycling and snappier trigger response. For more advanced features, a GATE PicoAAB or Perun V2 Hybrid offers burst fire, active braking, and precocking.
Core components like gears and the cylinder don’t need replacing unless something actually breaks. G&G’s factory gears are among the best in the entry-level segment and will last for years under normal use. Keep your upgrade priorities focused on accuracy and responsiveness, not chasing higher FPS or rate of fire — your field performance depends on whether you can hit your target, not how fast the BB leaves the barrel.
Field Performance and Tactical Tips
The CM16 Raider 2.0 is positioned as an all-around rifle, but it really shines on medium-sized outdoor fields. At 350-380 FPS with a 275mm inner barrel, effective range sits around 40-50 meters. Within that envelope, the factory hop-up system delivers stable enough trajectories to be competitive.
Running an M4 platform outdoors comes with a very practical advantage: you never have to worry about magazine and parts availability. Nearly all M4-pattern AEG magazines are cross-compatible, so you can easily borrow spares from teammates without stressing over proprietary specs. The 450-round hi-cap magazine requires occasional winding of the bottom wheel to feed, but for beginners the generous capacity offers plenty of forgiveness — you’re unlikely to suddenly run dry in the middle of a firefight. Once you’re ready for a more realistic experience, switch to 120-round mid-cap magazines and practice your reloads.
One thing many beginners overlook in actual games: learn to use semi-auto effectively. Full-auto spraying looks exciting, but beyond 40 meters the spread means you’ll burn through BBs without hitting anyone. Build the habit of using precise semi-auto fire, reserving full-auto for close encounters or suppressive fire. This conserves ammo and will make you a more effective shooter much faster.
Another common beginner confusion is BB weight selection. The CM16 Raider 2.0 achieves its rated FPS with 0.20g BBs, but outdoors in any wind, 0.20g trajectories get blown all over the place. Use 0.25g at minimum — if you’ve upgraded your hop-up bucking, 0.28g will dramatically improve your hit rate at medium range. Heavier BBs show lower FPS numbers on a chronograph, but actual effective range and trajectory stability are significantly better.
💡 Further Reading: Want to learn more about field selection and rules? Check out our Airsoft Field Guide.
Shot Timer Training Drills
🎯 Practice at home tonight, no field trip needed: Every drill below is timed with a shot timer — but you don’t need a $150 hardware unit like a CED7000 or PACT. A free Shot Timer app picks up the crack of an AEG (or your dry-fire clicks with no battery installed), gives you the same PAR-time beep, and logs your splits. Same numbers, zero cost. It’s the single cheapest way to turn a CM16 into a training tool between game days.
Once you have a reliable gun, what separates you from other beginners is training. The CM16 Raider 2.0 is the ideal platform for practicing fundamental rifle operations because its controls are identical to virtually every M4-pattern system — muscle memory built on the CM16 transfers directly to any M4 platform you might use in the future.
The first drill is target acquisition speed. Set up a Shot Timer, hold the rifle in a low-ready position, and on the buzzer, raise the gun, acquire your sight picture, and fire. Beginners typically need over 2 seconds; the goal is to consistently get under 1.5 seconds. The CM16’s light weight is an advantage here — you won’t fight excess barrel wobble during the mount.
The second drill is magazine changes. Hit the magazine release, strip the empty mag, insert a fresh one, slap the bottom to confirm it’s seated — time the whole sequence with the Shot Timer. The M4’s magazine well design is the most intuitive of any rifle platform, and your target is sub-3-second reloads. This skill matters more than you’d think: running empty mid-engagement and getting back in the fight within 3 seconds often decides whether you tag someone or get tagged.
The third drill is target transitions. Set up two targets roughly 60-90 degrees apart and practice swinging between them while firing. Record split times on the Shot Timer. This drill trains upper body coordination and visual switching speed — essential for real-game scenarios with multiple opponents.
All of these drills can be done at home with an empty magazine and no battery installed. Combined with the techniques in our Dry Fire Training Guide, you can dramatically improve your handling proficiency without spending a single BB. Fifteen minutes a week on these three drills, and within a month your teammates will notice the difference.
Maintenance and Common Issues
AEG maintenance is far simpler than GBB, but basic care habits will keep your CM16 running smoothly for years. After each session, run a cleaning rod with a lightly silicone-oiled patch through the inner barrel from the muzzle end. No special solvents needed. Periodically check whether the hop-up bucking has hardened with age — if your accuracy starts dropping off, a fresh bucking usually fixes it.
Battery care is the maintenance item AEG users most commonly neglect. If you’re running LiPo batteries, never discharge them to empty. Over-discharging permanently damages LiPo cells and can cause swelling or even fire. Best practice: recharge promptly after use, and store at storage voltage (about 3.8V per cell) when not in use for extended periods. Always use a balance charger, and never leave batteries charging unattended. If you’re not sure whether the Raider should be on 7.4V or 11.1V, or what the mAh and C rating on the label actually change, our airsoft battery guide walks through the whole decision — and why the base 2.0 without a MOSFET should stay on 7.4V.
The most common beginner issue is feeding problems. Hi-cap magazines need the bottom wheel wound regularly to push BBs into the feed tube — if you suddenly stop firing, give the wheel a few turns before troubleshooting further. Another frequent cause is low-quality BBs — cheap BBs with rough surfaces jam in the feed path. Investing in quality BBs (such as BLS, G&G factory, or Elite Force) will noticeably improve your experience.
💡 Further Reading: For more cleaning and maintenance knowledge, check out our Pistol Cleaning & Maintenance Guide.
Frequently Asked Questions (FAQ)
Is the G&G CM16 Raider 2.0 a good first airsoft gun?
For most beginners, yes — it’s the reason “just get a CM16” is the most repeated piece of advice on airsoft forums. It hits a rare balance: reliable enough that you won’t spend your weekends fixing it, light enough that a full game day won’t wreck your arms, and built on the M4 platform so parts and magazines are everywhere. It isn’t the cheapest or the most powerful gun in its bracket, but it’s the safest bet if you want to spend your first season actually playing rather than troubleshooting.
What FPS does the CM16 Raider 2.0 shoot?
Out of the box it chronographs around 350-380 FPS on 0.20g BBs, which sits comfortably inside most outdoor field limits. That’s the raw number — in practice your effective range depends far more on hop-up tuning and BB weight. Switch to 0.25g or 0.28g BBs and the FPS reading drops slightly, but real-world accuracy and stability at 40-50 meters improve noticeably.
Does the G&G CM16 Raider 2.0 have a MOSFET?
The standard 2.0 does not ship with a MOSFET — it uses basic trigger wiring. The 2.0E variant is the one with a built-in programmable MOSFET plus a 6.01mm precision barrel. If you bought the standard 2.0 and later want to run an 11.1V LiPo or add burst-fire features, a basic drop-in MOSFET costs about $20-30. This is the single most common point of confusion when people compare the two versions.
Should I buy the 2.0 or the 2.0E?
If your budget stretches to it, go straight for the 2.0E — the factory MOSFET and precision barrel save you from cracking open the gearbox later, and it’s the upgrade you’ll want eventually anyway. If money is genuinely tight, the standard 2.0 is a complete, field-ready gun that won’t leave you with regrets; you can always add the MOSFET yourself down the line. Think of the extra ~$50 as pre-paying for a future upgrade at a discount.
What upgrades should I do first on my CM16?
Start with accuracy, not power. A quality hop-up bucking (Maple Leaf or Modify, ~$10-15) plus a good nub is the best value change you can make, and a tightbore inner barrel takes it further — under $50 total for a visible jump in consistency. After that, a high-torque motor sharpens trigger response, and a MOSFET (if you have the standard 2.0) lets you safely run LiPo. Resist the urge to chase higher FPS; hitting your target is about trajectory, not muzzle velocity.
What’s the difference between the CM16 Raider and the Raider-L?
The difference is barrel and overall length. The standard Raider is the shorter carbine-length build that’s ideal for CQB and all-round play, while the Raider-L (Long) has an extended outer barrel and handguard for a full-length rifle profile — slightly better reach and a more “DMR-ish” look, at the cost of maneuverability indoors. Internally they’re the same platform, so everything in this guide applies to both. Pick the Raider for tight fields and mixed play, the Raider-L if you mostly run open outdoor ground.
Can I practice CM16 drills at home without firing BBs?
Absolutely — and it’s the fastest way to improve. Pull the battery, use an empty magazine, and run draw, reload, and target-transition reps against a free Shot Timer app that gives you a PAR-time beep and records your splits. Fifteen minutes a week of dry reps builds the exact muscle memory you’ll use on game day, without burning a single BB. Pair it with our Dry Fire Training Guide for a full at-home routine.
What is the price of the G&G CM16 Raider?
Expect roughly $150-180 for a standard CM16 Raider 2.0 and $200-230 for the 2.0E with its factory MOSFET and precision barrel, with the Raider-L generally sitting toward the top of each band. Prices drift with retailer promotions and region, and package deals that bundle a battery, charger and BBs often work out cheaper than buying those pieces separately. Whatever you pay for the gun, budget another $40-60 for a 7.4V LiPo, a balance charger and a bag of quality 0.25g BBs — you will need all three on day one.
What are the different models of the CM16 Raider?
The family splits three ways. Generation: the older 1.0 with its RIS handguard and 6.08mm barrel, versus the current 2.0 with M-LOK, a rotary hop-up and a 6.04mm barrel. Length: Short, standard Raider, and Raider-L with its longer barrel and higher muzzle velocity. Trigger: the plain version versus the “E” variant with a factory MOSFET/ETU and usually a PDW stock. The CM16 Carbine is a related but distinct model with a classic M4A1 handguard and carry handle instead of rails. All of them share the same Ver.2 gearbox and standard M4 parts compatibility, so upgrade advice transfers across the whole range.
Is G&G a reputable brand?
Yes — G&G Armament is one of the most established manufacturers in airsoft. Founded in Taipei in 1986 and building its own AEGs since 2001, it holds ISO 9001 certification, runs two Taiwanese factories and has released well over a hundred models. Its reputation rests less on cutting-edge performance than on consistency: Combat Machine rifles have been in continuous field use for more than a decade, which is exactly why spare parts, upgrade components and troubleshooting advice are so easy to find for them.
Is 350-380 FPS safe, and can it break skin?
With proper eye protection and sensible minimum engagement distances, yes — that band is what most outdoor fields are built around. But 350 FPS on 0.20g can absolutely break skin at very close range, especially on hands, neck and other thin-skinned areas, which is why fields impose minimum engagement distances and require full-seal goggles rather than shooting glasses. If you’ll mostly play indoors, check your site’s limit before ordering: plenty of CQB fields cap well below 350 FPS and will turn a stock Raider-L away at the chrono.
Conclusion: The Best Companion from Day One to Growing Beyond
The G&G CM16 Raider 2.0 isn’t a gun that’ll turn heads on an internet forum. It doesn’t have the cold touch of a full-metal receiver, the prestige of licensed trademarks, or the kind of looks that stop people in their tracks. But it does something more important — it lets you focus on actually enjoying airsoft, instead of spending your weekends fixing your gun.
From your first game day through your first upgrades, from the exploratory beginner phase to building genuine confidence, the CM16 Raider 2.0 provides stable, reliable support at every stage. The moment you land that first precise semi-auto hit on a target 40 meters out, you’ll understand why players worldwide consider this gun the starting point of the hobby. And with a Ver.2 gearbox offering a full universe of upgrades, this rifle can grow alongside your skills rather than being outgrown and discarded.
If you’re agonizing over what to buy as your first gun, my advice is simple: get a CM16 Raider 2.0, and spend the money you saved on a quality pair of goggles, good BBs, and a 7.4V LiPo battery. Then take that setup to the field and enjoy your first game of airsoft.
Related Articles
- Airsoft Gear Buying Guide — Complete guide from guns to protective gear
- Airsoft Loadout Guide — Loadout configurations for every play style
- Airsoft CQB Tactics Guide — Indoor tactical techniques
- Airsoft Field Guide — Outdoor vs indoor field comparison
- Shot Timer App Guide — Quantify your training progress with a timer
Put a Shot Timer in Your Pocket
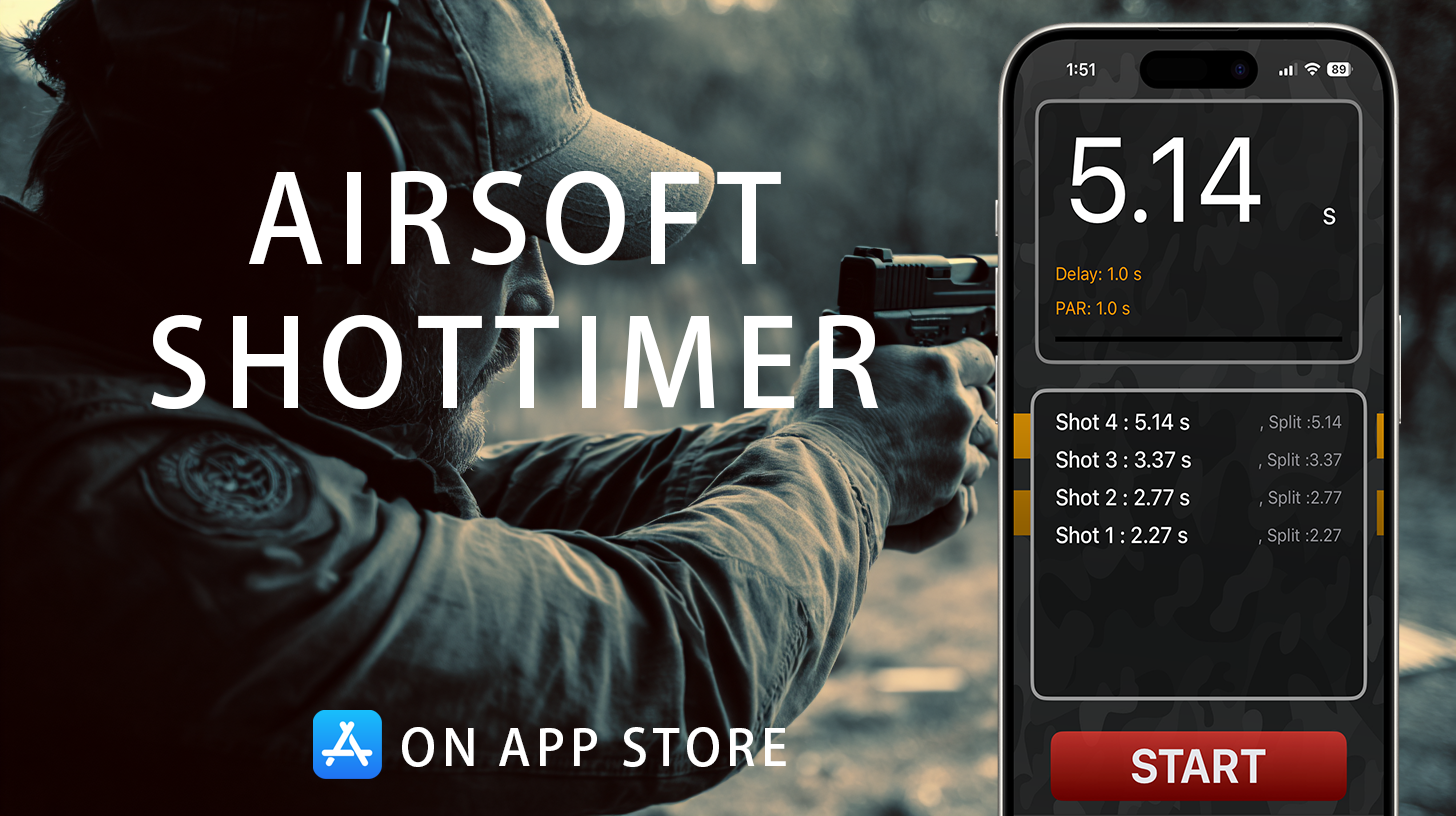
Airsoft Shot Timer is a free shot timer app tuned for airsoft and Action Air — it picks up BB gun shots, tracks your split times, and saves you the cost of a $150+ hardware timer for IPSC/IDPA practice.

- G&G
- CM16 Raider
- CM16 Raider 2.0
- CM16 Raider 2.0E
- AEG
- Electric Airsoft Gun
- Airsoft
- Airsoft AEG
- Beginner Airsoft
- M4
- Combat Machine
- MOSFET
- CM16 Raider L
- Airsoft AEG Upgrades
- Shot Timer
- Best Beginner Airsoft Gun
- Best Starter Airsoft Gun 2026
- CM16 Raider Short
- CM16 Raider vs Raider L
- CM16 Raider FPS
- G&G Armament
- CM16 Carbine
- Airsoft FPS Limits
- Rotary Hop-Up
- CM16 Raider Models
- CM16 Raider Price