Airsoft Loadout Ideas 2026: 10 Setups from Beginner to Pro Tier
Your Loadout Is More Than a Shopping List
I remember my first outdoor game — I showed up with an AEG, two spare mags shoved in my cargo pockets, and a pair of safety glasses I’d grabbed at the hardware store. Twenty minutes in, one magazine fell out of my pocket while I was sprinting between cover. The other jammed halfway through a reload because lint had gotten into the feed lips. I spent the rest of the round hiding behind a stack of tires with an empty gun, watching my teammates get picked off. I had a gun. I had ammo. What I didn’t have was a loadout.
That’s what building an airsoft loadout is really about — not just listing what to buy, but figuring out how everything works together so you can actually perform on the field. The same magazines, the same pouches, mounted in different positions on different carrying systems, can feel completely different in practice. A $40 chest rig with properly placed mag pouches will outperform a $200 plate carrier where nothing is within easy reach.
In this airsoft loadout guide, you’ll find 10 specific gear picks every beginner needs (with prices), plate carrier vs chest rig comparisons, complete setups for CQB, MilSim, Speedsoft, and casual outdoor play, team role configurations, and three budget tiers starting at $150. Whether you’re heading to your first game day or rebuilding your kit after a season of play, everything you need is here.
Related reading: If you’re still shopping for individual gear pieces, check out our Complete Airsoft Gear Guide first. This guide focuses on how to combine those pieces into a cohesive system.
Quick Loadout Builder: Pick Your Tier in 30 Seconds
Before you scroll through every section, here’s a fast way to figure out which loadout tier matches your current situation. Pick the row that sounds like you and jump straight to that section.
| Tier | Total Budget | Carrying System | Best For | Jump To |
|---|---|---|---|---|
| Entry | $150-250 (gear only) | Condor Recon chest rig + dump pouch | First 1-3 games, rental gun OK | Entry Tier Loadout |
| Mid | $300-500 | JPC-style PC or Spiritus rig + battle belt | Walk-on regular, casual MilSim | Mid Tier Loadout |
| Pro | $500+ | Crye JPC 2.0 + Ronin/AWS belt + comms | Competitive Speedsoft, hardcore MilSim | Pro Tier Loadout |
Bottom line for picking a tier: If this is your first season, start entry. Don’t skip tiers — most regrets in airsoft come from buying a $400 plate carrier before knowing whether you actually enjoy MilSim or prefer Speedsoft. The 10 loadout ideas below scale from one tier to the next so you never throw old gear away.
10 Airsoft Loadout Ideas at a Glance
Before we get into the build details, here are the 10 complete setups covered in this guide — each tied to a specific playstyle, role, or aesthetic so you can find one that fits:
- Casual Outdoor Loadout — chest rig + 3-4 mags, the everyday walk-on setup
- CQB Indoor Loadout — micro chest rig or belt-only, speed-first build
- MilSim Loadout — 8+ mags, hydration bladder, comms, 12-48 hour ready
- Speedsoft Loadout — Hi-CAPA + paintball mask, minimal gear, max mobility
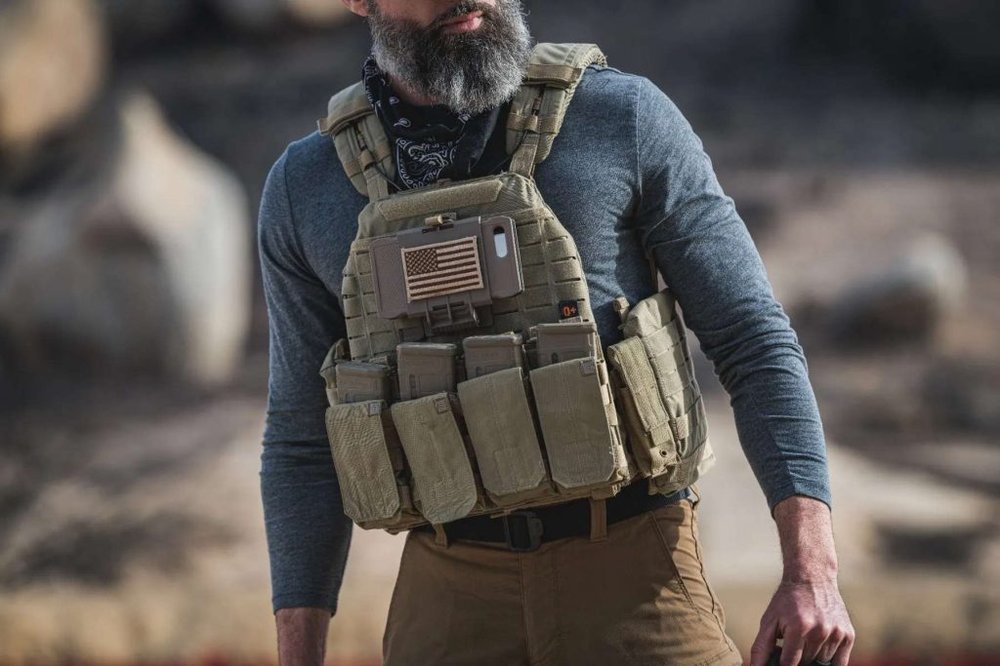
- PMC (Private Military Contractor) Loadout — civilian-tactical hybrid, coyote/khaki tones
- Multicam Loadout — full pattern-matched Crye/Emerson combat kit
- Sniper Loadout — bolt-action + ghillie + sidearm, concealment-first
- Rifleman Squad Role — balanced PC + 4-6 mags, the team backbone build
- Support Gunner Squad Role — LMG/SAW + sturdy PC, sustained firepower
- Breacher / Point Man Squad Role — micro rig + grenades, room-clearing speed
Each idea below tells you the exact gear, price range, and what mistakes to avoid. Pick the one that matches how you actually play (or want to play). And if you’re after a more specialized role, scroll down to the medic and shotgun builds — two of the most-requested setups that need their own approach to carrying gear.
10 Essentials for Your First Airsoft Loadout
If you’re piecing together your first kit and don’t want to overcomplicate things, here are the ten items that actually matter — in order of priority.
Your primary weapon is obviously the biggest decision and the biggest expense. For most beginners, an AEG (Automatic Electric Gun) is the right call — they’re reliable, low-maintenance, and perform well out of the box. The G&G CM16 Raider 2.0 ($150-180) and CYMA AK series ($90-130) are the two most recommended starting points in the community for good reason: they’re durable enough to handle drops, accurate enough to be competitive, and affordable enough that you won’t feel devastated if you decide airsoft isn’t for you.
Eye protection is non-negotiable — every field requires it, and this is the one item you should never cheap out on. Look for full-seal goggles with ANSI Z87.1+ or EN166 B-rated lenses. The Pyramex I-Force ($20-25) and Valken Sierra ($30-40) are both proven choices that resist fogging better than most budget options. Pair your goggles with a lower face mesh mask ($10-15) to protect your teeth and jaw — taking a BB to the mouth is an experience you only need once before you start wearing one religiously.
Footwear is the third priority, and it’s more important than most new players realize. You’ll be running on uneven terrain, kneeling behind cover, and on your feet for hours. Any boot with ankle support and decent tread will do — military surplus boots, hiking boots, or purpose-built tactical boots in the $50-80 range all work fine. Just don’t show up in sneakers or you’ll twist an ankle before the first round is over. For head protection in CQB environments, consider adding a helmet once you’ve got the basics covered.
For your carrying system, skip the heavy plate carrier as a beginner and start with a simple chest rig. The Condor Recon Chest Rig ($40-50) is the go-to entry-level option — it holds three rifle magazines, has a couple of utility pouches, and weighs almost nothing. If you’d prefer something more modular, Spiritus Micro Fight clones run $30-60 and let you swap inserts as your needs change. For a deep dive on all your carrying system options, see our Plate Carrier & Tactical Vest Guide.
You’ll need extra magazines — at minimum two spares beyond the one that comes with your gun. Mid-cap magazines (120-150 rounds) are the standard for most players since they don’t rattle like hi-caps and don’t need constant winding. Budget about $10-15 per magazine depending on your platform. A dump pouch ($10-15) mounted on your belt or carrier gives you somewhere to toss empties during a reload — it sounds like a minor accessory until you’re standing there with a spent mag in each hand and nowhere to put them.
Don’t forget BBs and a battery. For outdoor play, 0.25g BBs offer the best balance of range and accuracy for stock AEGs — a bag of 5,000 rounds runs about $12-15 and will last a full game day. Your gun probably comes with a basic battery, but upgrading to a 7.4V LiPo ($15-20) plus a smart charger ($15-25) gives you noticeably better trigger response and consistent performance throughout the day.
Finally, grab a pair of gloves ($15-25). Mechanix Original or M-Pact gloves are the unofficial standard in airsoft — they protect your knuckles from BB hits (which sting far more than you’d expect on bare hands) while keeping enough dexterity for trigger work and magazine changes.
That’s ten items, roughly $300-450 all-in with the gun, and you’ll show up to your first game better equipped than half the regulars on the field.
Build Your First Loadout: A Step-by-Step Process
Knowing what to buy is one thing — knowing what order to buy it in is what actually saves you money and frustration. I’ve watched too many new players drop $500 on a full plate carrier setup before their first game, only to realize they hate wearing it in the heat. Here’s the sequence that works.
Start with safety gear and footwear before anything else. Your first purchase should be full-seal goggles, a lower face mesh mask, and boots with ankle support. This isn’t glamorous spending, but it’s the foundation everything else builds on. You can borrow a gun for your first game — most fields offer rentals for $20-30 — but nobody’s lending you their eye protection. Get ANSI Z87.1+ rated goggles and boots you’ve actually walked around in. Budget about $80-120 for this step, and don’t rush it.
Once you’ve played a rental game or two and confirmed you want to keep going, buy your primary weapon. An AEG in the $150-200 range is the sweet spot — the G&G CM16 Raider 2.0 and CYMA AK series are popular for good reasons. Resist the urge to buy the most expensive gun in the shop. At this stage, you don’t yet know whether you prefer outdoor woodlands or indoor CQB, long-range engagements or close-quarters chaos. A mid-range AEG performs well in all scenarios while you figure that out.
Your third purchase should be a carrying system and magazine pouches — but only after you’ve played enough to know your playstyle. If you found yourself sprinting between cover and sweating through your shirt, get a chest rig. If you liked holding positions and carrying lots of ammo, a plate carrier might suit you better. Buy two to three extra mid-cap magazines at the same time, along with a dump pouch. This step typically costs $60-100.
From here, upgrade based on what’s actually bothering you. Are your hands getting stung? Get gloves. Running out of battery mid-game? Buy a 7.4V LiPo and a smart charger. Want better trigger response? Upgrade your motor before buying a new gun. The point is to let real experience guide your spending rather than buying everything at once based on someone else’s recommendation. Every player’s “perfect loadout” is different because every player’s field, climate, and playstyle is different.
The one mistake I see over and over is buying gear to fix problems you don’t actually have yet. A tactical radio sounds cool — until you realize your local walk-on games have six people on each team and you can just yell across the field. A full ghillie suit looks amazing — until you realize your field is 90% CQB buildings with zero sniping lanes. Play first, buy second, and your wallet and your loadout will both thank you.
Tactical Carrying Systems: Plate Carrier, Chest Rig, or Battle Belt?
Choosing your carrying system is the first step in building any loadout. It determines how much you can carry, how you carry it, and how freely you can move on the field. The three most popular systems in airsoft each have distinct strengths, and understanding the differences is key to making the right choice.
A plate carrier is the most common and instantly recognizable option. Originally designed as a military body armor platform, in airsoft we skip the ballistic plates but keep the MOLLE webbing and generous mounting space. Wearing a plate carrier feels “complete” — front and back panels both offer MOLLE real estate, and the shoulder straps plus cummerbund distribute weight across your entire torso. Entry-level options like the Condor MOPC or Emerson JPC run about $40-80, while mid-range JPC 2.0 replicas sit around $80-150. The upside is massive carrying capacity and that tactical look. The downside is equally clear: even without plates, the weight and coverage area will have you drenched in sweat on hot days, and your shoulders will start to ache after hours of wear.
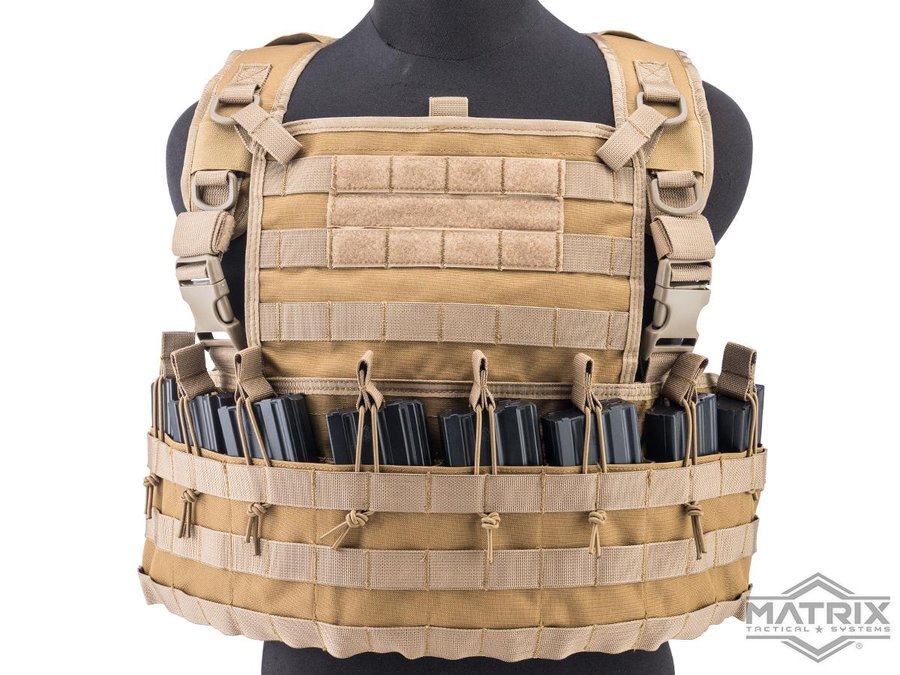
A chest rig has been gaining serious popularity in recent years, especially in warmer climates. At its core, a chest rig is simply a gear panel that hangs across your chest, typically with mounting space only on the front and your back completely exposed. This means dramatically better ventilation than a plate carrier and significantly less weight. Something like the Condor Recon Chest Rig runs about $50, while Spiritus Micro Fight clones can be had for $30-60. Wearing a chest rig feels more like having a few extra pockets strapped to your chest rather than wearing a vest. If you’re the type of player who hates feeling “trapped” by gear, a chest rig will feel much more freeing. The trade-off is limited carrying capacity — you’ll typically fit three to four rifle magazines and not much else.
A battle belt can be used standalone or paired with either of the above systems. It’s a rigid belt with a MOLLE attachment system, with all gear mounted at your waist. Running a battle belt solo is the lightest possible configuration — nothing on your chest, zero restrictions on breathing or movement. You can mount a pistol holster, one or two magazine pouches, and a dump pouch, which is plenty for pistol-only or light loadout players. However, if you need to carry rifle magazines, belt space gets tight quickly. Many experienced players run a “chest rig + battle belt” combination — rifle mags on the chest, pistol and utilities on the belt — which strikes an excellent balance between weight and functionality.
How to choose? A simple rule of thumb: if your field runs hot or you’re playing outdoors in warm weather, prioritize ventilation and go with a chest rig or battle belt. If you enjoy the military aesthetic of MilSim or need to carry large amounts of gear, go with a plate carrier. If you’re chasing pure speed like in Speedsoft, you might skip a carrying system entirely and rely on a belt or even just pockets. For detailed reviews and product comparisons of specific carriers and rigs, check out our Tactical Vest & Plate Carrier Guide.
Loadout Configurations for Four Playstyles
Each playstyle demands a fundamentally different approach to gear. The same gun and the same player, with a different loadout, might as well be playing a different game. Here’s how to think about gear configuration for the four most common playstyles.
Casual / Outdoor Loadout
This is the everyday setup for most airsoft players. You show up for a walk-on game day, play three to four hours, and need a setup that’s comfortable, functional, and won’t make you want to ditch all your gear at halftime.
A chest rig or lightweight plate carrier works best as your carrying system here. If summers in your area are brutal, a chest rig is practically the only sane choice. For magazines, three to four rifle mags on your rig (plus one in the gun makes four to five total) is more than enough for casual games — you can resupply during breaks. If you carry a sidearm, add a belt-mounted holster and one spare pistol mag.
Don’t forget water. This sounds basic, but you’d be surprised how many people play an hour before realizing they left their water bottle behind. If your plate carrier has rear MOLLE, mount a hydration carrier there. With a chest rig, a belt-mounted water bottle pouch works fine. Also strongly recommend a dump pouch — tossing spent magazines into it is infinitely faster than trying to stuff them back into mag pouches during a firefight.
For clothing, you don’t need full camo — focus on durability and protection. Long sleeves and pants reduce the sting of BB hits on bare skin, and boots with ankle support are essential on uneven outdoor terrain. Gloves are highly recommended too — taking a BB to the fingers is genuinely painful.
CQB Indoor Loadout
CQB is the fastest-paced scenario in airsoft, and the core principle for your gear is one word: light. You’re weaving through narrow corridors, snapping around corners, and constantly flowing between rooms. Any excess gear will slow you down or, worse, snag on a doorframe at the worst possible moment.
A micro chest rig or belt-only setup is ideal. CQB rounds are short and resupply is easy, so you don’t need many magazines. Two to three rifle mags plus one in the gun is plenty. If you’re running a Hi-CAPA pistol, three to four mags on your belt will keep you well-supplied.
Short-barreled AEGs and SMG-style guns have a natural advantage in CQB. M4 CQB variants, MP5s, and the ARP9 are all dramatically easier to handle around corners and through doorways than a full-length rifle. Going pistol-only is also a perfectly viable CQB strategy — without the added length of a rifle, your maneuverability indoors goes through the roof.
For protection, CQB means close-range hits that sting more. Full-seal goggles plus a lower face mask is the bare minimum, and many players also wear knee pads. Not for looks — kneeling shots and quick drops to the ground are constant in CQB, and doing that on concrete without pads gets old fast.
Related reading: Want to dive deeper into CQB tactics? Check out our Complete CQB Tactics Guide.
MilSim Loadout
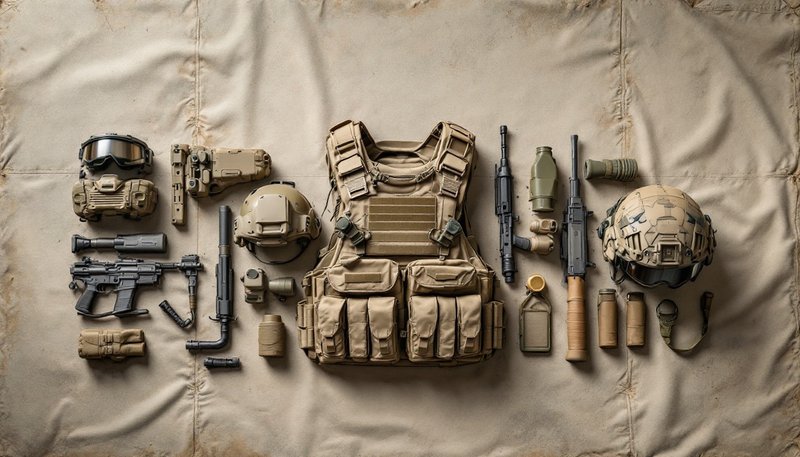
MilSim (Military Simulation) is the playstyle that emphasizes realism and immersion above all else. A MilSim event can last 12 to 48 hours, and you’ll need to carry not just combat gear but survival supplies as well. This is by far the most gear-intensive playstyle.
A plate carrier is almost always the right choice, and specifically a higher-capacity model. MilSim events typically don’t allow mid-game resupply runs to the safe zone, so everything comes with you. You’re looking at six to eight rifle magazines minimum, two to three spare pistol mags, a hydration bladder (at least 1.5 liters), rations, a simulated medical kit, map and compass, and communications gear. Some MilSim events even require carrying mock medical supplies for simulated casualty evacuation procedures.
Communications equipment isn’t optional in MilSim — it’s essential. A two-way radio with a tactical headset or throat mic is your team’s lifeline. Mount the radio on your plate carrier’s front panel or shoulder strap for easy access, and position the PTT (Push-to-Talk) button on your chest where you can reach it instinctively. The Baofeng UV-5R is the go-to entry-level radio in the MilSim community — affordable and functional enough for most events.
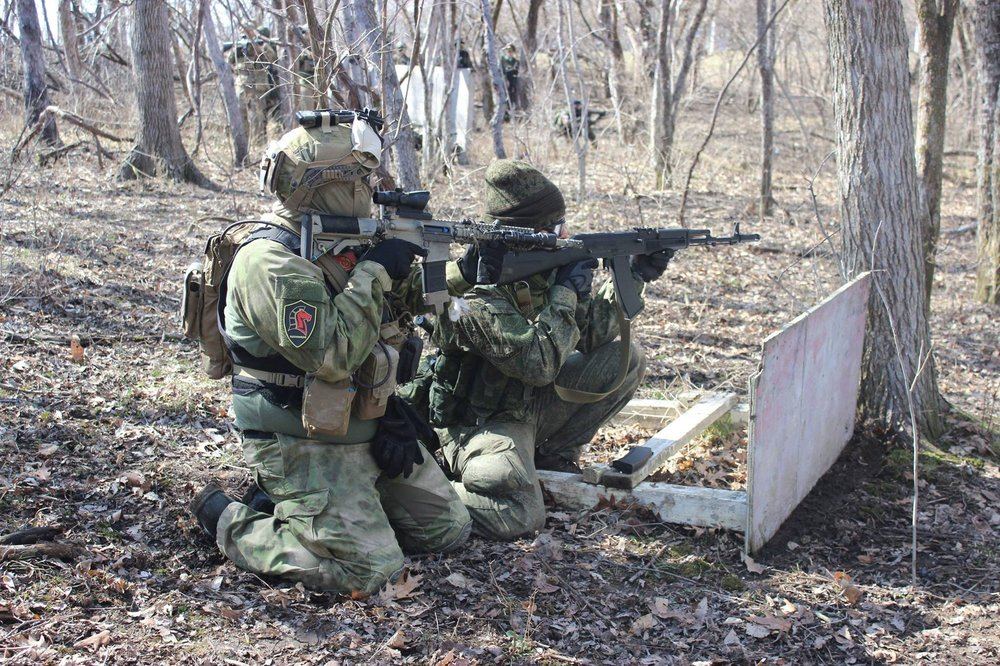
Clothing typically follows faction-specific requirements. One side usually wears MultiCam (or similar modern multi-terrain patterns) while the other wears OD Green or Russian camo patterns. Always check dress code requirements before an event — wearing the wrong camo can lead to friendly fire incidents.
Weight distribution deserves special attention with MilSim loadouts. All your gear combined might exceed 10 kg (22 lbs), and if that weight concentrates on one side or one area, your body will protest within hours. Keep the heaviest items (hydration bladder, magazines) close to your body’s center, and use your plate carrier’s cummerbund to transfer some weight to your hips. Do a trial run at home — wear your full loadout and walk around for 30 minutes to identify any friction points or discomfort.
Speedsoft Loadout
If MilSim is a loaded long-distance march, Speedsoft is a 100-meter sprint. Everything exists to make you faster, and anything that doesn’t serve that goal is dead weight.
Carrying system choices are extreme. Many Speedsoft players don’t even wear a chest rig — they rely on hoodie pockets or a simple magazine belt to get by. If they do use a carrying system, it’s the lightest possible micro chest rig or a speed rig with nothing but mag slots. Less gear on your body means a smaller profile and harder to hit.
For weapons, Hi-CAPA GBB pistols reign supreme in Speedsoft. A properly upgraded Hi-CAPA with a short-stroke kit and lightweight slide, combined with raw trigger finger speed, can match AEG fire rates. Other popular choices include the AAP-01 (excellent value for beginners) and HPA-converted short M4s.
Speedsoft protection gear differs from every other playstyle. Paintball-style full-face masks (like the Dye i4 or i5) are the standard — they provide full face protection with better visibility and breathability than a goggles-plus-mesh-mask combo, and they’re lighter and more streamlined. Knee pads are near-essential since sliding is a core Speedsoft technique. As for clothing, athletic hoodies, shorts with knee pads, and indoor court shoes are the standard uniform — looking more like a paintball player than a military enthusiast.
Related reading: For more on Speedsoft rules, techniques, and gear, see our Complete Speedsoft Beginner’s Guide.
Themed Loadouts: PMC, Multicam, and Sniper Builds
Beyond playstyle-based loadouts, many airsoft players build their gear around a specific aesthetic or role identity. These themed loadouts are some of the most searched-for setups in the airsoft community, and for good reason — they add a layer of immersion and personality to the game that a generic kit just can’t match.
PMC (Private Military Contractor) Loadout
The PMC look has exploded in popularity thanks to video games and movies featuring private military contractors. What makes a PMC airsoft loadout stand out from a standard MilSim setup is the deliberate mix of civilian and tactical gear. You’re not trying to look like a uniformed soldier — you’re going for that rugged, “hired gun” aesthetic.
Start with civilian-style clothing as your base layer. A flannel shirt, cargo pants in earth tones, or even jeans paired with a tactical vest creates the classic PMC silhouette. Avoid standard military camo patterns like Woodland or MARPAT — PMC operators typically wear solid colors like coyote brown, tan, khaki, or olive drab. The idea is looking like someone who picks their own gear rather than someone issued a uniform.
For your carrying system, a slick plate carrier or a low-profile chest rig works best. PMC loadouts are inherently minimalist — you’re carrying what you need for the mission and nothing more. A JPC-style carrier with just a triple mag shack on the front, a radio on the shoulder, and maybe an admin pouch is the sweet spot. Keep it lean. Some players go even lighter with just a battle belt and a sidearm holster for that contractor-on-a-quick-job vibe.
Headgear is where you can really sell the PMC look. Baseball caps, boonie hats, or Mechanix-style tactical gloves are all staples. Add a pair of Oakley-style tactical sunglasses and you’ve nailed the aesthetic. Some players add a shemagh scarf around the neck for extra flair.
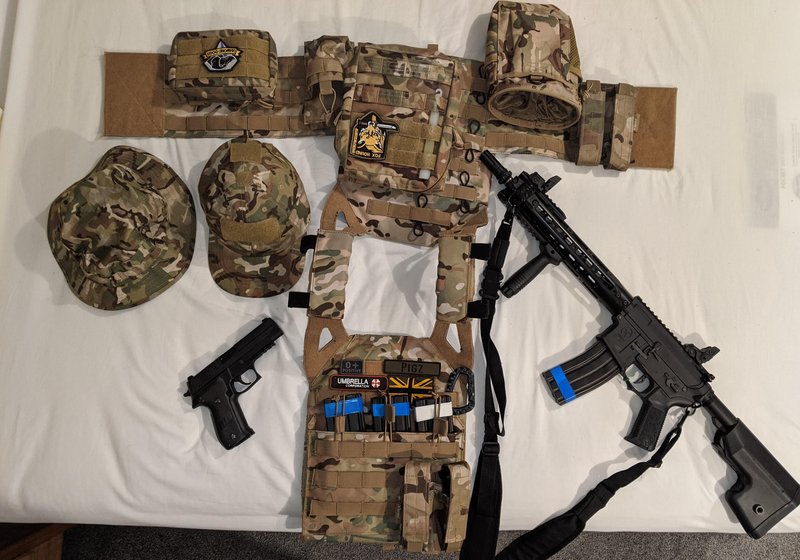
Multicam Loadout
Multicam is the single most popular camouflage pattern in airsoft, and building a full multicam loadout is almost a rite of passage for players who want a cohesive military appearance. The appeal of Multicam is its versatility — it works reasonably well across woodland, arid, and transitional terrain, making it a solid choice regardless of where you play.
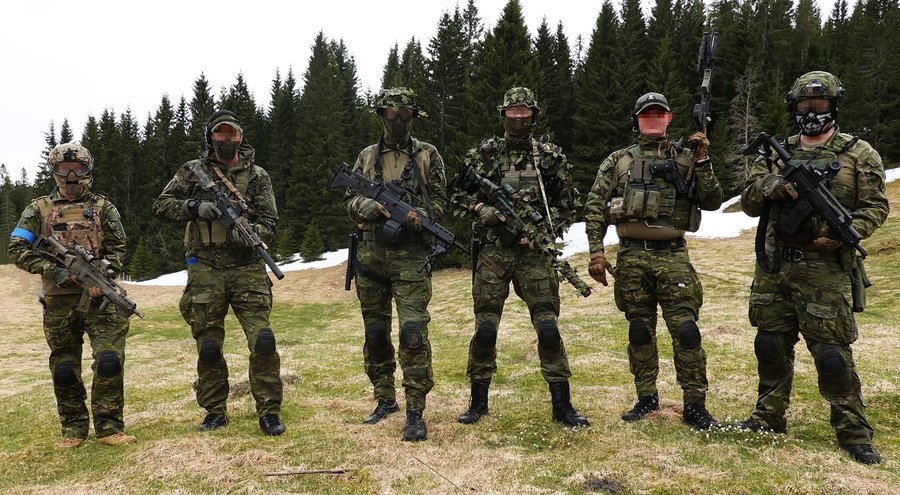
Building a complete multicam loadout means matching your uniform, plate carrier or chest rig, pouches, and even accessories in the same pattern. Crye Precision combat shirts and pants are the gold standard, but excellent replicas from brands like Emerson and TMC run $30-60 per piece and look nearly identical from a few feet away. Pair these with a multicam plate carrier (JPC or CPC style) and multicam MOLLE pouches, and the overall effect is impressive.
One thing to watch out for: there are now several multicam variants — Multicam Tropic (greener, for jungle environments), Multicam Arid (lighter, for desert), Multicam Black (popular for law enforcement impressions and Speedsoft), and Multicam Alpine (white-based, for snow). Mixing different multicam variants looks odd, so pick one and commit. Standard Multicam is the safest bet for most environments and the easiest to find gear in.
Multicam loadouts pair naturally with MilSim events, where one faction is often assigned multicam. But even for casual play, a matched multicam setup simply looks sharp and signals that you take the hobby seriously.
Airsoft Sniper Loadout
Sniping in airsoft is a completely different game from regular skirmishing, and the loadout reflects that. Where a rifleman needs quick access to multiple magazines and fast reloads, a sniper prioritizes concealment, patience, and carrying only the essentials.
Your primary weapon is obviously a bolt-action sniper rifle — popular choices include the Tokyo Marui VSR-10 and its many clones, the Silverback SRS, and the Novritsch SSG series. Upgrade your hop-up and inner barrel for consistency at range, because stock airsoft snipers rarely perform well enough to justify the playstyle. A quality scope in the 3-4x magnification range is the sweet spot for airsoft distances — anything higher actually becomes harder to use because airsoft engagement ranges rarely exceed 70 meters.
For concealment, a ghillie suit or ghillie cape transforms your effectiveness. A full ghillie suit provides maximum concealment but runs hot and restricts movement — best for patient, stationary snipers who set up a position and wait. A ghillie cape or 3D leaf suit covers just your upper body and is far more practical for mobile snipers who reposition frequently. Budget options run $30-50, while purpose-built airsoft ghillie systems from brands like Novritsch or Kicking Mustang run $80-150. Many experienced snipers build their own using a base suit and natural vegetation from the field — it’s more work but gives the best results for your specific environment.
The carrying system for a sniper loadout is minimal by design. A low-profile chest rig or even just a battle belt with a sidearm holster, one or two spare sniper magazines, and a pistol with extra mags is all you need. You don’t want bulk or dangling pouches that catch on brush or rustle when you move. Many snipers carry a compact hydration bladder since they’re often far from resupply and can’t break concealment easily.
Don’t forget a reliable sidearm — as a sniper, you’ll inevitably encounter enemies at close range where your bolt-action rifle is too slow. A gas blowback pistol with two spare magazines gives you enough firepower to disengage from surprise encounters.
Related reading: For protective eyewear that works with ghillie hoods, see our Airsoft Mask & Goggles Guide.
Team Role Loadouts: Gearing Up for Your Position
When you play as part of an organized squad — whether at a MilSim event or just a regular game day with friends who communicate — your role within the team should shape your loadout differently than your personal playstyle alone. A four-person squad where everyone carries identical gear is missing opportunities. Here’s how to think about loadout configuration based on your team position.
The rifleman is the backbone of any squad. Your job is straightforward: engage targets, hold positions, and stay in the fight as long as possible. A mid-capacity plate carrier or chest rig with four to six rifle magazines covers your ammo needs. You want quick, reliable magazine changes above all else — mount your mag pouches where your support hand naturally falls. Carry a smoke grenade or two for covering advances and retreats. The rifleman’s loadout is the most balanced of all roles: moderate weight, moderate ammo, maximum flexibility. If you’re unsure what role to start with, this is it.
The support gunner trades mobility for sustained firepower. If you’re running a SAW-style LMG or a high-capacity drum magazine AEG, your loadout revolves around feeding that beast. A sturdy plate carrier with wide shoulder straps helps distribute the extra weight of an LMG, and you’ll want a sling system that lets you brace the weapon while standing. Ammo management is different for support gunners — instead of individual magazine pouches, you might carry box magazines or large-capacity pouches. Keep your loadout simple beyond the weapon system itself: one sidearm, water, and basic utilities. You’re already carrying more weight than anyone else on the team.
The designated marksman sits between a rifleman and a sniper. You’re engaging at longer range than your teammates but still moving with the squad, not hiding in a bush 200 meters away. An upgraded AEG or DMR-class rifle with a low-power optic (1.5-4x) is the standard weapon, and your loadout should reflect that middle ground. A chest rig keeps you light enough to reposition quickly, while four to five magazines of heavier-weight BBs give you enough ammo for precision engagements. A small pair of binoculars or a monocular can be surprisingly useful for spotting targets and calling out positions to your squad before engaging.
The breacher or point man leads the entry into rooms and contested spaces. This is the most demanding role physically, and your gear should be the lightest on the team. A micro chest rig or battle belt with just two to three magazines, a sidearm, and perhaps a grenade for room clearing is all you need. Speed and reaction time matter more than ammo capacity in this role — if you’re doing your job right, you’re making first contact and your teammates are cleaning up. Knee pads are practically mandatory since you’ll be dropping to low positions constantly.
Specialized Loadouts: Medic and Shotgun Builds
Beyond the standard playstyles and team roles, two specialized loadouts come up constantly in the community — the medic and the shotgunner. Both are role builds that change how you carry gear in ways the generic kit never accounts for, and both are surprisingly fun to play once you understand what the role actually demands on the field.
The airsoft medic loadout is built around one job: reaching downed teammates fast and getting them back into the fight. Most fields that run a medic rule require you to apply a “bandage” — usually a colored band, a token, or a timed hold on the casualty — so your loadout has to make those medic items instantly accessible while still letting you fight your way to whoever just got tagged. The trick most new medics miss is that you are a combatant first and a medic second; if you over-build for the medical role and skimp on ammo, you get pinned down before you ever reach the casualty. A practical medic kit is a chest rig or slick plate carrier with three to four rifle mags, a dedicated front-mounted medic pouch (a repurposed admin or GP pouch works perfectly) holding your bandages, respawn tokens, and a few spares for teammates, plus a brightly visible medic marker so your team can find you in a firefight. Keep the medic pouch on your support side at chest height where you can rip it open one-handed while your other hand stays on the gun. A reliable sidearm matters more for a medic than almost any other role, because you are constantly moving into contested ground to revive people and a fast pistol transition can be the difference between a successful revive and trading two players for nothing.
The airsoft shotgun loadout flips the usual magazine logic on its head. Tri-shot spring shotguns like the Tokyo Marui M870 or the CYMA breachers don’t feed from a single high-capacity mag — they run on shells that each hold a small number of rounds and need manual reloading, so shell management becomes the entire focus of your carrying system. Instead of rifle mag pouches, you want shotgun shell caddies or open-top pistol-mag pouches that hold loose shells, and you want a lot of them, because a shotgunner burns through shells fast in the close-range fights where the platform shines. A battle belt with shell loops and a couple of GP pouches, or a minimalist chest rig with the front panel dedicated to shell storage, is the standard setup. Since shotguns dominate at CQB distances, build the rest of the loadout light and mobile like a breacher kit — knee pads, a micro footprint, and a pistol as backup for when you’ve run your shells dry mid-push. The shotgun is a high-skill, high-reward CQB weapon, and a loadout tuned for rapid shell access is what makes it viable rather than a novelty.
If you’re trying to keep costs down across any of these builds, a cheap airsoft loadout doesn’t mean a bad one. Prioritize eye protection and footwear, buy a budget chest rig instead of a plate carrier, run mid-cap mags rather than expensive hi-caps, and pick up used pouches from community marketplaces — you can put together a fully functional medic, shotgun, or casual kit for well under $200 in gear by spending where it counts and waiting on the cosmetic upgrades.
Accessory Planning: The Gear Beyond Magazines
A well-rounded loadout isn’t just about guns and mags. Those seemingly minor accessories often make the biggest difference in your on-field experience.
A dump pouch is, in my opinion, the single most underrated airsoft accessory. During a firefight, you can’t carefully slide an empty magazine back into its pouch — you just need to toss it somewhere and keep shooting. A foldable dump pouch sits flat when empty and opens up when you need it. They run $10-20 and solve a problem you didn’t know you had until you’re standing there with an empty mag in each hand and nowhere to put them.
An admin pouch sits on the upper front of your plate carrier and holds your phone, map, spare batteries, or field rules card. Not everyone needs one, but if you’re playing MilSim or like having your phone accessible for photos, a small admin pouch is incredibly practical.
A hydration system is practically mandatory for any session longer than an hour. A belt-mounted water bottle works, but a hydration bladder with a drinking tube lets you hydrate without stopping — particularly important in MilSim scenarios. Most plate carriers have a built-in hydration bladder compartment on the back panel, so look for this feature when shopping.
Finally, a word on MOLLE configuration logic. Don’t mount everything on your front panel — too much weight pulls you forward and makes going prone uncomfortable. Put your most-used items (magazines, dump pouch) in the most accessible positions, and less-used items (hydration, admin pouch) on the sides or back. Once configured, practice magazine changes and gear access at home several times to make sure everything is reachable without fumbling.
Budget Planning: Three Tiers of Complete Loadouts
Regardless of your budget, you can assemble a functional loadout. The key is spending money where it matters most — eye protection and footwear are absolutely non-negotiable, while everything else can start budget-friendly and upgrade later as you learn what you actually need.
An entry-level loadout runs about $150-250 (not including your gun). This gets you a Condor-tier chest rig or entry plate carrier ($40-60), three to four magazine pouches ($20-30), a dump pouch ($10-15), basic tactical boots ($50-80), goggles and face protection ($30-50), and gloves ($15-20). This setup is perfectly adequate for comfortable all-day walk-on games.
A mid-range loadout runs $300-500. Upgrade to a JPC-style plate carrier or modular Spiritus-style chest rig ($80-120), quality MOLLE mag pouches ($40-60), a battle belt system ($40-60), waterproof tactical boots ($80-120), anti-fog goggles plus lower face mesh ($50-80), and a hydration carrier ($20-30). This tier handles most scenarios, including entry-level MilSim events.
An advanced loadout runs $500+. At this level, you’re chasing specific brands and fine-tuned modularity. Genuine or high-quality Crye JPC 2.0 replicas ($150-300), Esstac KYWI magazine pouches ($20-30 each), a Ronin or AWS tactical belt ($80-150), Merrell or Salomon tactical boots ($120-180), and a communications setup ($60-100). Advanced players often maintain multiple loadout modules — swapping magazine pouch configurations on the same belt and carrier to quickly switch between playstyles.
Using a Shot Timer to Optimize Your Loadout
Your loadout isn’t just about aesthetics — what matters most is whether your gear actually works smoothly in action. And the best tool for measuring operational efficiency is a shot timer.
Use a shot timer to benchmark key actions across different configurations. For example, magazine changes — is it faster pulling a mag from your chest rig’s front panel or from your battle belt? Does moving your mag pouches from left to right make a difference? These questions get definitive answers after a few timed reps.
Some actions worth benchmarking include: rifle magazine changes (time from pulling a fresh mag off your rig to the first shot after reloading), pistol transitions (time from downing your rifle to drawing and firing your pistol), and accessory access smoothness (grabbing your water bottle, retrieving items from your admin pouch). If any action feels clunky, the issue might be pouch placement, retention tension, or items interfering with each other.
A good loadout doesn’t make you “think” about where things are — your hands just know. This takes time to develop, but deliberate practice with a shot timer dramatically accelerates the process.
Related reading: Learn more about shot timer training methods in our Shot Timer App Guide and Shooting Drills Guide.
Frequently Asked Questions
What is an airsoft loadout?
An airsoft loadout is the complete set of gear you wear and carry on the field — your primary weapon, sidearm, magazines, magazine carrying system (plate carrier, chest rig, or battle belt), eye and face protection, footwear, gloves, ammunition, batteries, and any utility items like a dump pouch, hydration system, or radio. It’s not just a shopping list — a good loadout is configured so every piece works together: mag pouches positioned where your support hand naturally falls, dump pouch within easy reach during reloads, hydration accessible without breaking position. Two players with identical gear can have completely different on-field experiences depending on how their loadout is laid out.
Is 300 FPS airsoft painful?
A 300 FPS airsoft BB hit is generally manageable — it stings on bare skin (like a strong rubber band snap) but won’t break skin or cause injury under most circumstances. Pain depends heavily on distance and what you’re wearing: at close range (under 30 feet), 300 FPS feels noticeably sharper than at 50+ feet because the BB hasn’t shed velocity. On bare hands, neck, or ears, even 300 FPS stings significantly, which is why long sleeves, gloves, and full-seal goggles plus a lower face mask are standard parts of any beginner loadout. Players sensitive to pain should add knee pads and consider a paintball-style full-face mask. Most outdoor fields cap velocity at 400 FPS and most indoor CQB fields at 350 FPS for exactly this reason.
What’s the best airsoft loadout in 2026?
The best airsoft loadout in 2026 isn’t a single fixed setup — it’s a chest rig or low-profile plate carrier configured for your specific playstyle. For most players, the current 2026 sweet spot is: a Spiritus Micro Fight-style chest rig ($40-80), three to four mid-cap rifle magazines, a dump pouch, full-seal goggles with a lower mesh mask, tactical boots with ankle support, and Mechanix-style gloves. This loadout runs $150-250 in gear (excluding the gun), handles every playstyle short of long-duration MilSim, and stays comfortable for full-day games. The 2026 trends moving away from heavy plate carriers toward lightweight chest rigs and battle belts continues, especially in warmer climates and Speedsoft scenes.
What is the best airsoft loadout for beginners?
Start with a simple chest rig, three to four magazine pouches, full-seal goggles with a lower face mesh mask, tactical boots with ankle support, and gloves. Skip the plate carrier for now — it adds weight and heat that new players don’t need. Your total gear cost (excluding your gun) should run about $150-250. Focus on comfort and protection first. Once you’ve played a few games and know what playstyle you enjoy, you can upgrade to a more specialized setup. The most common beginner mistake is buying too much gear before knowing what you actually need on the field.
How many magazines should I carry for airsoft?
For casual walk-on games, three to four rifle magazines on your rig plus one in the gun is plenty — you can resupply during breaks. CQB games need even fewer since rounds are short: two to three mags plus one loaded is enough. MilSim events are the exception — bring six to eight rifle mags minimum since mid-game resupply usually isn’t allowed. For pistol players, three to four gas magazines on a battle belt covers most situations. Always carry one more magazine than you think you’ll need, but don’t overload yourself — unused magazines are just dead weight slowing you down.
Plate carrier or chest rig — which is better for airsoft?
Neither is universally “better” — it depends on your playstyle and climate. Plate carriers offer more MOLLE space, a more complete tactical look, and better weight distribution for heavy loads, making them ideal for MilSim and players who carry lots of gear. Chest rigs are lighter, cooler in hot weather, and allow more freedom of movement, making them perfect for casual games, CQB, and warm climates. Many experienced players own both and choose based on the day’s game. If you can only buy one, a chest rig is the more versatile starting point for most players.
How do I set up MOLLE pouches on my plate carrier?
Thread the MOLLE straps on your pouch through the webbing rows on your carrier, weaving over and under each row from top to bottom, then snap or fold the retention tab at the bottom. Keep your most-used items (magazine pouches) on the front panel at chest height where your hands naturally reach. Put less-used items (admin pouch, radio) on the upper chest or sides. Avoid loading everything on the front — too much forward weight makes going prone uncomfortable and pulls your posture forward over long games. Leave your back panel for a hydration bladder or keep it empty for ventilation.
What’s the difference between a MilSim loadout and a regular airsoft loadout?
A MilSim loadout is built for extended operations lasting 12 to 48 hours with no mid-game resupply, so it includes survival gear alongside combat equipment: more magazines (6-8 minimum), a hydration system, rations, a simulated medical kit, communications radio, and navigation tools. Regular airsoft loadouts prioritize comfort for 3-4 hour game sessions with break-time resupply. MilSim events also typically have strict dress code requirements — specific camo patterns for each faction — while regular games have no uniform restrictions. Expect a MilSim loadout to weigh 8-12 kg versus 3-5 kg for a casual setup.
What should I bring to my first airsoft game?
The absolute essentials are your gun, eye protection (full-seal goggles), face protection (lower mesh mask), sturdy footwear with ankle support, and water. Beyond that, bring at least two spare magazines, a bag of 0.25g BBs, a charged battery plus a spare if you have one, and gloves. Wear long sleeves and pants to reduce the sting of BB hits on exposed skin. A chest rig or even a hoodie with deep pockets works for carrying magazines if you don’t have tactical gear yet. Don’t stress about having the perfect loadout on day one — many fields offer rental equipment, and experienced players at walk-on games are almost always happy to lend spare gear to newcomers.
How much does a complete airsoft loadout cost?
A basic but functional loadout including your gun costs roughly $300-450: about $150-180 for an entry-level AEG, $50-80 for boots, $30-50 for eye and face protection, $40-60 for a chest rig and pouches, and $30-50 for BBs, batteries, and gloves. You can cut costs by starting with rental gear at your local field or buying used equipment from community forums. Mid-range setups with a quality plate carrier and better boots run $600-900 total. Serious MilSim or competition loadouts with premium gear, communications equipment, and multiple weapon systems can easily exceed $1,000.
Do I need a sidearm for airsoft?
For most players, a sidearm is a nice-to-have, not a necessity. Your primary AEG or rifle will handle the vast majority of situations. Sidearms become genuinely useful in specific scenarios: MilSim events where your primary might run out of ammo and resupply isn’t available, sniper roles where you need a backup for close-range encounters (most fields have a minimum engagement distance for snipers), and CQB games where a pistol’s compact size gives you an edge in tight spaces. If you do decide to add one, budget $100-150 for a reliable GBB pistol like the ASG CZ P-09 or Elite Force Glock 19, plus $40-60 for a holster and two spare magazines.
What order should I buy airsoft gear in?
Buy safety gear first (goggles, face mask, boots — about $80-120), then rent at your local field once or twice to confirm you enjoy the sport. Next, get your primary AEG ($150-200). After a few games, add a carrying system and extra magazines ($60-100) based on your preferred playstyle. Finally, fill in comfort items like gloves, a dump pouch, and a battery upgrade as specific needs arise. This staged approach prevents wasting money on gear that doesn’t match how you actually play.
What’s in an airsoft medic loadout?
An airsoft medic loadout is a normal combat kit with one addition: a dedicated, instantly-accessible medic pouch. Run a chest rig or slick plate carrier with three to four rifle magazines so you can still fight, then mount a front GP or admin pouch on your support side holding your bandages, respawn tokens, and spare medic items for teammates. Add a brightly visible medic marker so your squad can find you, and carry a reliable sidearm — medics constantly push into contested ground to revive people, and a fast pistol transition saves revives. The most common mistake is over-building the medical side and running out of ammo before you reach the casualty. You’re a fighter first, a medic second.
What does an airsoft shotgun loadout look like?
A shotgun loadout is built entirely around shell management, not magazines. Tri-shot spring shotguns like the Tokyo Marui M870 run on shells that hold only a few rounds each and reload manually, so swap rifle mag pouches for shotgun shell caddies or open-top pouches that hold loose shells — and carry plenty, because shotgunners burn through shells fast. A battle belt with shell loops or a micro chest rig with the front panel dedicated to shells is standard. Since shotguns excel at CQB range, keep the rest of the kit light and mobile like a breacher build, add knee pads, and bring a pistol as backup for when you run dry mid-push.
What’s a good casual airsoft loadout?
For casual walk-on games, a casual airsoft loadout is a chest rig (or lightweight plate carrier) with three to four rifle mags, a dump pouch on your belt, full-seal goggles with a lower mesh mask, tactical boots, gloves, and water. That’s it — you can resupply during breaks, so there’s no need for the heavy ammo loads that MilSim demands. Total gear cost lands around $150-250 excluding your gun. The goal of a casual setup is comfort across a 3-4 hour game day, so prioritize ventilation and easy mag access over capacity and tactical looks.
What is a speedsoft loadout?
A speedsoft loadout strips everything down to maximize speed and minimize your profile. Most speedsoft players skip a full rig entirely, running a lightweight speed rig or magazine belt with nothing but mag slots — some just use hoodie pockets. The weapon of choice is usually an upgraded Hi-CAPA GBB pistol or an HPA-converted short M4, paired with a paintball-style full-face mask (Dye i4/i5) and knee pads for sliding. Athletic clothing and indoor court shoes complete the look. The whole philosophy is that less gear means a smaller target and faster movement, so anything that doesn’t directly help you move or shoot gets left at home.
Wrapping Up
Building an airsoft loadout is an ongoing process of adjustment and refinement. Your first setup doesn’t need to be perfect — what matters is getting out on the field and discovering what works and what doesn’t through actual play. Even experienced players are constantly tweaking their loadouts — one more mag pouch or one fewer, dump pouch on the left or right, tighten this strap just a bit more.
The best loadout is always the one that works best for you. Other people’s configurations are great for reference, but there’s no need to copy them exactly. Your body type, your usual field type, your playstyle, and your budget all combine to determine what configuration serves you best. Start with a simple chest rig and a few mag pouches, experiment and upgrade gradually — that process of discovery is part of what makes airsoft so enjoyable.
Related Articles
- Complete Airsoft Gear Guide - Detailed buying advice for every gear category
- Tactical Vest & Plate Carrier Guide - In-depth plate carrier, chest rig, and battle belt reviews
- Airsoft Helmet Guide - FAST, MICH, and bump helmets compared
- Airsoft Mask & Eye Protection Guide - Choose the right face and eye protection
- G&G CM16 Raider 2.0 Guide - The most recommended beginner AEG
- CQB Close Quarters Battle Guide - CQB tactics and gear configuration
- Airsoft Team Tactics Guide - Squad tactics and communication for outdoor games
- Speedsoft Beginner’s Guide - Speedsoft gear and techniques
- Airsoft Smoke Grenade Guide - Smoke tactics for team play
- Airsoft Field Guide - Find and choose the right airsoft field
- Airsoft & Firearms Cross-Training Guide - Using airsoft gear for shooting practice
- Shot Timer App Guide - Improve training efficiency with a shot timer
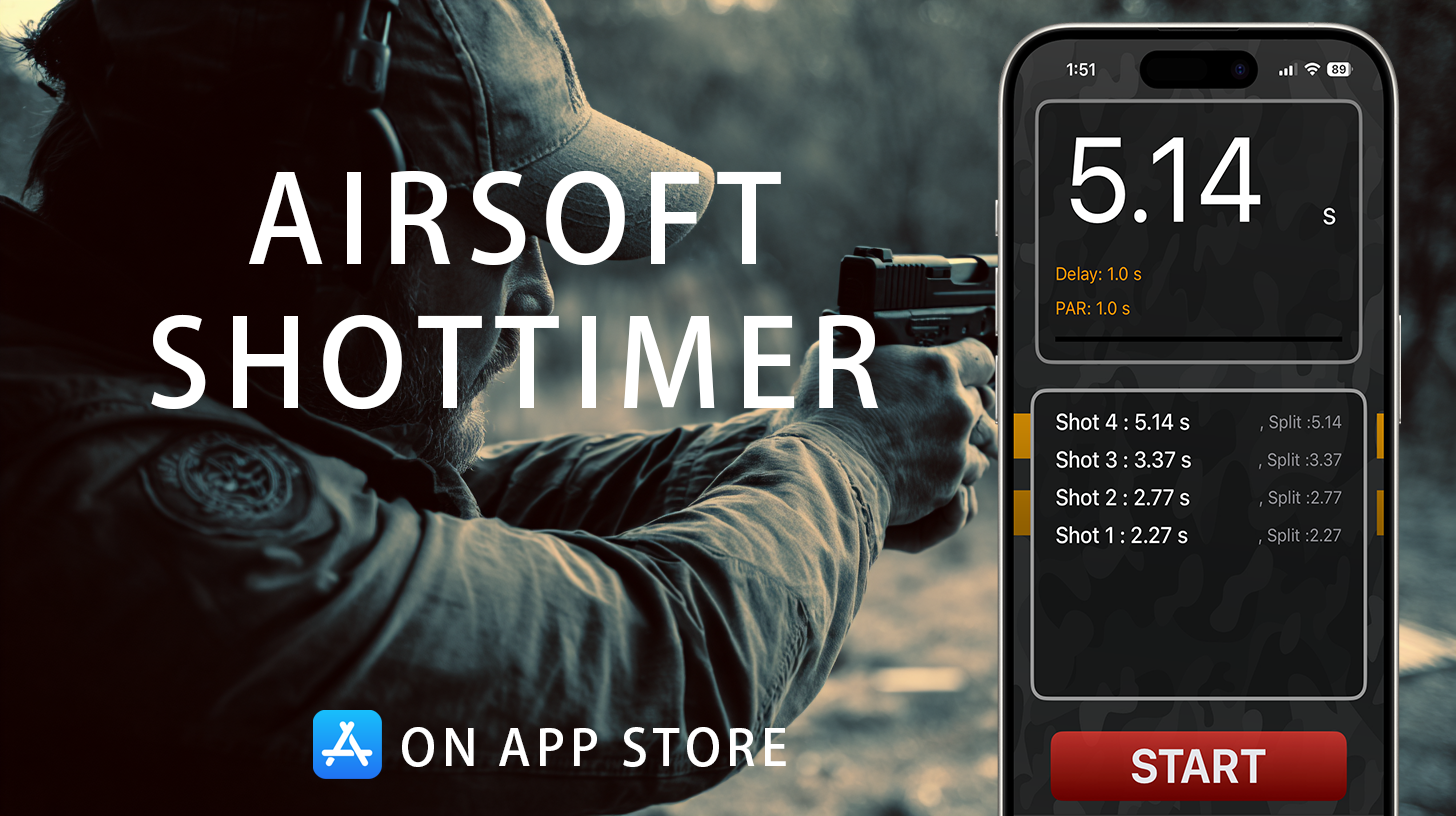
Put a Shot Timer in Your Pocket
Airsoft Shot Timer is a free shot timer app tuned for airsoft and Action Air — it picks up BB gun shots, tracks your split times, and saves you the cost of a $150+ hardware timer for IPSC/IDPA practice.

- Airsoft
- Airsoft Loadout
- Airsoft Loadout Ideas
- Airsoft Loadout Builder
- Best Airsoft Loadout
- Airsoft Loadout 2026
- 10 Airsoft Loadouts
- Airsoft Loadout Tier List
- Airsoft Loadout Kit
- Airsoft Kit
- Plate Carrier
- Chest Rig
- Battle Belt
- MilSim
- CQB
- Speedsoft
- Speedsoft Loadout
- Tactical Gear
- MOLLE
- Airsoft Vest
- PMC Loadout
- Airsoft Sniper Loadout
- Airsoft Medic Loadout
- Airsoft Shotgun Loadout
- Casual Airsoft Loadout
- Cheap Airsoft Loadout
- Multicam
- Airsoft Gear Setup
- Airsoft Budget Loadout
- Airsoft Loadout Essentials
- Airsoft Gear Checklist
- What to Bring Airsoft
- Best Airsoft Gear 2026
- Beginner Airsoft Loadout
- Airsoft Loadout for Beginners
- Airsoft Budget Build
- First Airsoft Game Gear