How to Clean a Pistol in 6 Steps — Beginner-Friendly Gun Cleaning Guide 2026
Why Gun Cleaning Is a Skill Every Shooter Needs
The first time I took my pistol apart for cleaning, I stared at the recoil spring sitting on the mat and wondered if I’d ever get it all back together. That’s a feeling every new gun owner knows. But here’s the thing — cleaning a pistol is far simpler than it looks, and once you’ve done it two or three times, the whole process becomes second nature.
A clean gun runs. A dirty gun surprises you at the worst possible moment. I’ve watched a fellow IPSC competitor’s slide lock up mid-stage because carbon buildup had gummed up his rails. He’d skipped cleaning for weeks. That malfunction cost him the match, and it was entirely preventable.
This guide walks you through the complete pistol cleaning process in six clear steps, from field stripping to reassembly. You’ll also learn the cleaning frequency that actually makes sense for your shooting habits, when your recoil spring is telling you it’s time for a replacement, and how to maintain airsoft GBB and AEG guns if that’s your platform. Whether you just bought your first handgun or you’re a competitive shooter looking to dial in your maintenance routine, everything you need is right here.
💡 Further Reading: Learn about pistol malfunctions and how to clear them in our Pistol Malfunction Clearance Complete Guide. Safety is the foundation of everything — also check out our Shooting Safety Rules Complete Guide.
Safety Preparation Before Cleaning
Safety is always the first priority. Before beginning any cleaning work, you must ensure the firearm is completely unloaded.
Safety Check Steps
- Remove the magazine: Fully remove the magazine from the firearm
- Rack the slide: Pull the slide back multiple times to confirm the chamber is empty
- Visual inspection: Look into the chamber to confirm it’s empty
- Tactile confirmation: Insert your finger into the chamber to double-check
- Remove ammunition: Move all ammunition to another room or outside your work area
Workspace Preparation
- Choose a well-ventilated area—cleaning solvents produce volatile fumes
- Lay down an absorbent pad or old newspapers to protect your work surface
- Prepare safety glasses and nitrile gloves to protect eyes and skin
- Ensure adequate lighting to see details clearly
- Turn off distractions like TV to focus on the cleaning process
⚠️ Warning: Cleaning solvents contain chemicals that may irritate skin and respiratory systems. Always work in ventilated areas with proper protective equipment.
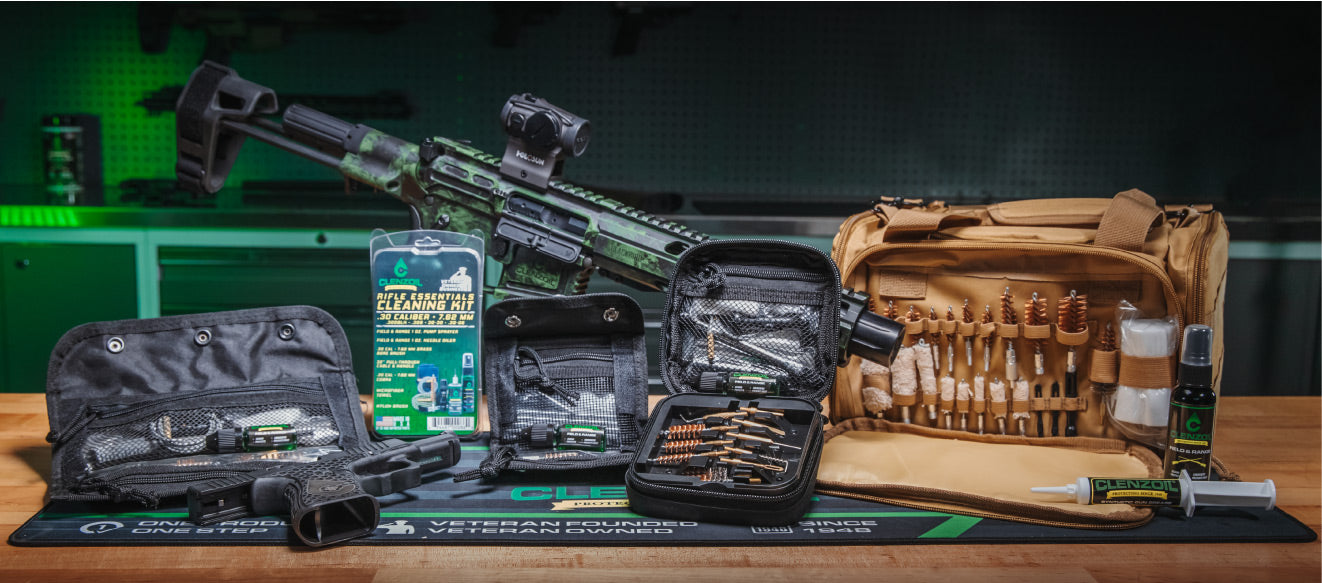
Essential Cleaning Tools and Products
Basic Cleaning Tools
| Tool | Purpose | Notes |
|---|---|---|
| Cleaning Rod | Used with brushes and patches to clean barrel | Choose appropriate caliber; coated rods recommended |
| Bore Brush | Removes carbon deposits from barrel | Brass material is gentler on rifling |
| Patches/Cloths | Absorbs solvent, wipes oil and debris | Use correct size |
| Nylon Brush/Toothbrush | Cleans small crevices and parts | Avoid steel brushes that damage surfaces |
| Boresnake | Quick barrel cleaning | Ideal for field maintenance |
| Bore Guide | Protects muzzle crown and rifling | Prevents cleaning rod scratches |
Three Categories of Cleaning Products
Gun cleaning products fall into three main categories, each with specific purposes:
1. Cleaning Solvents
Used to dissolve and remove carbon deposits, copper fouling, and powder residue.
Recommended Products:
- Hoppe’s No. 9: Classic choice, proven effective since the early 1900s
- Hoppe’s Elite: Odorless formula, ideal for indoor use
- Real Avid Bore-Max: Designed for deep cleaning
2. Lubricants
Reduces friction between metal parts, ensuring smooth slide and action operation.
Recommended Products:
- Break-Free LP: Light lubricant, suitable for daily use
- Lucas Gun Oil: Odorless formula, ideal for hunting applications
- Mobil 1 Synthetic: Economical alternative
3. CLP (Clean, Lubricate, Protect)
Three-in-one products that clean, lubricate, and protect against rust simultaneously.
Recommended Products:
- Break-Free CLP: Military standard issue, well-balanced all-around performance
- Gunzilla CLP: Non-toxic eco-friendly formula, suitable for indoor use
- Lucas Extreme Duty CLP: Rapid carbon removal
CLP vs Dedicated Products Comparison
| Type | Pros | Cons | Best For |
|---|---|---|---|
| CLP 3-in-1 | Convenient, easy to carry | Not as effective as dedicated products | Field maintenance, daily care |
| Dedicated Products | Better results, targeted performance | Requires multiple products, more work | Deep cleaning, competitive shooters |
💡 Tip: Use CLP for daily maintenance, then use dedicated solvents and lubricants every few cleanings for deep cleaning.
How to Clean a Pistol: 6 Steps From Start to Finish
The entire process takes about 20 to 30 minutes. Once you’ve done it a few times, you’ll move through these steps without even thinking about it.
Step 1: Field Strip the Pistol
Disassemble the pistol into its four major components: the slide, barrel, recoil spring, and frame. Every semi-automatic pistol follows roughly the same procedure — lock the slide back, rotate the takedown lever, and slide the upper assembly forward off the frame. Your owner’s manual has the exact sequence for your specific model, and it’s worth keeping it nearby for the first few attempts.
You only need a basic field strip here. Don’t go pulling out the firing pin or trigger group unless you have specific training. Over-disassembly creates more problems than it solves for routine cleaning.
Step 2: Clean the Barrel
The barrel is where the real dirt lives. Every round fired leaves behind carbon, copper, and unburned powder residue. Always clean from the breech end (rear) toward the muzzle (front) — pushing a rod in from the muzzle risks damaging the crown, which directly affects accuracy.
Start by applying cleaning solvent to your bore brush and running it through the barrel about ten times. This loosens the carbon buildup. Then switch to solvent-soaked cotton patches and push them through one at a time. Keep going until a patch comes out without black or green stains. Finish with a dry patch to remove residual solvent, then apply a very thin layer of lubricant to the barrel exterior, especially the feed ramp where the next round slides into the chamber.
One trick that makes a noticeable difference: after applying solvent, let it sit for three to five minutes before you start scrubbing. The solvent needs time to dissolve carbon — wiping it off immediately wastes most of its cleaning power.
Step 3: Clean the Slide
The slide interior accumulates carbon and oil residue, affecting smooth operation.
Key Areas to Clean:
- Rails: Sliding surfaces that contact the frame
- Breech Face: Area where the bolt contacts the cartridge base
- Extractor: The claw that grips the spent casing
- Ejector: The part that kicks out the casing
Use a nylon brush or solvent-dampened cloth to wipe these areas, removing all visible carbon deposits.
Step 4: Clean the Frame
The frame interior has less carbon buildup but accumulates dust and lint (especially for concealed carry guns).
Key Areas to Clean:
- Rail Grooves: Parts that contact the slide
- Trigger Group: Clean carefully without disassembly
- Magazine Well: The channel where the magazine inserts
Gently wipe with a solvent-dampened cloth, avoiding excessive solvent in the trigger group interior.
Step 5: Lubrication
Lubrication is key to maintenance, but too much or too little causes problems.
Lubrication Principle: Less is more
Parts That Need Lubrication:
- Underside of the slide (entire sliding surface)
- Frame rails
- Barrel exterior
- Recoil spring (thin coat)
- Barrel hood and locking lugs
Amount:
- Just one small drop of oil per lubrication point
- Spread evenly into a thin film with finger or cloth
- Wipe off excess oil to prevent dust accumulation
⚠️ Note: Excess lubricant attracts dust and debris, actually causing malfunctions. After applying, wipe off excess with a dry cloth.
Step 6: Reassembly and Function Check
- Reassemble the pistol in reverse order per the manual
- Confirm all parts are properly seated
- Perform function checks:
- Rack the slide, confirm smooth operation
- Dry fire with empty chamber, confirm firing mechanism works
- Test slide release
- Test magazine release
- Check safety mechanisms (if applicable)
How Often Should You Clean Your Gun?
One of the most common questions new gun owners ask is how often they actually need to clean their firearm. The honest answer depends on how you use it.
| Usage Scenario | Recommended Frequency | Notes |
|---|---|---|
| After each range session | Quick clean (Boresnake + CLP) | Prevents carbon from hardening |
| Every 300-500 rounds | Complete cleaning (field strip + deep clean) | Standard for regular shooters |
| Weekly | Wipe down and inspect (EDC carry guns) | Removes pocket lint and sweat |
| Monthly | Complete cleaning | Even for unfired storage guns |
| After corrosive ammo | Immediate complete cleaning | Corrosive residue damages barrels quickly |
Recommendations for Competitive Shooters
If you’re an IPSC/IDPA competitive shooter with high round counts:
- After practice days: At minimum, quick clean the barrel with Boresnake
- Day before competition: Complete cleaning to ensure optimal condition
- Match day: Don’t over-clean or over-oil, avoid affecting feel
💡 Shot Timer Training Tip: Clean your firearm after extensive dry fire training too, as snap caps and repeated trigger manipulation produce wear debris.
Recoil Spring Replacement: When to Replace and How to Tell
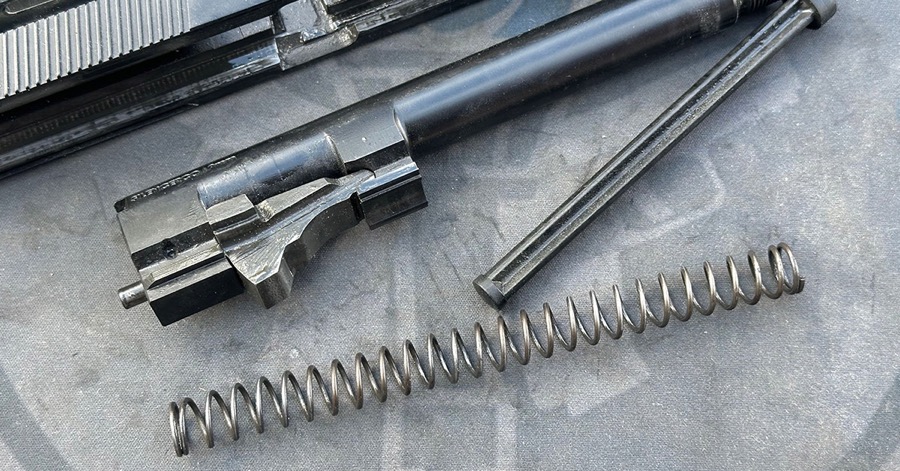
When you’re cleaning your pistol, it’s easy to focus on the barrel and slide while overlooking one unassuming but critical component — the recoil spring. This spring is responsible for pushing the slide back into battery, completing the extraction and feeding cycle. It’s the unsung hero of reliable pistol operation, and when it gets tired, mysterious malfunctions start showing up.
Most full-size pistols have a recoil spring lifespan of roughly 3,000 to 5,000 rounds. However, if you’re shooting a subcompact — like a Glock 43 or SIG P365 — the single spring design handles more stress and may need replacement around 1,500 rounds. If you regularly train with +P ammunition, it’s wise to inspect your spring every 2,000 rounds. IPSC and USPSA competitive shooters, who put high round counts through their guns, will often proactively replace the recoil spring before major matches to avoid match-day surprises.
So how do you know it’s time for a replacement? The most obvious sign is a change in ejection distance. If your spent casings suddenly start flying much farther than usual — going from landing six to eight feet away to sailing fifteen feet or more — that’s a clear signal the spring has lost tension. Another common symptom is failure to return to battery, where the slide doesn’t fully close after firing and you need to give it a manual push. Feeding issues and frequent jams can also be spring-related, since a weakened spring doesn’t drive the slide forward with enough force to reliably chamber the next round.
Every time you field strip your pistol for cleaning, take a moment to inspect the recoil spring. Remove it and give it a visual check — look for obvious bending, deformation, or uneven compression marks. You can also compress it by hand and compare the resistance to when it was new. If it feels noticeably softer, it’s time for a swap. Always use factory-spec replacement springs, as different spring weights will affect the operating cycle and reliability of your pistol.
How to Clean and Maintain Your Recoil Spring
Many shooters meticulously clean their barrel and slide but give the recoil spring barely a wipe before reassembly. Proper recoil spring maintenance isn’t complicated, but doing it right can noticeably extend the spring’s service life. The basic approach is to dry-brush the spring along its spiral direction with a nylon brush, removing carbon residue, metal shavings, and old oil buildup trapped between the coils. For stubborn fouling, use a cleaning patch soaked in Hoppe’s No. 9 and work it along the spring’s diameter, letting the solvent dissolve embedded carbon deposits.
After cleaning, the lubrication principle is the same as for other parts — less is more. Some shooters prefer applying a thin coat of dry-film lubricant, which doesn’t attract dust once dried, making it ideal for a component that cycles at high speed. If you use traditional liquid gun oil, apply only the thinnest possible layer and wipe off any excess with a dry cloth. Too much lubricant on a recoil spring actually becomes a dust and debris collector, accelerating wear over time.
Recoil Spring Material Differences
When shopping for replacement recoil springs, material is an easily overlooked factor that makes a significant difference in longevity. The market currently offers two primary materials: chrome silicon steel and stainless steel. Chrome silicon has markedly better fatigue resistance and handles compression set more effectively — under identical conditions, a stainless steel recoil spring might start showing fatigue signs around 3,000 rounds, while a chrome silicon version can last 10,000 rounds or more before needing replacement. Stainless steel’s advantage lies in superior corrosion resistance, which matters if your gun frequently encounters moisture or is carried concealed where sweat is a constant enemy. For high-volume IPSC and IDPA shooters, chrome silicon is typically the smarter choice.
💡 Practical Tip: Track your round count in a training log so you can plan recoil spring replacements based on cumulative rounds rather than waiting for problems. Pair with a Shot Timer to track training data and more precisely monitor equipment condition. For detailed cleaning tool recommendations, check out our Gun Cleaning Kit Guide.
Airsoft Gun Maintenance Guide
GBB (Gas Blowback) Maintenance
Gas blowback guns operate similarly to real firearms, and maintenance is comparable but with key differences.
GBB Maintenance Focus Areas
-
Barrel Cleaning
- Use cleaning rod and soft cloth to clean the inner barrel
- Avoid getting silicone oil in the hop-up rubber—this affects trajectory stability
- Use only dry cloth for the inner barrel
-
Slide and Frame Lubrication
- Use 100% silicone oil (light to medium weight)
- Lubricate slide rails, hammer, recoil spring guide
- Avoid grease—too thick and affects operation
-
Magazine Care
- Regularly apply silicone oil to magazine inlet and outlet valves
- Keep O-rings moist to prevent gas leaks
- Store magazines pressurized to maintain seal integrity
GBB Lubrication Points
| Part | Frequency | Notes |
|---|---|---|
| Slide rails | After each use | Thin layer of silicone oil |
| Magazine O-rings | After each use | Just one small drop |
| Hammer/Trigger | Every 500 rounds | Minimal lubrication |
| Outer barrel | Every 500 rounds | Where slide contacts |
AEG (Automatic Electric Gun) Maintenance
Electric gun maintenance focuses on different areas, primarily battery and gearbox.
AEG Maintenance Focus Areas
-
Inner Barrel Cleaning
- Clean regularly with cleaning rod and soft cloth
- Clean every 2-3 games
- Dirty barrels are the main cause of FPS drop and accuracy loss
-
Battery Care
- Don’t overcharge LiPo batteries (no more than 2.5 hours)
- Don’t fully discharge—swap batteries when rate of fire slows
- Store at 50% charge for long-term storage
-
Spring Decompression
- After use, switch to semi-auto and fire a few shots to reset the piston
- Reduces spring tension from long-term compression
- Extends gearbox life
-
Gearbox
- Unless experienced, don’t disassemble the gearbox yourself
- For abnormal sounds or operation issues, consult a professional tech
Airsoft Gun Storage Tips
- Store in a cool, dry place to prevent rust and material degradation
- Remove battery (AEG), release most gas (GBB, but keep some pressure)
- Unload BBs from magazines to reduce spring tension
- Use protective cases or gun racks for storage
8 Gun Cleaning Mistakes That Damage Your Pistol
Mistake 1: Cleaning from the Muzzle
Problem: Cleaning from muzzle to chamber damages the crown, affecting accuracy.
Solution: Always clean from breech to muzzle, or use a Boresnake.
Mistake 2: Not Using a Bore Guide
Problem: The cleaning rod bounces inside the barrel, scratching the rifling.
Solution: Use a bore guide to center the cleaning rod and protect the rifling and chamber.
Mistake 3: Over-Lubrication
Problem: Excess oil attracts dust, creating an abrasive compound that accelerates wear.
Solution: A thin layer is enough. After applying, wipe off excess with a dry cloth.
Mistake 4: Using Wrong Solvents
Problem: Some solvents corrode plastic and rubber parts, causing permanent damage.
Solution:
- Use solvents only on metal parts
- Use dry cloth or plastic-safe cleaners for plastic and rubber
- Check product labels for material compatibility
Mistake 5: No Dwell Time for Solvent
Problem: Wiping solvent off immediately prevents effective carbon dissolution.
Solution: Let solvent work for 3-5 minutes before scrubbing for better results.
Mistake 6: Forgetting to Clean Magazines
Problem: Magazine interiors accumulate dust and debris, causing feed issues.
Solution: Regularly disassemble magazines and clean interior and springs.
Mistake 7: Over-Cleaning
Problem: Frequent use of steel brushes or excessive cleaning wears parts.
Solution: Follow recommended cleaning frequencies—you don’t need to clean after every round. Use brass or nylon brushes instead of steel.
Mistake 8: Forcing Reassembly
Problem: Forcing parts together when misaligned can damage parts or cause malfunctions.
Solution: If reassembly is difficult, recheck steps and ensure parts are properly aligned.
Maintenance Checklist
Quick Maintenance (After Each Range Session)
- Confirm firearm is completely unloaded
- Clean barrel with Boresnake
- Wipe exterior dust and fingerprints
- Check for obvious wear or damage
Complete Maintenance (Periodic)
- Safety check, remove all ammunition
- Field strip the pistol
- Clean barrel (solvent + brush + patches)
- Clean slide interior (breech face, extractor, rails)
- Clean frame (rail grooves, magazine well)
- Clean recoil spring
- Properly lubricate all contact points
- Reassemble and function check
- Clean magazines
- Wipe exterior, apply thin layer of rust protectant
Frequently Asked Questions
How often should I clean my pistol?
After each range session, at minimum run a Boresnake through the barrel with a drop of CLP. A complete field strip and deep clean every 300 to 500 rounds is the standard most instructors recommend. If you carry concealed daily, a weekly wipe-down removes pocket lint and body sweat before they cause problems. Guns sitting in the safe unfired still benefit from a monthly inspection and light oiling.
How long does it take to clean a pistol?
A quick post-range clean with a Boresnake takes about five minutes. A full field strip, barrel scrub, slide and frame cleaning, lubrication, and reassembly typically takes 20 to 30 minutes once you’re comfortable with the process. Your first few times will be slower as you learn the disassembly sequence, but speed comes naturally with practice.
Can I use WD-40 to clean my gun?
WD-40 is a water displacer and penetrant, not a gun lubricant. It can seep into primer pockets and potentially deactivate cartridges. More importantly, it evaporates and leaves no lasting lubrication film. Use products specifically formulated for firearms — Break-Free CLP, Hoppe’s No. 9, or Lucas Gun Oil are all proven choices that won’t let you down.
Can CLP replace dedicated cleaning solvents?
For routine maintenance after a range session, absolutely. CLP handles the job well for most shooters. But if you’re putting serious round counts through your gun or notice stubborn copper fouling, dedicated solvents like Hoppe’s No. 9 or Bore-Max will dissolve deposits that CLP alone can’t fully remove. A good approach is CLP for everyday, dedicated products every third or fourth deep clean.
Why does my pistol jam after cleaning?
Nine times out of ten, the culprit is too much lubricant. Excess oil attracts dust and carbon particles, forming a gummy paste that actually increases friction. Strip the gun again, wipe everything down with a dry cloth, and reapply oil sparingly — one drop per lubrication point, spread into a thin film. Also double-check that you reassembled correctly, especially the recoil spring orientation.
Should I clean a brand new gun before shooting it?
Yes. New firearms ship coated in heavy preservative oils designed for long-term storage and shipping, not for smooth operation. Field strip the gun, wipe off the factory grease, and apply proper gun lubricant before your first range trip. Most owner’s manuals explicitly recommend this step.
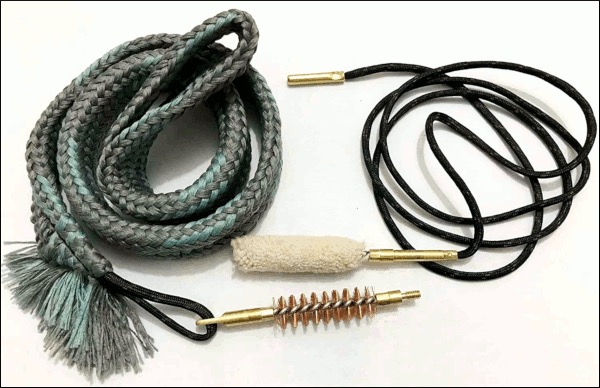
What’s the difference between a Boresnake and a cleaning rod?
A Boresnake is a pull-through rope with an integrated brush — it’s fast, portable, and perfect for quick field cleaning. A cleaning rod with bore brush and patches provides a more thorough scrub, letting you control pressure and repeat passes until patches come out white. Use a Boresnake after every range session for convenience, and a cleaning rod for periodic deep cleans.
Can I use real firearm cleaning products on airsoft GBB guns?
Some metal-safe solvents work fine on GBB slides and frames, but you need to be careful around plastic parts, rubber hop-up buckings, and magazine O-rings. Petroleum-based solvents will destroy rubber seals. The safest universal choice for airsoft is 100% silicone oil — it lubricates without damaging any material.
How do I prevent rust on my firearms?
Apply a thin coat of CLP or rust protectant after every cleaning session. Store guns in a low-humidity environment, ideally with silica gel desiccant packs in your safe. Avoid touching bare metal surfaces with your hands — the salt in sweat is surprisingly corrosive. If you carry concealed, wipe down the gun weekly since body moisture accelerates oxidation.
Do I need to clean my gun if I only dry fire?
Dry fire alone doesn’t produce carbon fouling, but it does generate tiny wear particles from the trigger mechanism, firing pin, and sear surfaces. If you’re doing extensive dry fire practice — say 200 or more trigger pulls in a session — a quick wipe-down and light lubrication of the action afterwards keeps everything running smoothly. Check your snap caps for wear too.
The 5-Minute Post-Range Clean
Not every cleaning session needs to be a full teardown. After a typical range visit, this quick routine keeps your gun in good shape until your next deep clean.
Grab your Boresnake and a small bottle of CLP. Drop a few drops of CLP onto the Boresnake’s brass brush section, then pull it through the barrel three times from the breech end. That alone removes the majority of fresh carbon before it has a chance to harden. Next, rack the slide a few times to check for smooth operation, then use a CLP-dampened cloth to wipe the slide rails and the breech face. Finish by wiping down the exterior with a dry microfiber cloth to remove fingerprints and any surface residue. The whole process fits easily into the time it takes your range bag to cool down in the car.
This quick routine doesn’t replace periodic deep cleans, but it dramatically reduces how much scrubbing you’ll need when you do sit down for a thorough session. Think of it like rinsing your dishes right after dinner versus letting them sit in the sink for a week — same principle, much less effort.
Conclusion
Cleaning your pistol isn’t glamorous, but it’s the single most impactful thing you can do to keep your gun running reliably. Every competitive shooter I know treats cleaning as non-negotiable, and every malfunction I’ve seen at matches could have been avoided with fifteen minutes of maintenance.
Start simple. Do the five-minute Boresnake clean after every range trip. Sit down for a full field strip and deep clean every few hundred rounds. Pay attention to your recoil spring. Before long, the whole process becomes automatic — just another part of your shooting routine.
🎯 Training Tip: After maintenance, run a quick dry fire session with a Shot Timer to confirm everything cycles smoothly while keeping your draw and trigger press sharp. Need a complete cleaning kit? Check our Gun Cleaning Kit Guide for product recommendations at every budget.
Related Articles
- Best Gun Cleaning Kit Guide 2026 — Detailed cleaning tool and product recommendations at every budget
- Pistol Malfunction Clearance Guide — Learn to identify and clear common jams and stovepipes
- Shooting Safety Rules Guide — Essential range and competition safety protocols
- Dry Fire Training Guide — Safe and effective dry fire practice methods
- Recoil Spring & Pistol Grip Guide — How grip technique affects wear patterns
- IPSC Training Guide — Training methods and maintenance routines for competitive shooters
- Airsoft GBB & AEG Gear Guide — Complete introduction to airsoft gun types and care
- Shot Timer App Guide — Track training data and improve with timer feedback
- Gun Cleaning
- Gun Maintenance
- Pistol Care
- CLP
- Gun Oil
- GBB Maintenance
- AEG Maintenance
- Airsoft
- Shooting Training
- Recoil Spring Replacement
- Recoil Spring
- How to Clean a Gun
- Gun Cleaning Tips
- Recoil Spring Maintenance
- How to Clean a Pistol
- Pistol Cleaning Guide
- Gun Cleaning for Beginners
- Best Gun Cleaning Kit 2026